Install Artica for Docker Edition
How to install the Artica Docker edition in order to manage a real docker server ?
Back to Artica for Docker Edition
Enable the Docker service after installing its packages.
Check the appliance resources, administrator rights and network access before starting.
Prerequisites
| Requirement | What to check |
|---|---|
| Artica appliance | Use an Artica appliance with the Docker package and a compatible Docker Manager package. Update the appliance before evaluating current manager features. Container images must match the host architecture. |
| Administrator access | Use an account with system administration rights to enable the Docker Engine feature. Docker Manager installation and service controls require Docker administration rights. Other Docker pages and actions depend on the account's Docker privileges. |
| Memory and CPU | The Docker feature declares a minimum of 2,000 MB of RAM. Allocate additional memory and CPU for your applications and the other services running on the appliance. This feature threshold is not a sizing recommendation for a production workload. |
| Disk space | Leave room for downloaded image layers, container writable data, persistent volumes and logs. Allow extra space for updates and backups. Check free space on the filesystem used by Docker before pulling large images. |
| Packages and Internet access | Install the Docker package from Artica's Packages Center. The appliance needs working DNS and access to the package sources and image registries you use. Configure the appliance's outbound proxy if your network requires one. |
| Image sources | Docker Hub is allowed by the manager's default image source policy. Add other registry hosts to the permitted image sources before pulling from them. The Docker Engine must also trust the registry's TLS certificate. |
| Application networking | Choose unused host ports and check the host firewall and routing. Artica's current managed Engine configuration disables Docker's automatic iptables and masquerading rules. Bridge network Internet access and published ports therefore require a suitable host network configuration. Test connectivity from the application before relying on it. |
| Persistent data and recovery | Decide where the application will store its data. Prepare a backup and recovery procedure before placing production data in containers. |
| Optional components | Docker Relay publication needs an installed, enrolled agent and an Artica reverse proxy. Container disk quotas need an enabled quota backend and the required host storage support. Neither component is required for a basic container evaluation. |
Before changing an existing appliance
Use a separate appliance for your first evaluation.
Back up an existing appliance before changing its role.
Older Docker Edition releases used a conversion workflow that disabled unrelated features, including proxy, reverse proxy and DNS services.
Check the confirmation shown by your release before proceeding.
If it announces service removal, plan the change as an appliance role conversion.
The screenshots below show the older interface.
Current releases may use different menu names and display a Docker section with separate Status and Engine pages.
Step 1: Install the Docker package
- Open Your System > Update > Packages Center.
- Search for docker.
- Install or update the Docker Service package.
Wait for the installation to finish.
See Install or upgrade the Docker package for the illustrated procedure.
On older releases where Docker Edition is hidden, first follow Enable Docker Edition visibility.
Step 2: Enable the Docker service
- Open Your System > Features.
Some releases label this entry Feature. - Enter docker in the search field.
- Find the Docker Service entry and click Install.
- Read the confirmation and wait for the operation to finish.
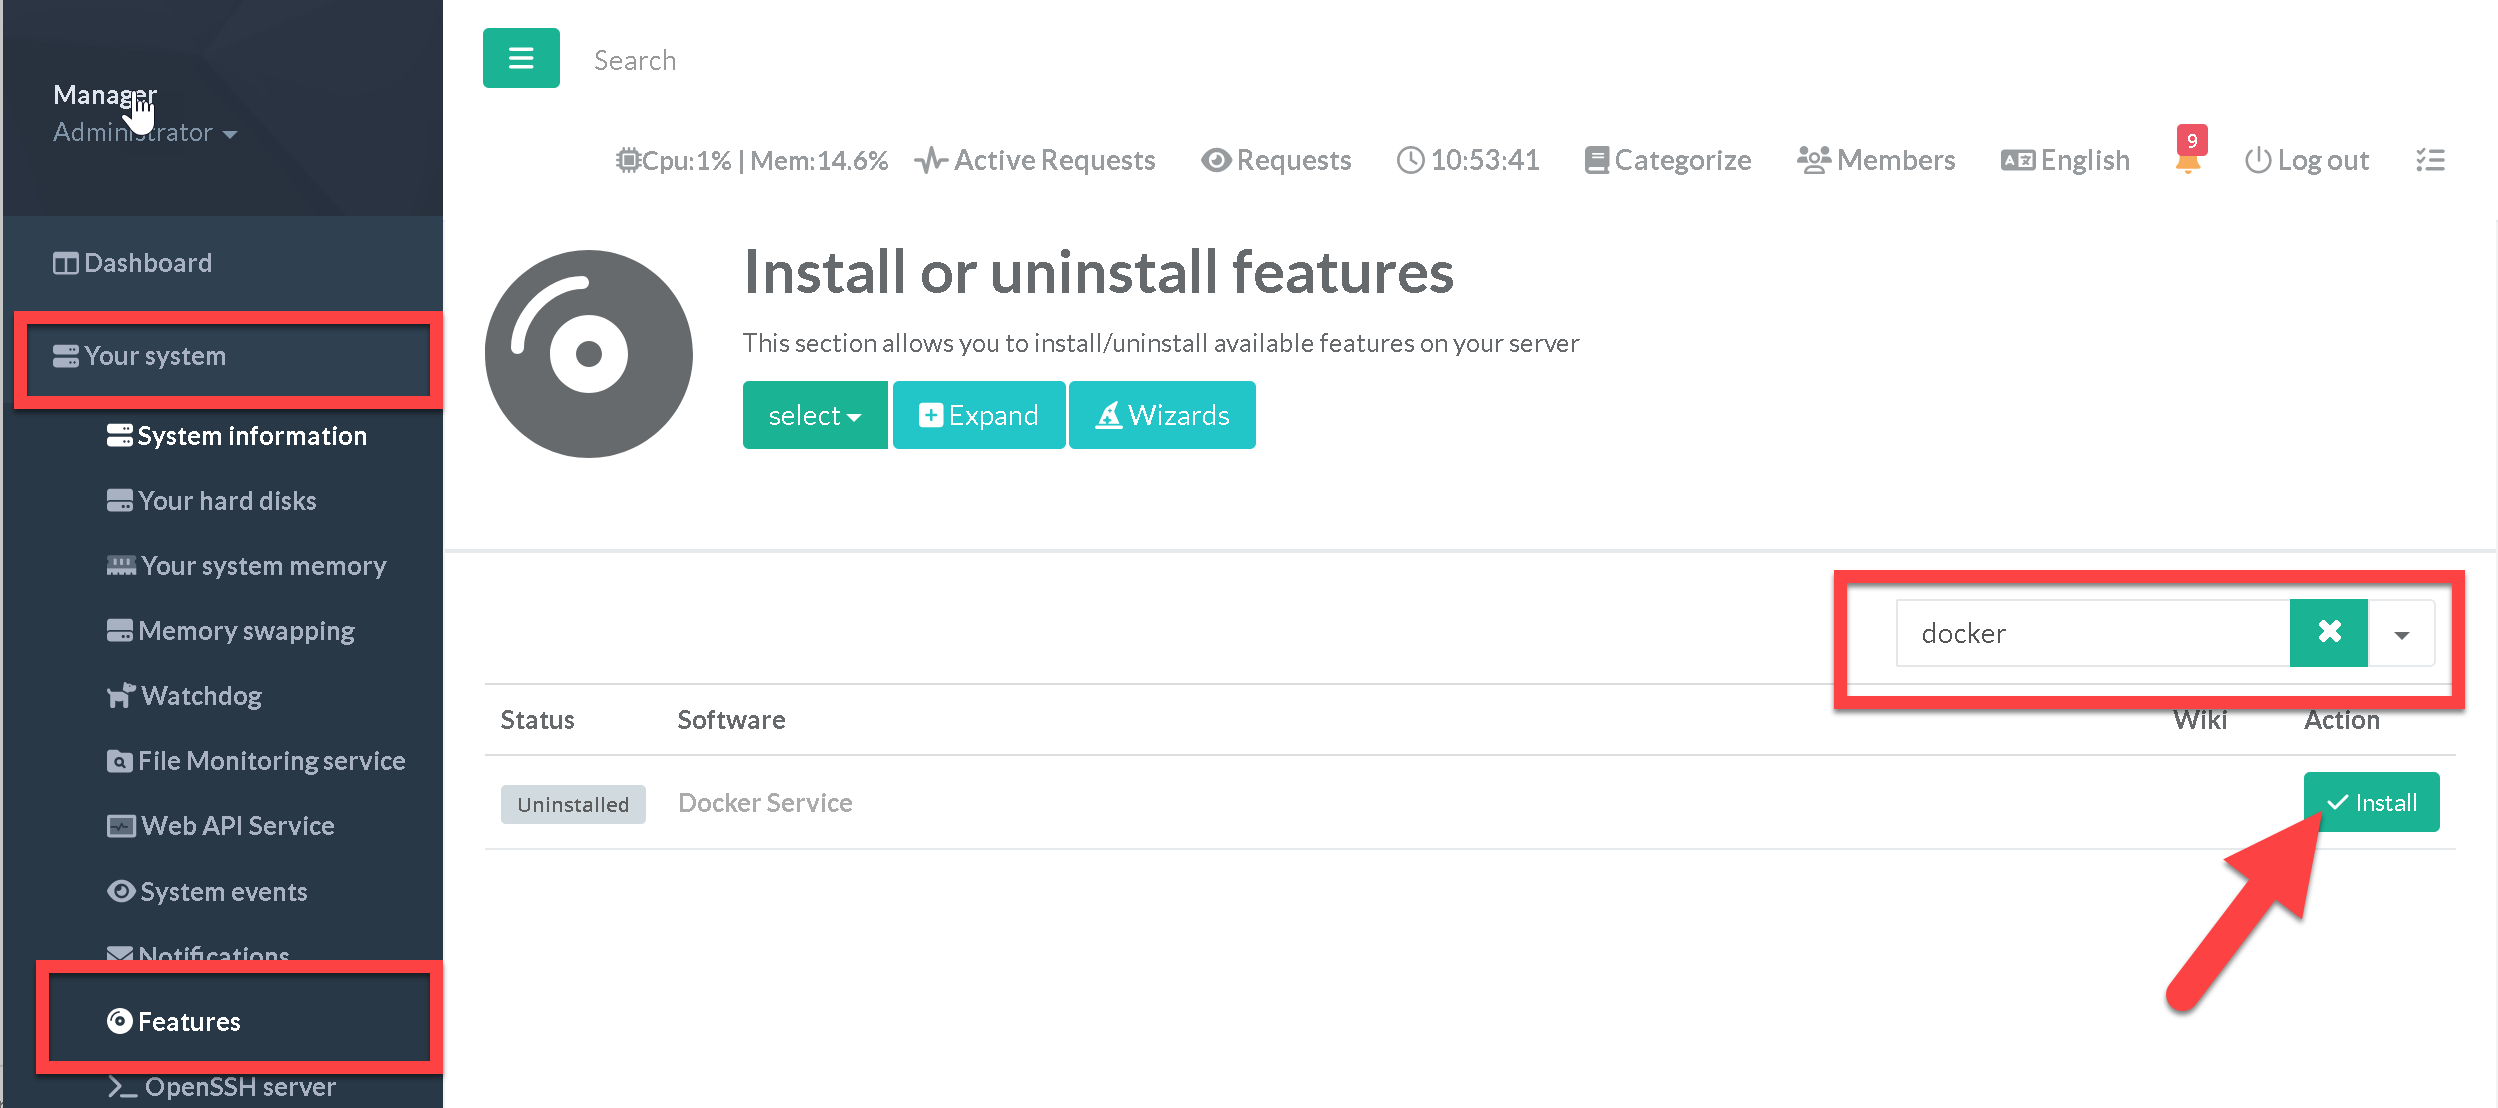
Docker service activation in the older Artica interface.
Installing the package places the software on disk.
Enabling the feature requests the Docker Engine service.
Both steps are required.
Step 3: Open Docker Manager
Refresh the console menu after activation.
A Docker or Docker service entry should appear for accounts with Docker privileges.
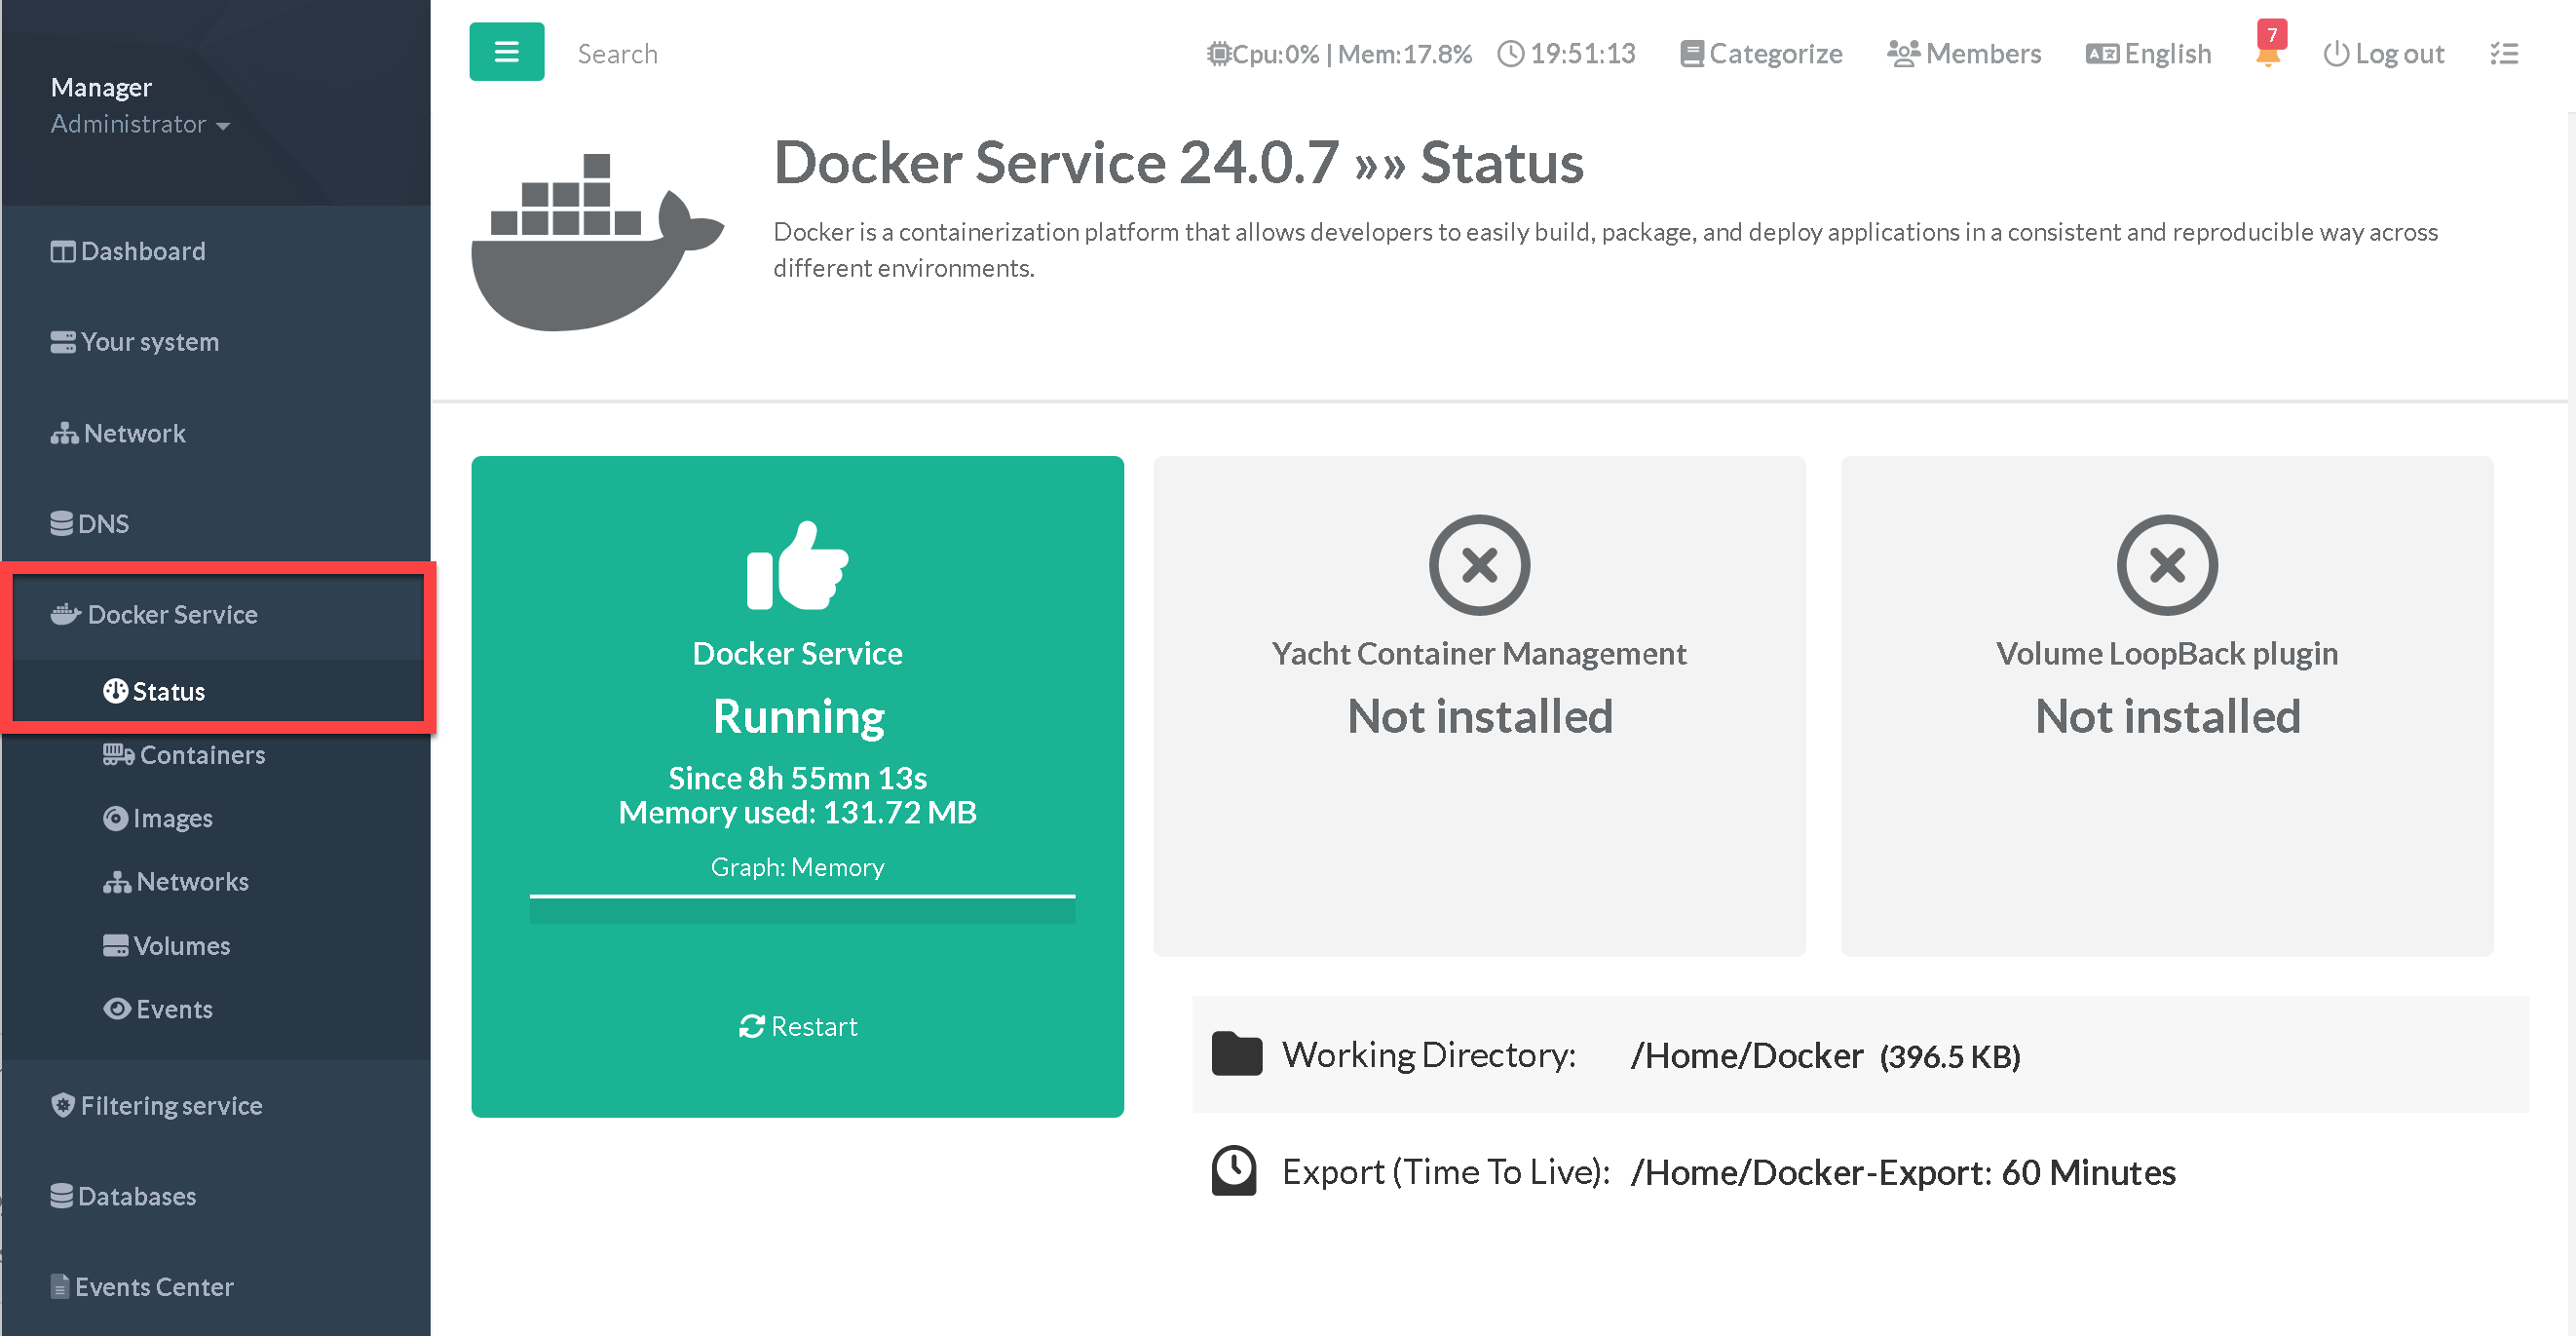
Docker navigation in the older Artica interface.
On current releases, open Docker > Status.
If Docker Manager is shown as not installed, use its Install action with a Docker administrator account.
Check that the manager and Engine are running before creating a container.
Step 4: Verify the installation
- Open the Engine information page and confirm that Docker responds.
- Pull a small image from an allowed registry.
- Create a test container with settings suitable for that image.
Check its state and logs. - Test application connectivity if the container needs network access.
- Remove the test container when you have finished.
Review any volumes before deleting them.
Troubleshooting
| Symptom | Action |
|---|---|
| The Docker feature is missing | Check that the Docker package installation completed. The current Features screen hides this entry when the package is not installed. For an older release, check the feature visibility procedure. |
| The Docker menu is missing | Check that the service is enabled and the account has Docker privileges. Refresh the console or sign in again after changing permissions. |
| Access is denied | Ask an administrator to review the account's group permissions. Current releases separate viewing, container actions, stack deployment and other Docker rights. The older privilege guide shows the earlier group screen. |
| The manager or Engine does not start | Review the service status and installation output. Check that the matching packages are installed and the disk is not full. |
| An image pull fails | Check DNS, outbound access, proxy settings, the registry policy and TLS trust. Confirm that the selected image tag supports the host architecture. |
| The application has no network access | Check its network mode, routing and host firewall. Do not assume that Docker has created NAT or port forwarding rules on the managed appliance. |
Return to the Artica for Docker Edition overview to explore stacks, the Store and other management features.