Using Let's Encrypt Certificates
To build Let’s Encrypt certificate your server needs to be contacted by the Let’s Encrypt public web servers** in order to verify that you are the owner of the domain
A self-signed certificate is regularly used to ensure SSL decryption in the proxy system or to check client certificates in the reverse proxy.
This Article is for Artica versions 4.30/4.40/4.50 Service Pack 0 (without Hotfix )
If you using the latest Hotfix for Artica v4.50 or Service Pack 1, the Let's encrypt certificate generation has been simplified ( see this article )
Let’s Encrypt cannot to be used on internal servers
During the building certificate, the Web service and the Firewall will be shut down in order to let the process running a micro web server to allow Let’s Encrypt public servers validating your domain.
Verify the Let's Encrypt Automation Installation
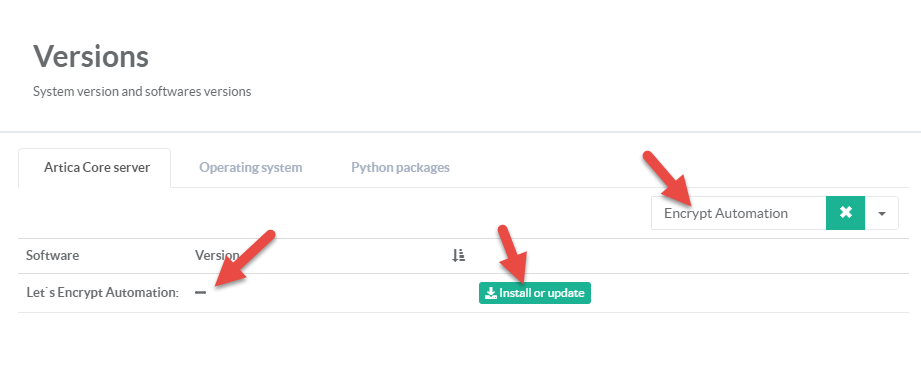
On the left menu, click on “Your system” item and “Versions”
On the search field, type "Encrypt Automation" filter
If no version is displayed on the “Let’s Encrypt Automation” row, this means it is not installed.
Click on the “Install or update” button.
Generate the Certificate
On the left menu, click on “Your system” item and “Certificates Center”
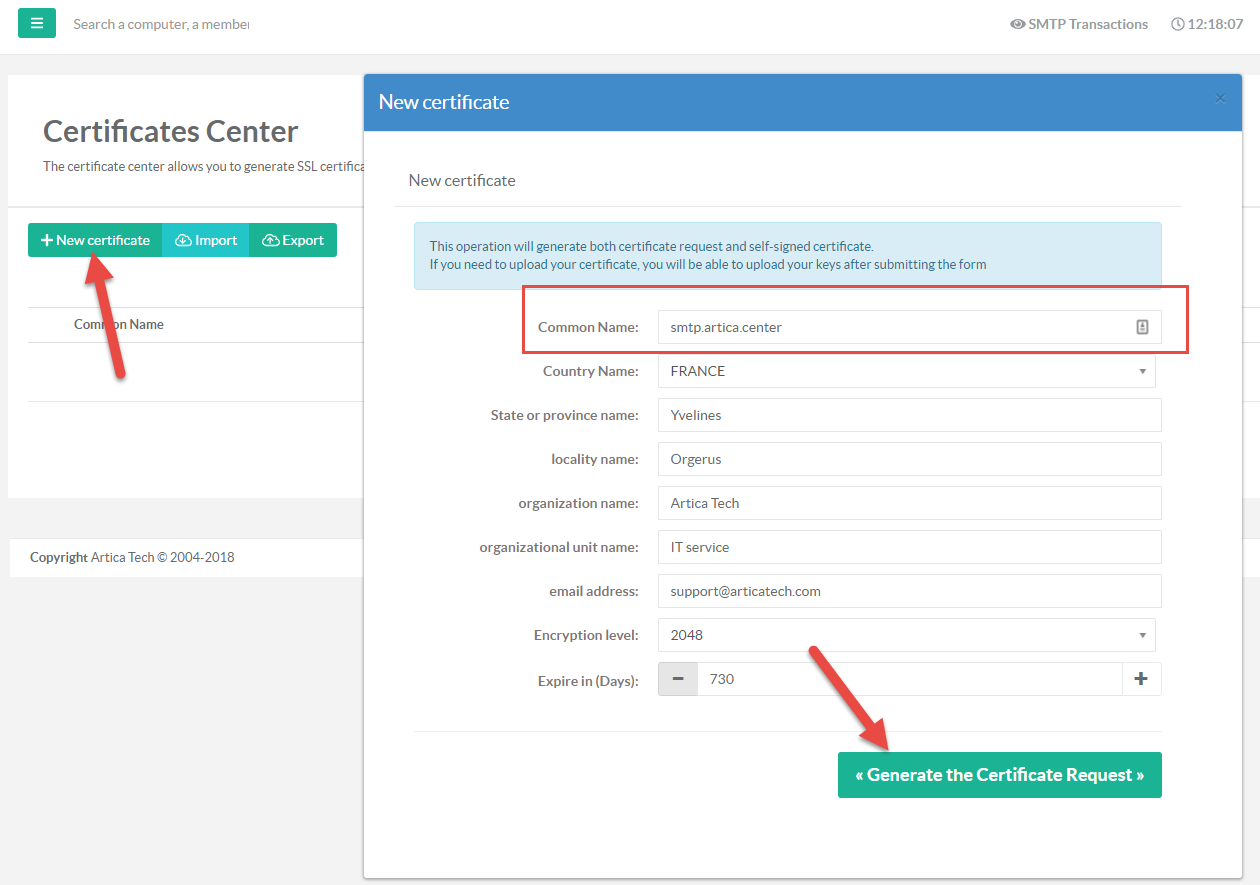
- On the table, Click on “New Certificate”
- In the Common Name field set the domain or the fully qualified hostname of your server.
- In our case we want to reach the https://smtp.artica.center URL, our domain will be “smtp.artica.center”
- Fill correctly information on the form
- Select 2048 for the encryption Level.
- After finish, click on the “Generate the Certificate Request”
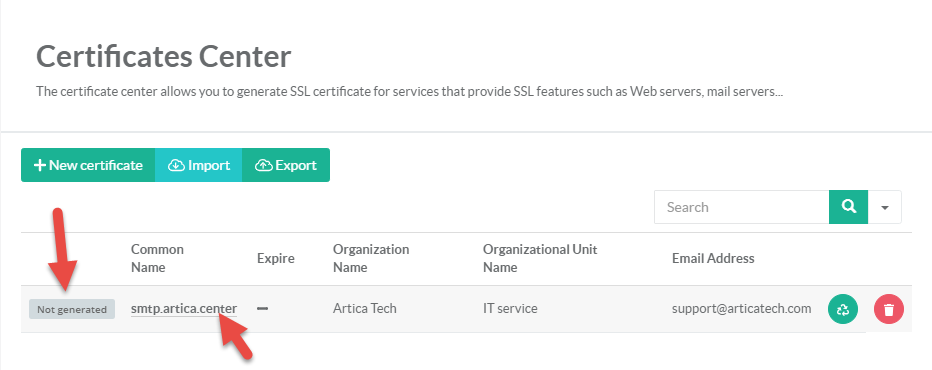
- You will see in the table your certificate but it is not generated.
This means only the CR (Certificate Request) is generated. - Click on the certificate name on the table.
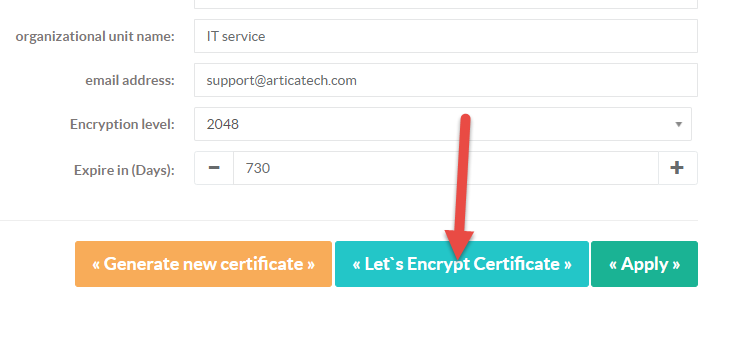
- At the bottom of the form (if Let`s Encrypt Automation is installed) you should see the “Let’s Encrypt Certificate” button.
- Click on this button.
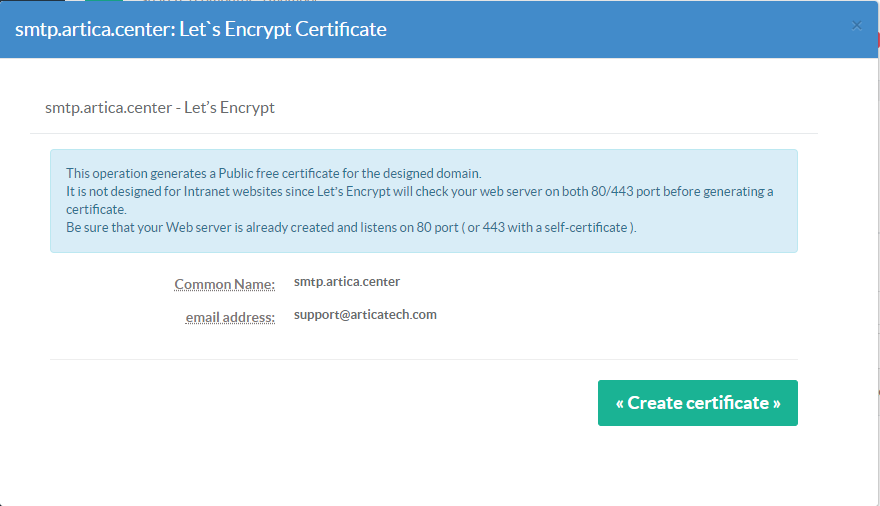
- A confirmation message is displayed.
- Click on the “Create Certificate” button.
- If task is failed, progress will be turned in red.
- You can click on the details link to see events.
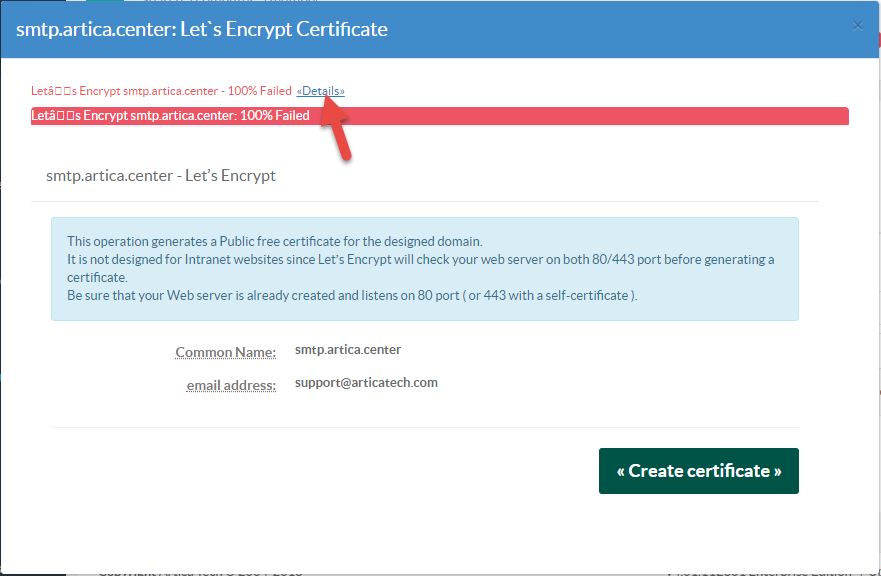
- In most cases, you will see this error
Failed authorization procedure. your.server.com (http-01): urn
connection :: The server could not connect to the client to verify the domain :: Fetching http://your.server.com /.wellknown/acmechallenge/G3RoBDc6pX55EqbZrJr6pihcBKIe8A4m2XZAv6dlojk: Timeout during connect (likely firewall problem)
This means the Let’s Encrypt servers could not reach the HTTP 80 port of your server.
You have to check your Firewall rules in order to access.
- If the generation task is a success, your certificate will have a “Let’s Encrypt Certificate” stamp in the table.
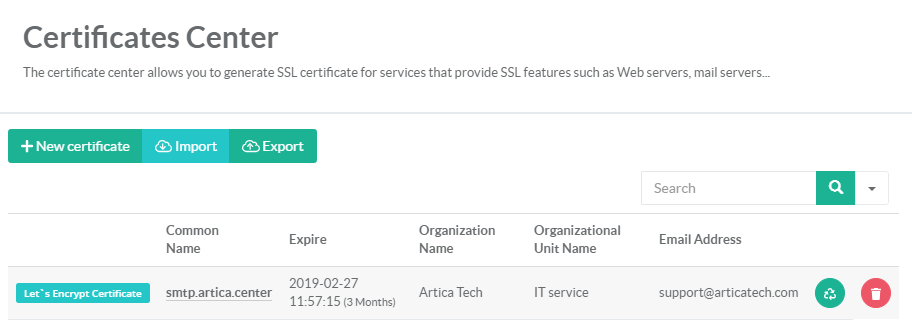
- You will see that the certificate is only for 3 months.
- You can perform the same procedure to renew it.
Import PFX
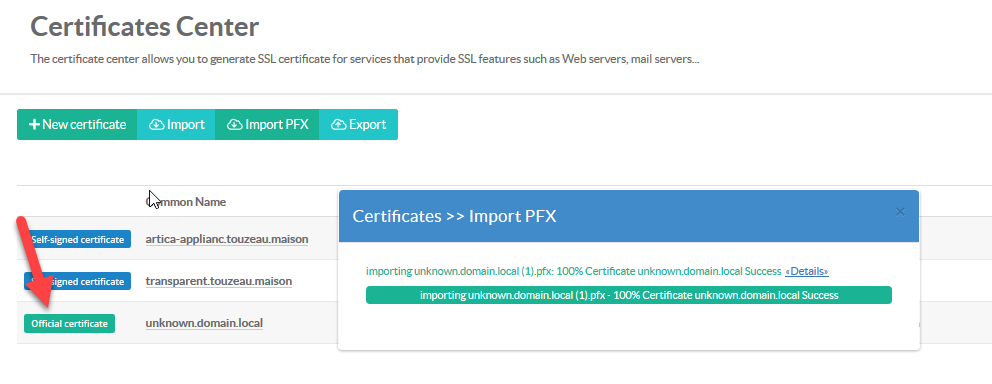
A PFX file is an encrypted security file that stores secure certificates used to authenticate a person or device, such as a computer or web server; requires a password to be opened; can be installed by right-clicking the file and selecting "Install PFX."
It is usually used on Windows system to export certificates.
- On the main certificates center, click on “Import PFX” button.
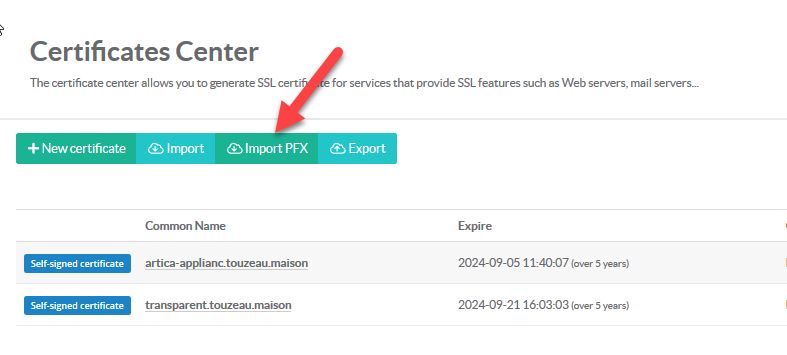
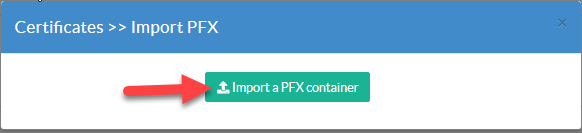
- Click on Import a PFX container button and browse your computer to select the PFX file you want to import
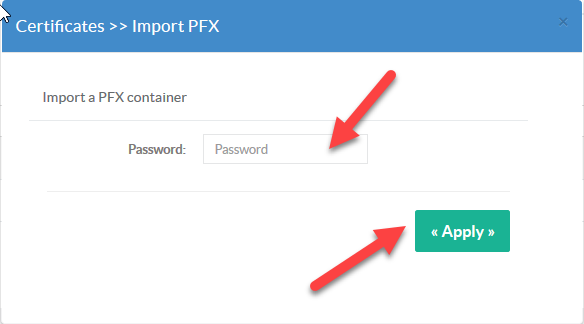
- Once uploaded, set the password protection and click on Apply button
- If the certificate is correctly imported, you will see your certificate as an “Official Certificate”