Back to proxy-pac service main section | Back to Active Directory main section | Proxy Settings via GPO For Firefox
This article is about deploy the proxy.pac settings inside the GPO
These proxy server settings are used by all modern browsers, including: Internet Explorer 11, Google Chrome, Chromium-based, Edge, Opera,
- Mozilla Firefox (with the option Use system proxy settings enabled by default).
¶ Create the GPO
- Open Group Policy Management Console (gpmc.msc) on a computer running Windows 10 or Windows Server
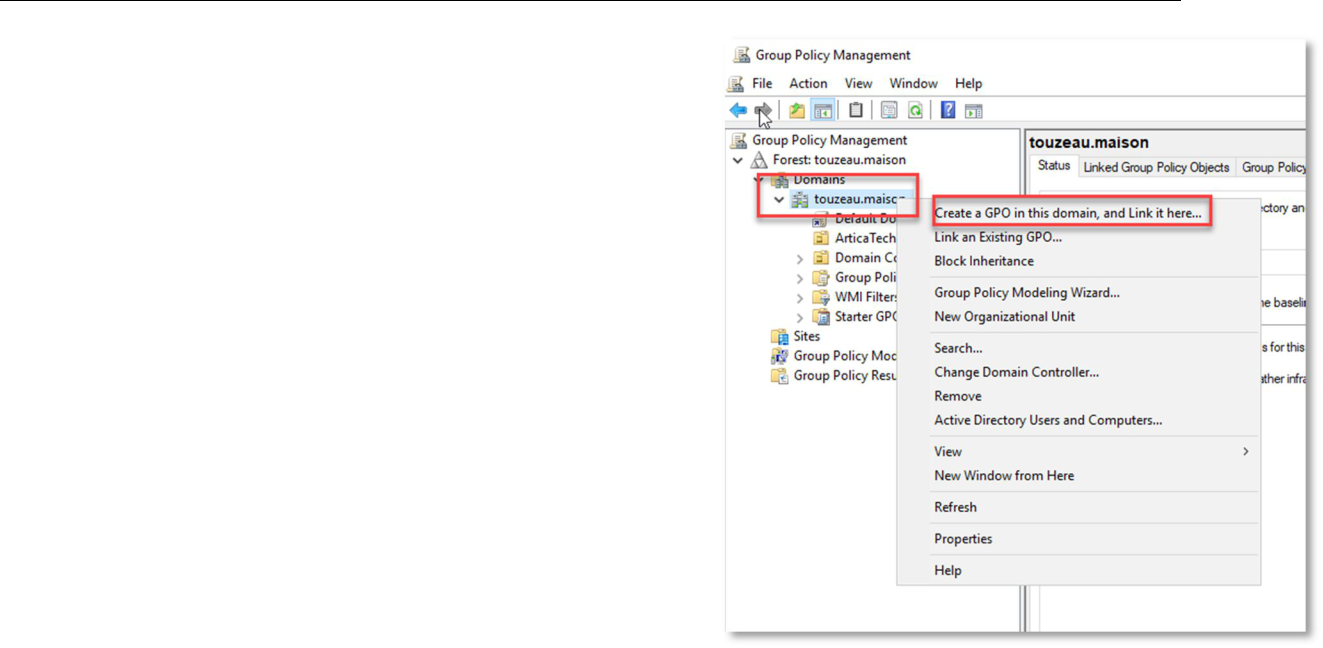
- Select the Active Directory organization unit (OU) for which you want to apply the new proxy settings.
- Right-click on OU and select Create a GPO in this domain and link it here
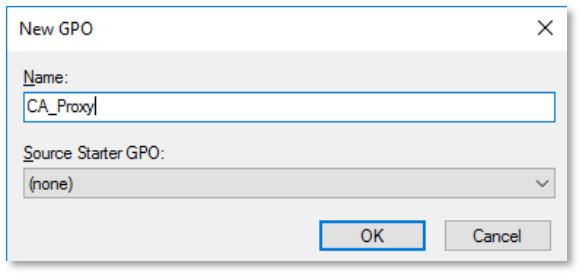
- Specify a policy name, for example CA_Proxy;
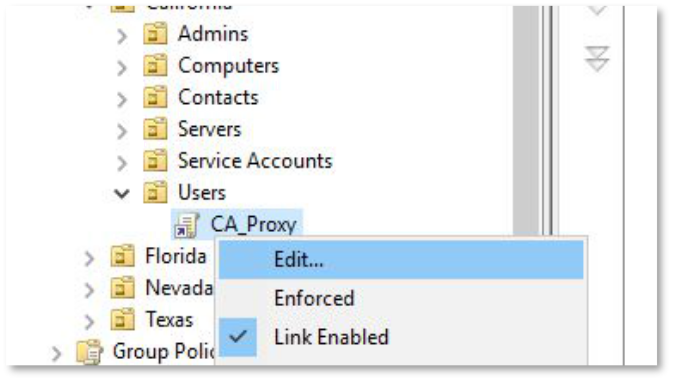
- Click on the policy and select Edit
- Expand the following section:
- User Configuration o Preferences
- Control Panel Settings o Internet Settings.
- Right click and select New Internet Explorer 10 (this policy will also be applied for the IE 11)
- On the standard windows with the Internet Explorer settings, go to the Connections tab and press LAN Settings button.
- Add the URL to your proxy.pac file via HTTP ( example http://myserver/proxy.pac).
- To enable this option, press F6 button (underline for that setting will change the color from red to green).
- To disable specific policy setting press F7 (disable the option “Automatic detect settings” this way).
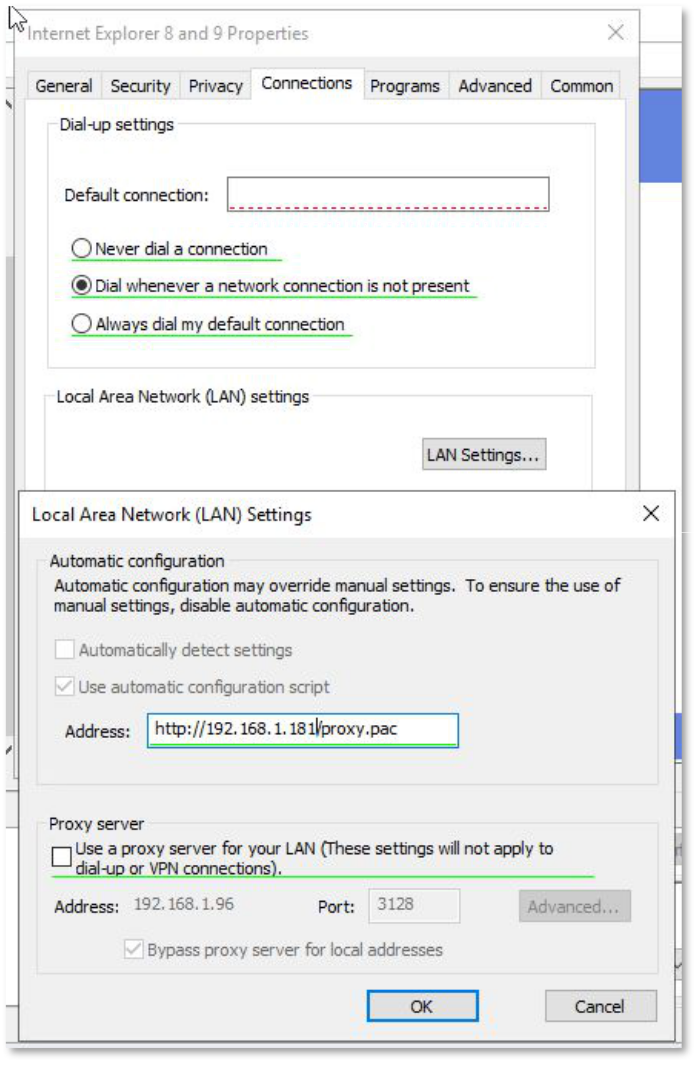
- Press OK twice to save settings.
TIP. THE GREEN UNDERSCORE FOR THE IE PARAMETER MEANS THAT THIS POLICY IS ENABLED AND WILL BE APPLIED THROUGH GROUP POLICY. RED UNDERLINING MEANS THAT THE SETTING IS CONFIGURED, BUT DISABLED FOR USERS’ COMPUTERS.
TO ENABLE ALL SETTINGS ON THE CURRENT TAB, PRESS F5. TO DISABLE ALL POLICIES ON THIS TAB USE F8 KEY.
This rule only works for Internet Explorer 10 and Internet Explorer 11. For earlier IE versions, you need to create separate rules.
¶ Prevent Changing IE Pproxy Settings Using GPO
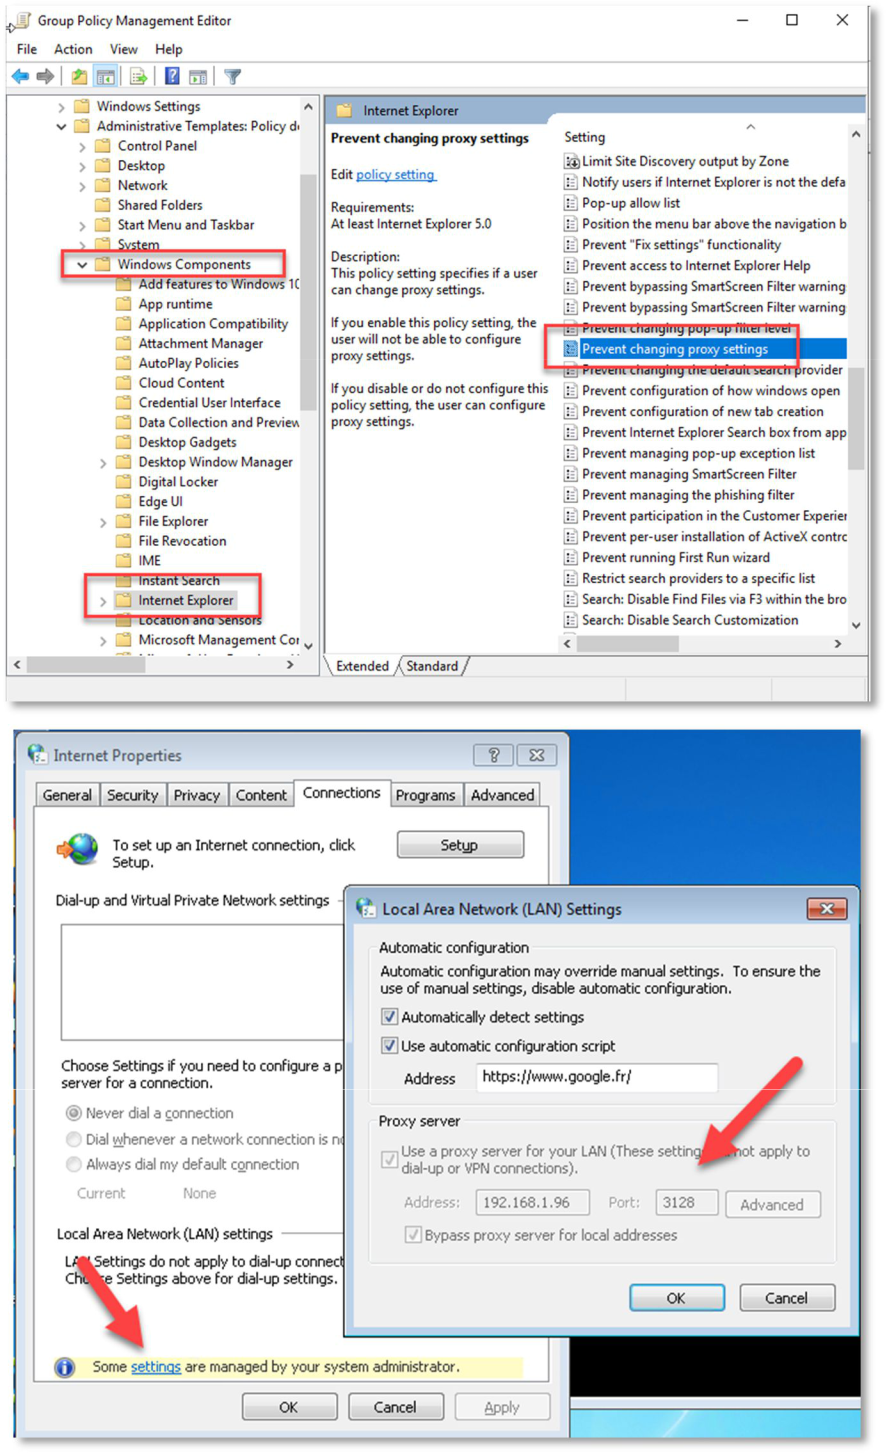
- In “GPMC.msc” console, create a new GPO and switch to the Edit mode. Open :
- User Configuration
- Policies
- Administrative Templates
- Windows Components
- Internet Explorer section
- Enable the policy Prevent changing proxy settings.
¶ Deploy Via Cisco ASA DHCP Service
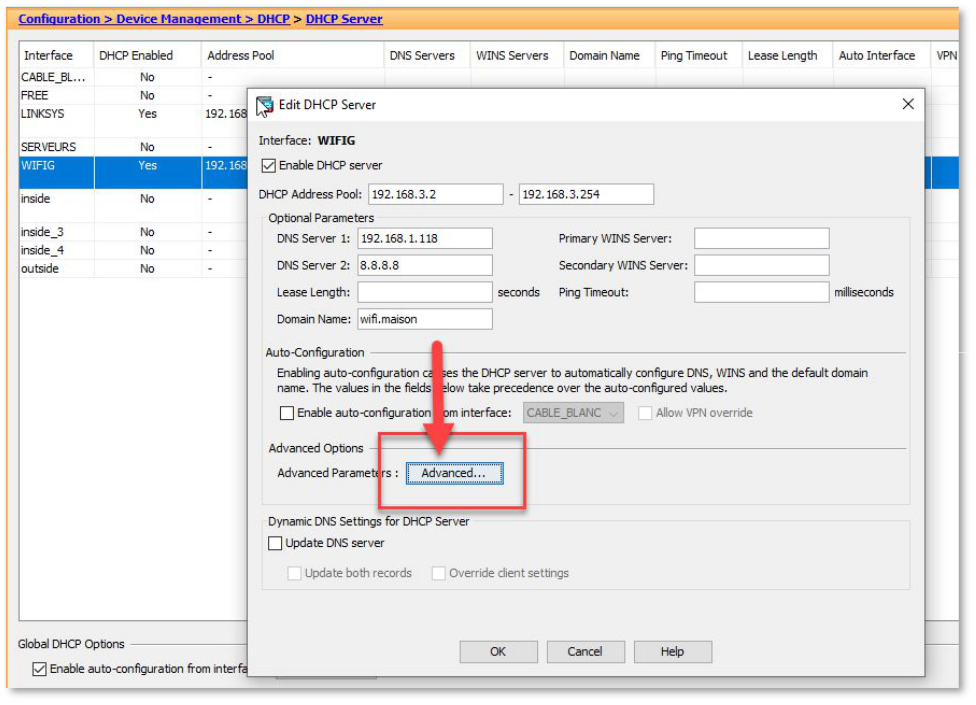
- Open the CISCO ASA ASDM-IDM interface
- Select Device Management / DHCP / DHCP server.
- Open the properties of your DHCP server based on your interface.
- Click on Advanced button
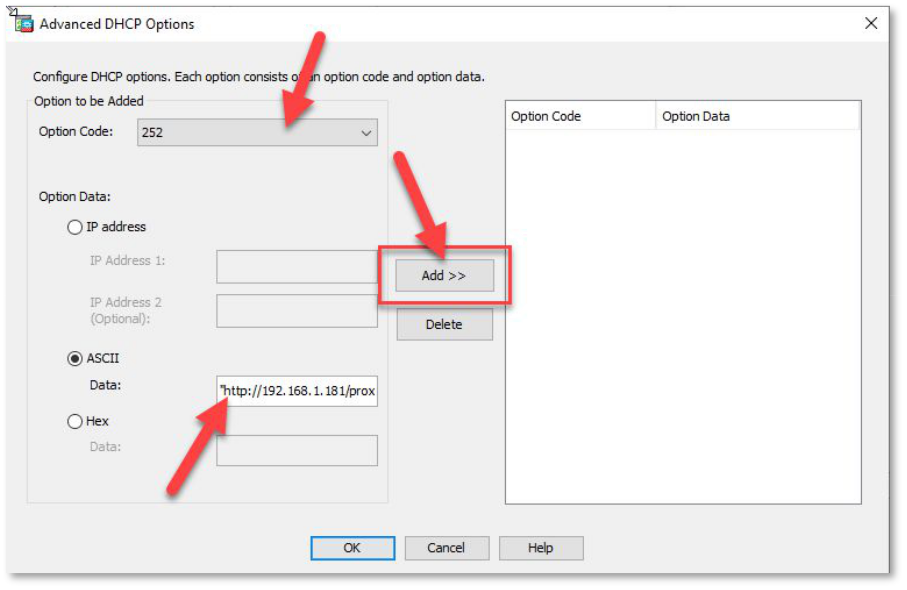
- On the Option code drop-down, choose 252
- Click on the ASCII checkbox.
- On the data field; add the path of the proxy.pac file.
- You will need to configure it with the (“) as per this example:
option 252 ascii "http://X.X.X.X/proxy.pac"
- You will need to configure it with the (“) as per this example:
- Click on Add >> button to add the option to the right side.
¶ Deploy Via Microsoft DHCP Service
- Click Start, point to All Programs, point to Administrative Tools, and then click DHCP
- In the console tree, right-click the applicable** DHCP server**, click Set Predefined Options
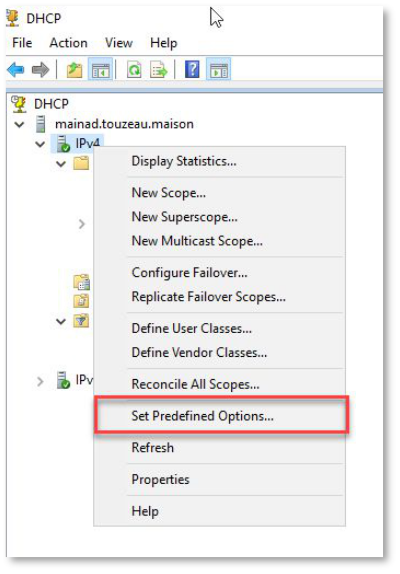
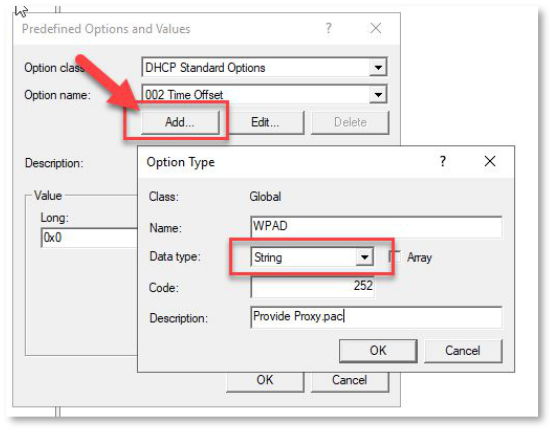
- Click Add.
- In Name, type WPAD
- In Code, type 252
- In Data type, select String, and then click OK
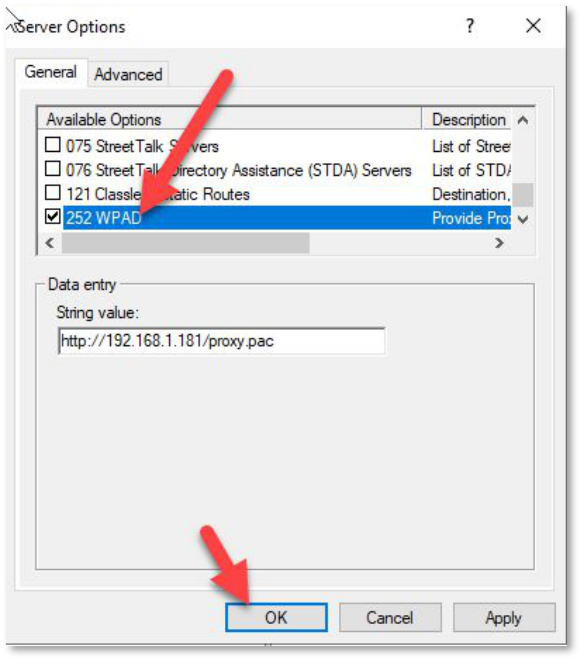
- In String, type http://Computer_Name/proxy.pac where:
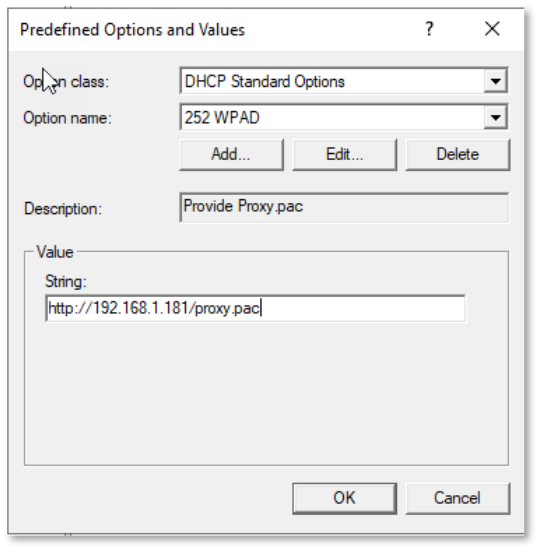
Computer_Name is the fully qualified domain name or IP address of the Artica Server computer.
- Right-click Server options
- Click Configure options.
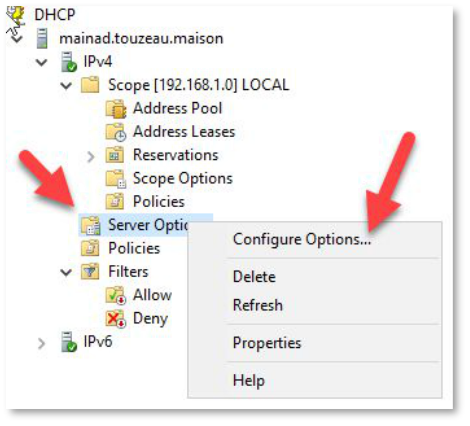
- Confirm that Option 252 is selected.
