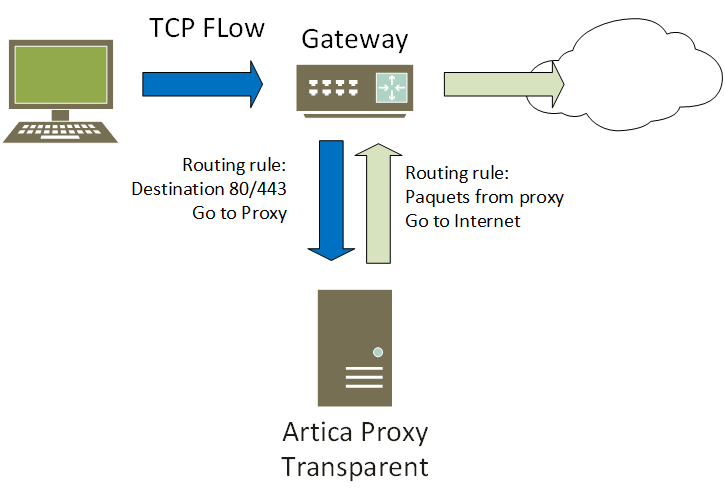
The transparent mode is designed to intercept web flows and pass them through the local proxy service
The proxy in transparent mode does not need the browser's consent to be introduced into the organization.
There are a number of methods for diverting HTTP flows to the proxy ( WCCP, MikroTik ).
The simplest method is to make the proxy the Internet gateway.
¶ How it works ?
In other words, to make the transparent mode work, you need to have your internal gateway send the flows back to the proxy, or simply have your workstations use the proxy as a gateway.

¶ Transparent Proxy mode (TProxy) benefits
- Preservation of Original IP:
TProxy maintains the original source IP address of client requests.
This is crucial for logging, auditing, and for applications where the client's IP needs to be known by the end server. - Flexible Routing:
Allows more sophisticated routing decisions based on the original source IP.
It's possible to route traffic dynamically based on policies, user groups, or geographic location. - Less Intrusive:
Since TProxy can work at the network layer, it doesn't require NAT (Network Address Translation), making it less intrusive in terms of network operations. - Protocol Agnostic:
It can work with any TCP/UDP traffic, making it versatile for different types of applications beyond just HTTP/HTTPS.
¶ Limits of the transparent interception:
- Complex Setup:
Configuring TProxy can be more complex than setting up a simple intercepting proxy.
It often requires changes to iptables or routing tables and may require support from the operating system kernel. - Compatibility Issues:
Not all network devices or operating systems support TProxy, which might limit its deployment in certain environments. - Increased Load on Proxy Server:
Because TProxy forwards traffic while preserving source IPs, the proxy server might see an increased load, impacting its performance.
¶ Create an HTTP TProxy proxy port (Port 80)
Artica's transparent ports meet this need.
The easiest way is to create two ports that will focus on destination ports 80 and 443
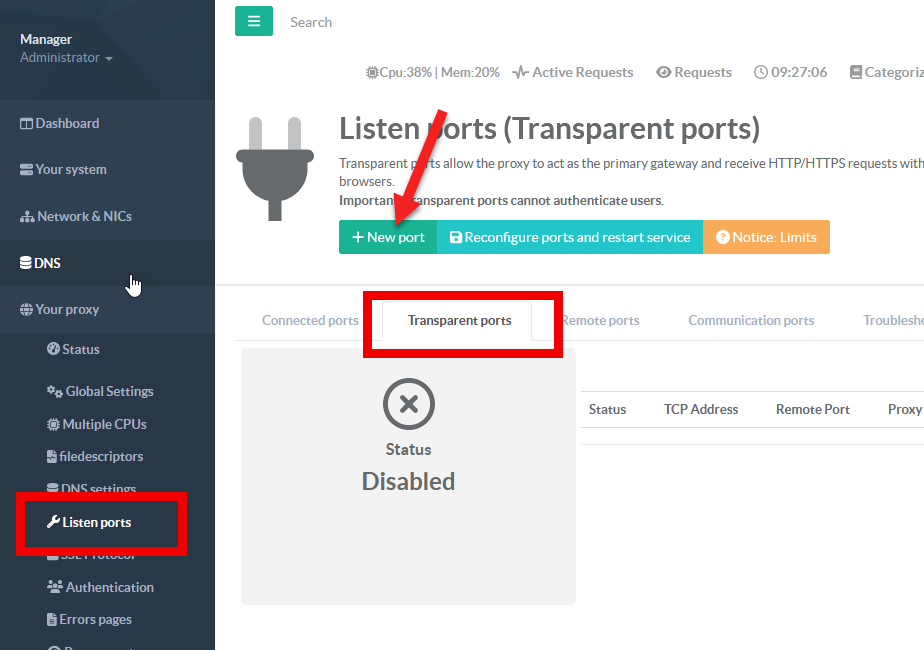
- On the left menu, choose “
Your Proxy” > “Listen ports” - Choose the
Transparent portstab - Click on
New port
- On the destination port, set the 80 port
- Enable the “Use Tproxy Mode” checkbox
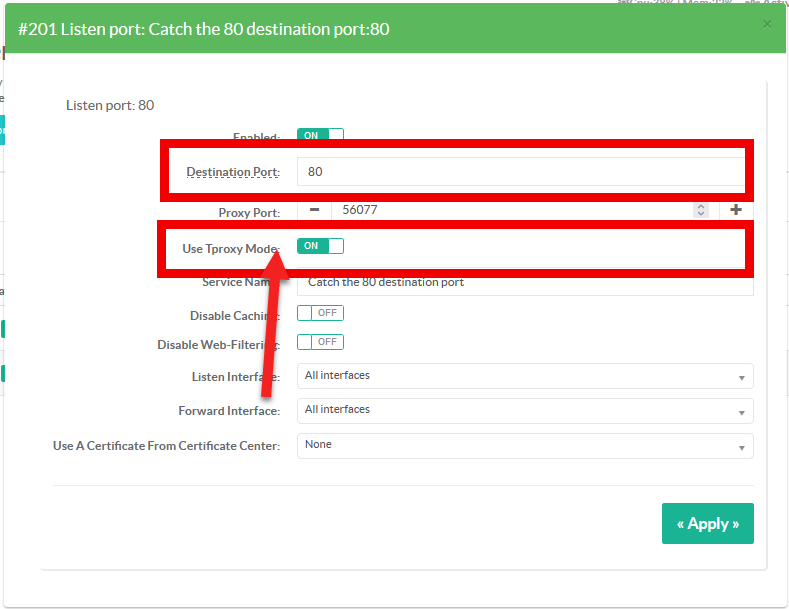
- The proxy port field is optional;
Artica offers you a randomly generated one because it is used locally.
The field is present to prevent local port conflicts. - If you have several network cards and want to force the proxy to use a specific network card to exit to the Internet, enter the network card in the "Forward Interface" field.
¶ Create an HTTPs transparent proxy port (Port 443)
- Click again on
New port - On the destination port, set the 443 port
- Enable the “Use Tproxy Mode” checkbox
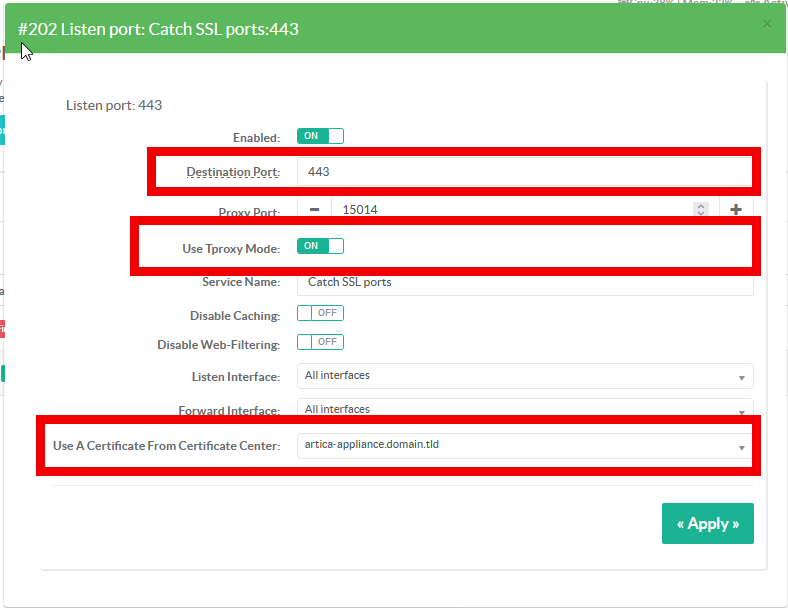
- In "Use a certificate from certificate center", select a certificate.
Don't worry about the certificate: it's used internally, as the default proxy doesn't decrypt the SSL protocol.
It just needs a certificate to work.
If you really want to decrypt/encrypt through the proxy, the certificate used by the proxy must be installed in your users' browsers.
¶ Finally, compile your configuration.
After adding your ports, Artica performs an audit of your configuration.
As the parameters have not been applied, your settings are not in line with the system.
- Click on the "Reconfigure an restart service" button to put your settings into production mode.
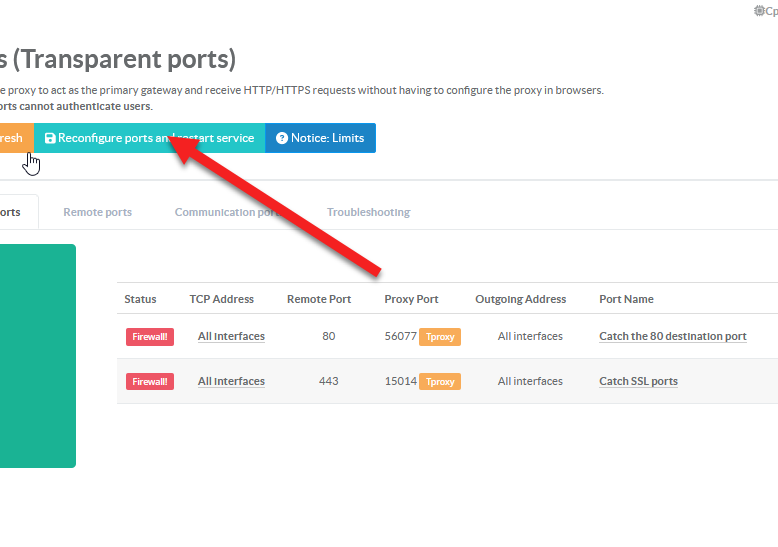
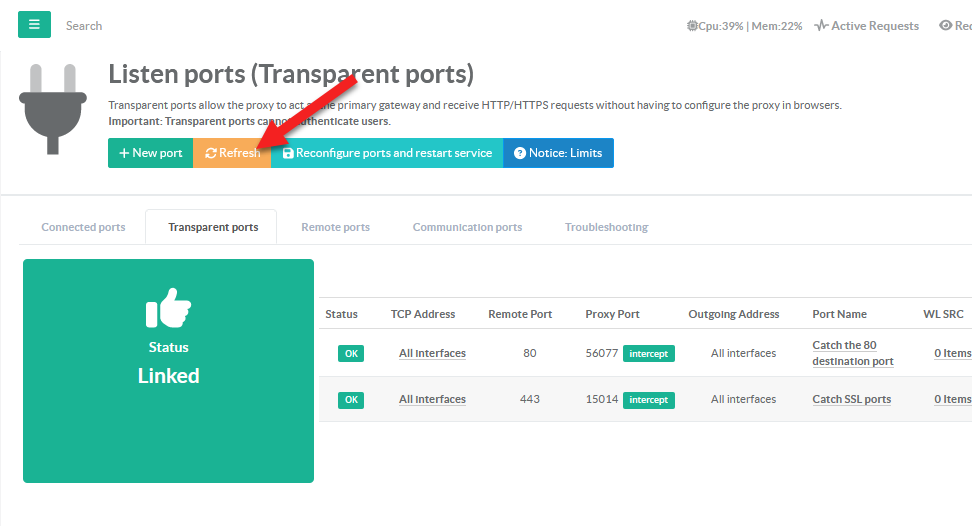
- After compilation, the interface may display a failed status.
This is normal, as the Web interface checks the ports while the proxy has not yet fully started up. Simply refresh the table to be sure.

¶ Network checks
- Make sure all states are green.
- Click on
Requestson the top menu. - You should see requests from your workstations

If your browser goes into timeout after setting up the tproxy, this means that your gateway is not accepting packets returned by your proxy. You should then use the "Intercept Mode" method.
