¶ Overview
This feature is avaliable on Artica version 4.40 SP152+ and 4.50.
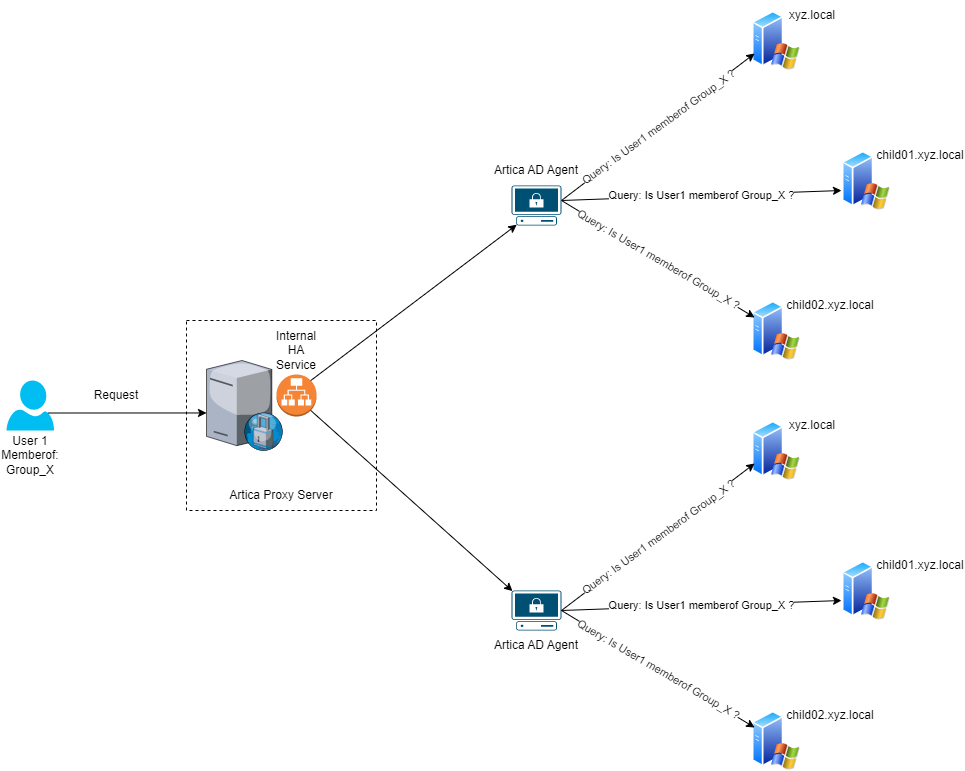
Artica AD Agent is used when you have a big and complex Active Directory with several child domains and/or trusted domains, in this method instead you configure each connection manually inside Artica, you just need to install the Agent in one or more Domain computers, this Agent will retrive automatically all the information of your forest and do the necessary queries based of the domain.
¶ Artica Active Agent Ecosystem
The Agent: - Executable file installed in one or more windows computer(s) on your domain, the Agent is in charge to get the necessary information from Active Directly Forest and query the Domains in the forest.
High Available Service AKA AD Agent HA - The AD Agent HA is installed through Artica Web Console and is used to create a High Available Service, load-balancing or faiolver between Artica and the Agent(s).
AD Agent Connector - The connector is a plugin that connects the Proxy Service or other library used by Artica to the AD Agent HA.
¶ Agent
¶ Requisites
- 6 or more GB of Ram
- 4 or more CPU's
- 1GB Nic
- The machine must be in the Active Directory Domain.
- The installation must executed by a user with Administrative privileges and the service must be run by at least a user member of Domain Users.
- Allow the service port on Firewall, by default the port is 8080
¶ Installation
- Download the executable file artica-ad-agent.exe.
- Execute artica-ad-agent.exe as Administrator.
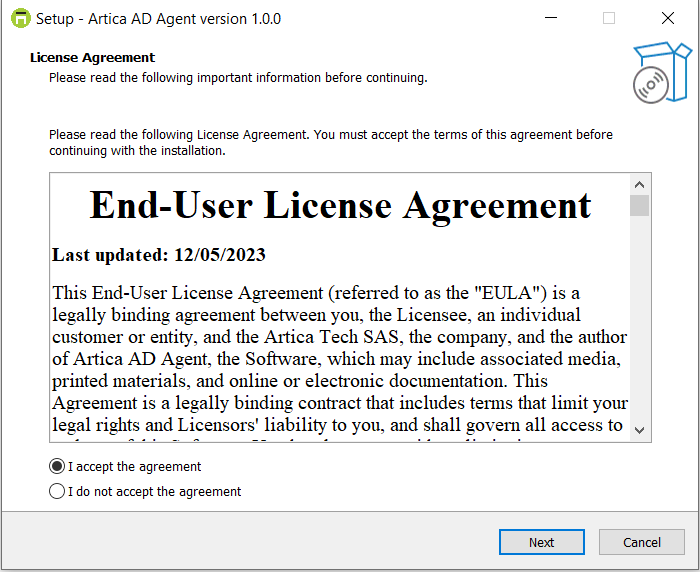
- Accept the EULA and click Next.
- Click Install.
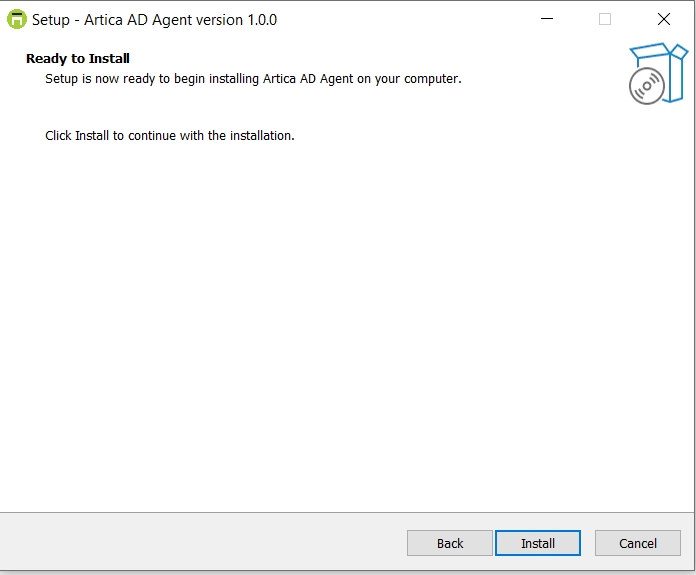
- Finish the installation.

¶ Setup
After installation the service is up and running with the default parameters, to change the default parameters open cmd.exe with Administrative privileges and change diretory to %programfiles(x86)%\Artica AD Agent.

¶ Parameters
Run .\artica-ad-agent.exe -help to print all available commands.

Run .\artica-ad-agent.exe -{command} to change the parameters.
-gc=true/false - Enable/Disable Global Catalog. Default: true
-ad-ssl=true/false - Enable/Disable Secure LDAP. Default: false
-listen-ip=IP - Change default listen IP. Default: ALL
-listen-port=PORT - Change default listen Port. Default: 8080
-debug=true/false - Enable/Disable debug mode. Default: false
-add-proxy=IP - Allow only sources to connected to the Agent. Default: ALL
-delete-proxy=IP - Delete entries added by -add-proxy.
-print - Print the configuration file.
-print-token - Print the authorization token.
-change-token - Change the authorization token.
-start - Start the service.
-install - Install the service.
-stop - Stop the service.
-remove - Remove the service.
¶ Events
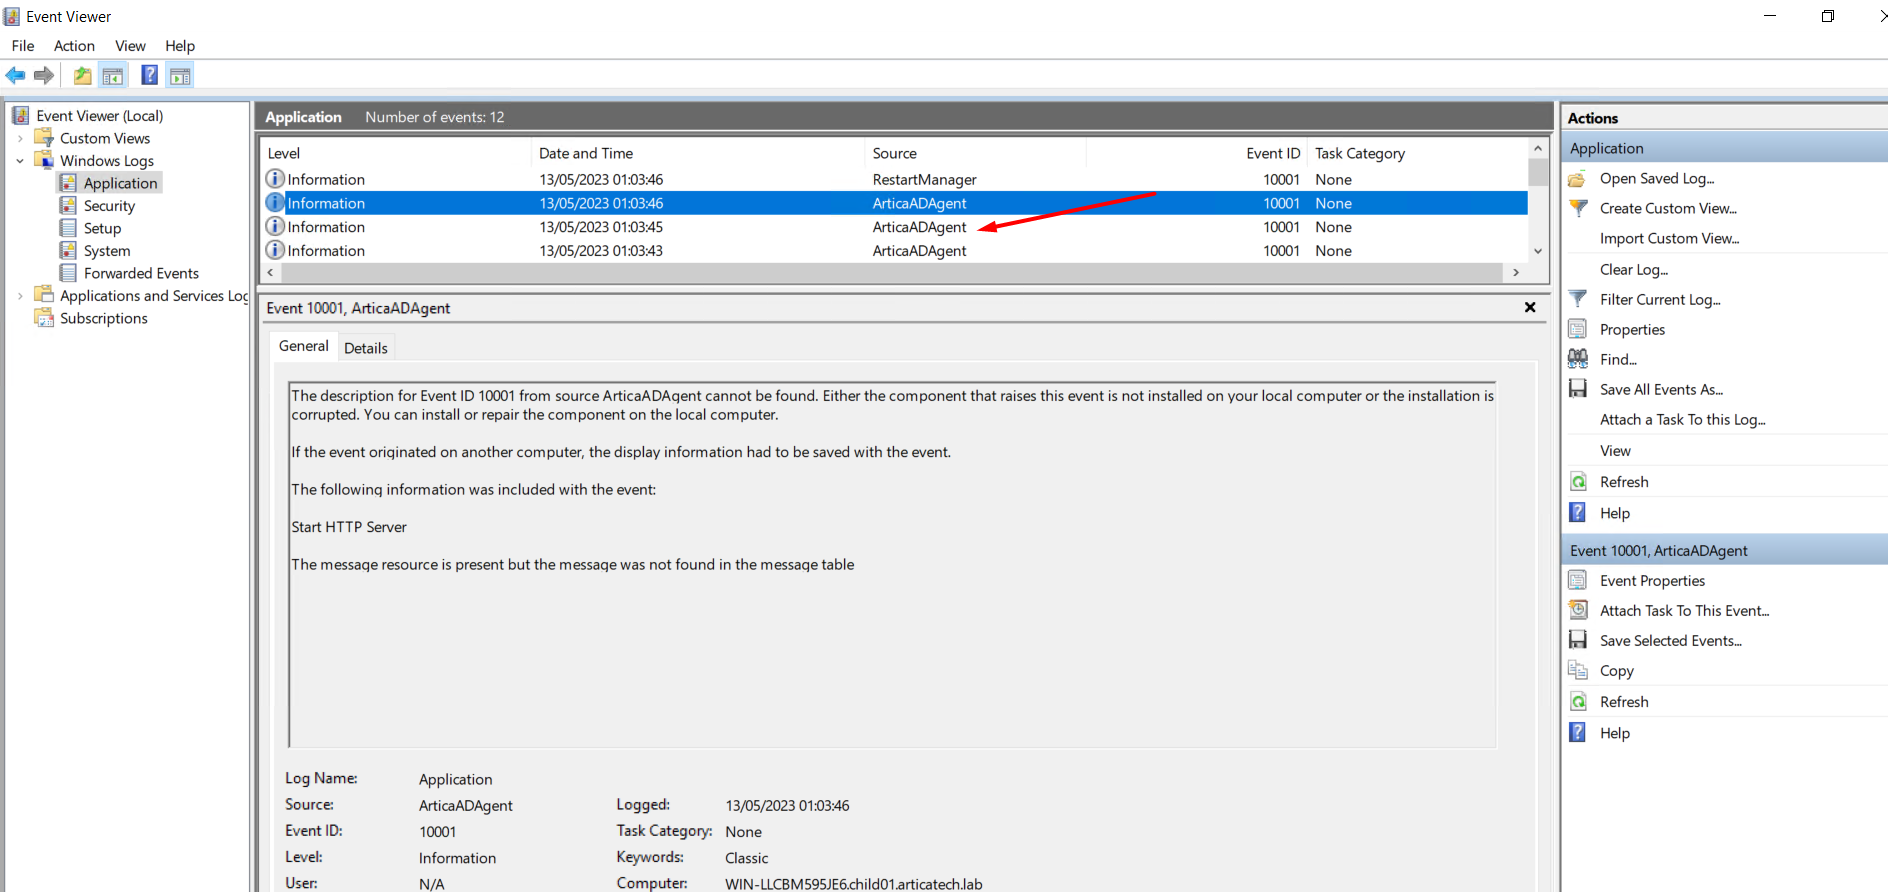
The events of the Agent are stored on Windows Event Viewer and can be found by the process name, ArtciaADAgent
¶ Start, Stop, Restart the Servie
If you need to Start, Stop or Restart the Agent, open the Windows Service console (services.msc), find the service Artica Active Directory Agent and execute the desired task.

¶ Uninstall
To fully remove the Agent from the machine open the folder %programfiles(x86)%\Artica AD Agent and execute the file unins000.exe

¶ AD Agent HA
¶ Installation
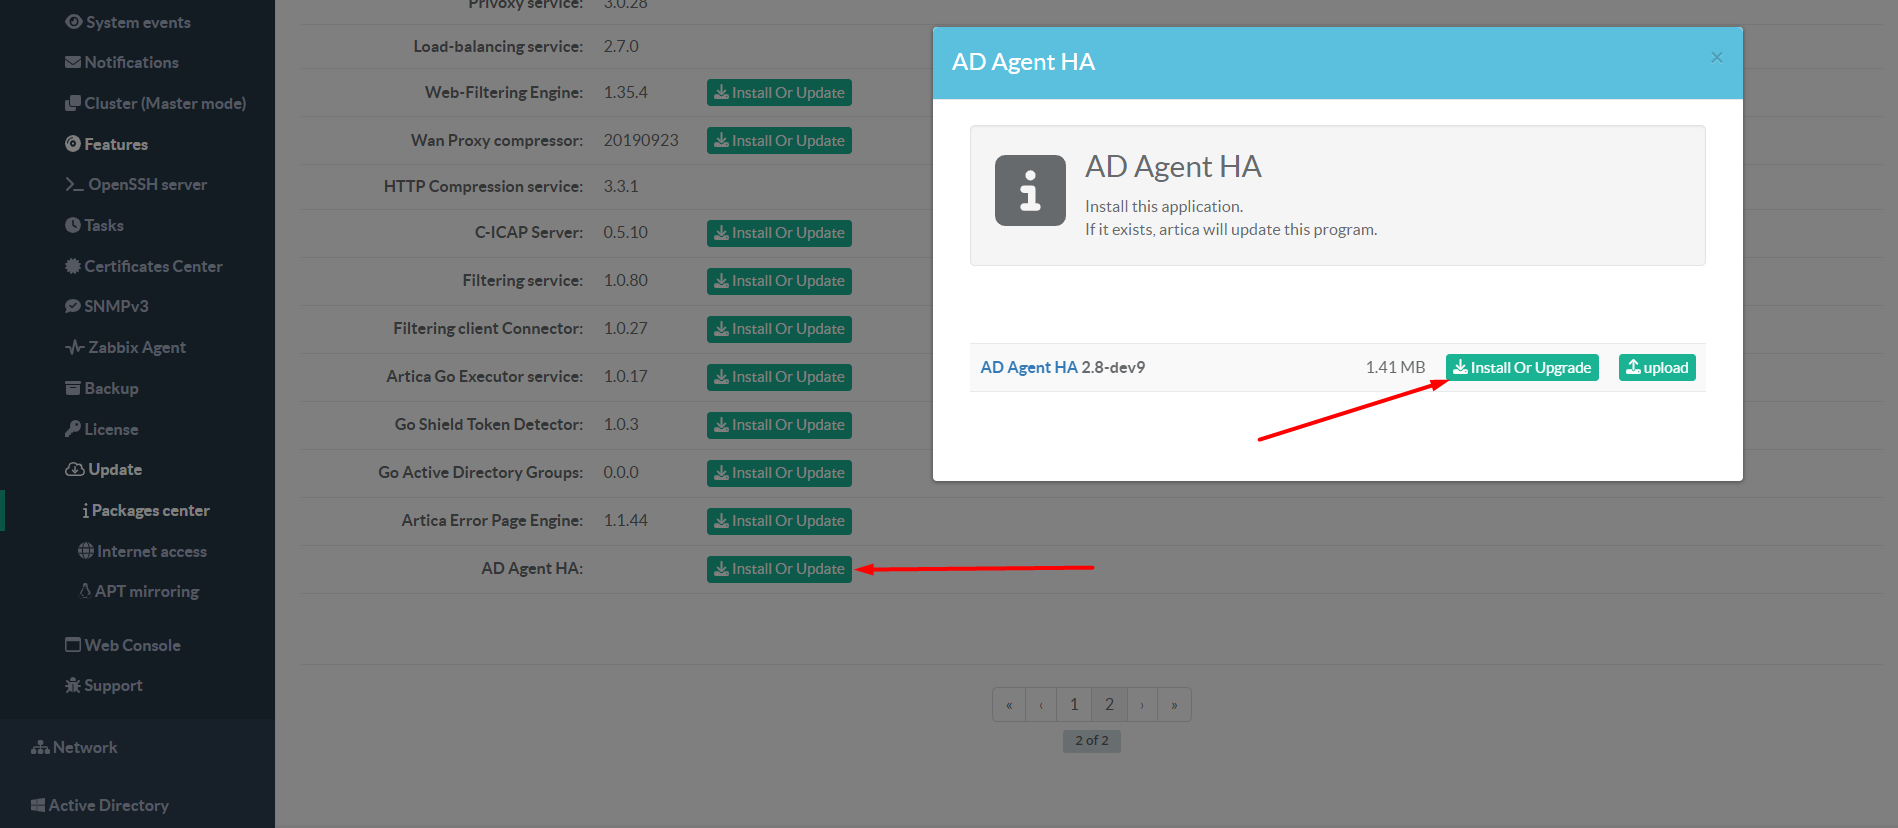
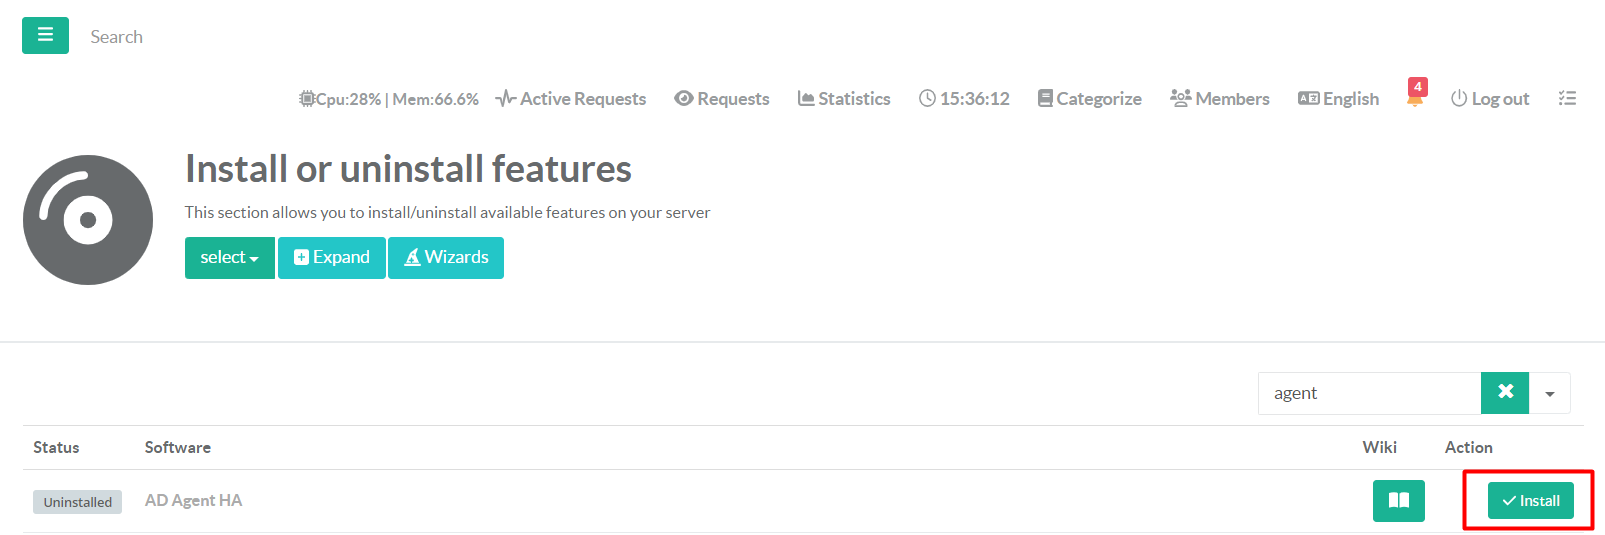
- From Artica Web Console, on left menu click on Your System / Features and install the AD Agent HA feature
¶ Setup
From left menu click on Active Directory / Query Users and Groups / AD Agent HA / Main tab
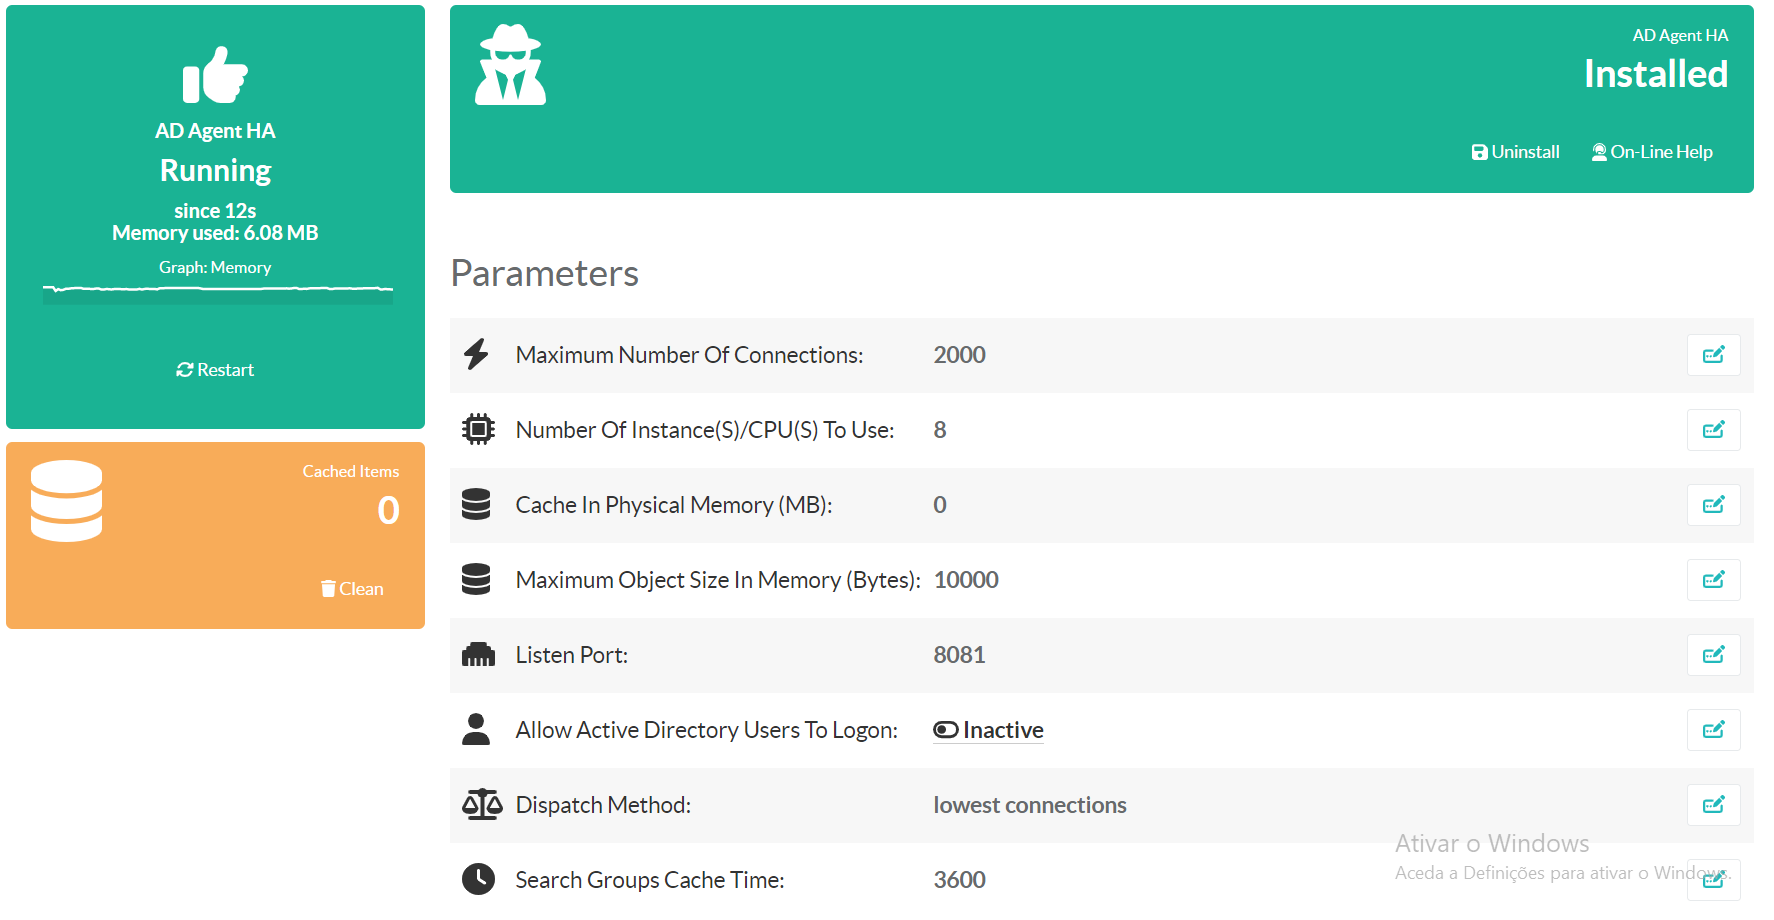
- Maximum Number Of Connections - Define the maximum Number of connections that the service can process in simultaneous.
- Number Of Instance(S)/CPU(S) - Define the number of CPU's affected to this service.
- Cache In Physical Memory - Define the service cache size in MB.
- Maximum Object Size In Memory - Maximum bytes of objects that the service will keep in memory before release it.
- Listen Port - Define the listen port of service.
- Allow Active Directory Users To Logon - Enable this option if you want that Active Directory Users to logon on Artica Web Console see here
- Dispatch Method - Define the algorithm used to select a server when doing load balancing.
- Search Groups Cache Time - Define the time to live (TTL) that the results will be keeped in cache.
¶ Agents
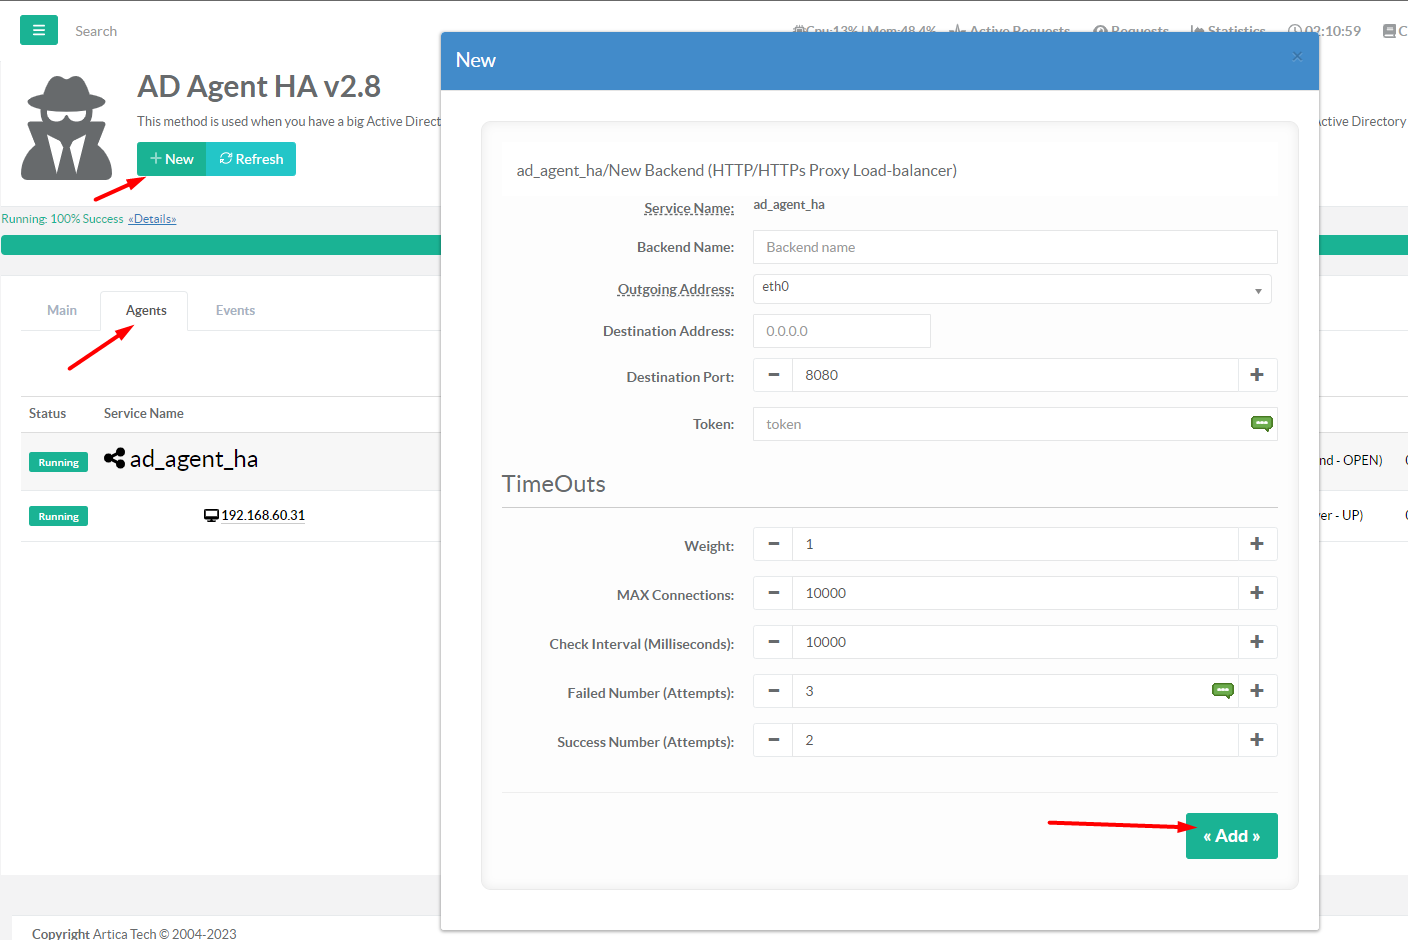
Click on Agents tab to add / delete the Agents to/from the AD Agent HA service.
¶ Add Agent
- Click on the button New on the top.
- Fill the information.
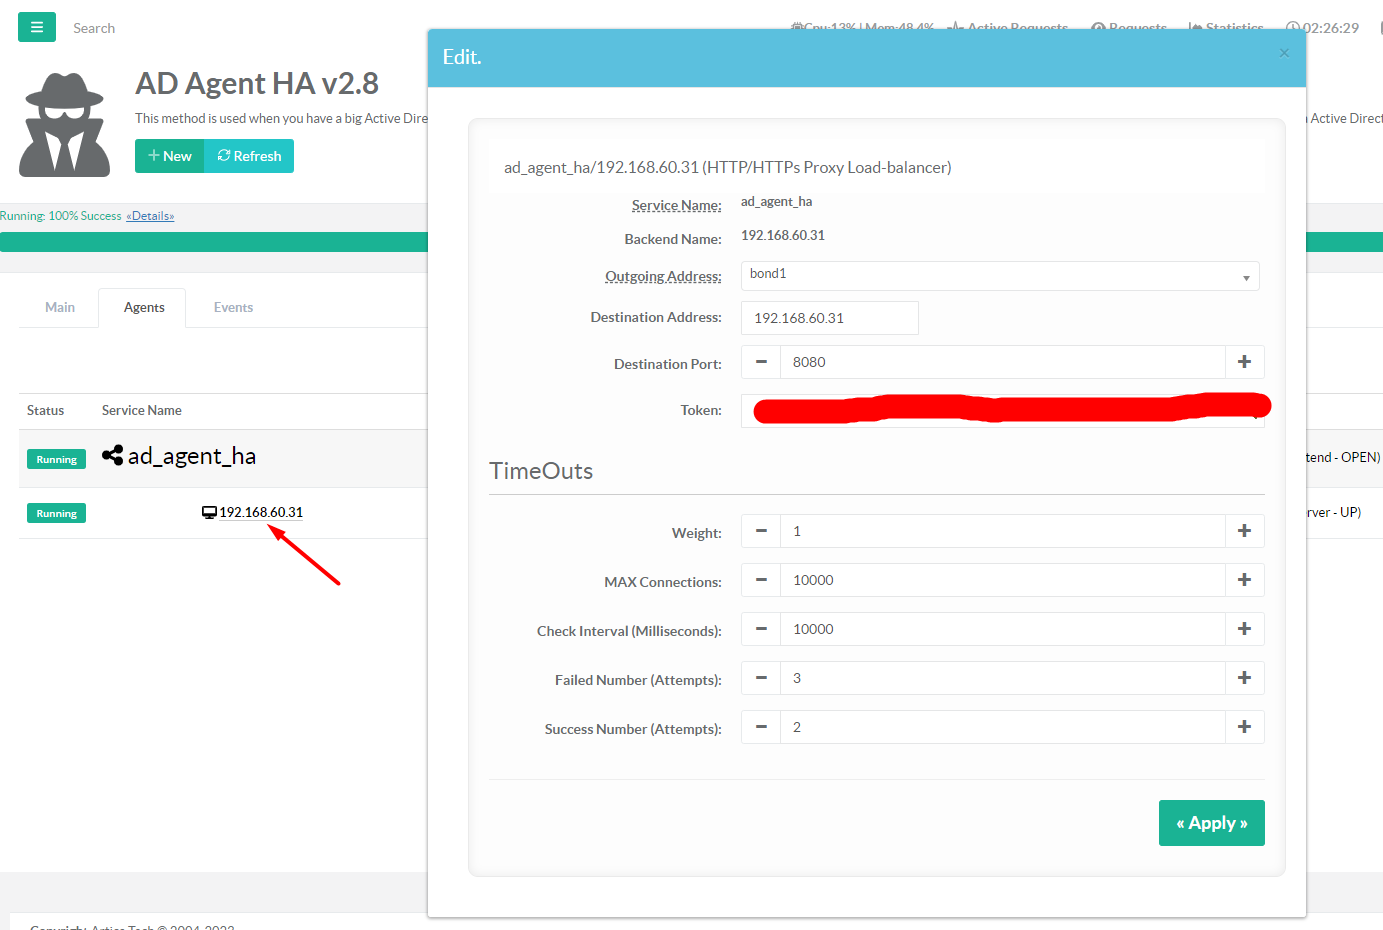
2.1 Backend Name - Free field, this is just used to quickly identify the Agent by name.
2.2 Outgoing Address - Set the source interface for outgoing connections.
2.3 Destination Address - The IP of the machine where the Agent service is installed-listen-iphere.
2.4 Destination Port - The Port where the Agent service is running, see-listen-porthere.
2.5 Token - The authorization token of the Agent service, see-print-tokenhere.
2.6 Weight - This parameter is used to adjust the server's weight relative to other servers. All servers will receive a load proportional to their weight relative to the sum of all weights, so the higher the weight, the higher the load. The default weight is 1, and the maximal value is 256.
2.7 Max Connections - This parameter specifies the maximal number of concurrent connections that will be sent to this Agent.
The maximum connections that an Agent can receive also depends of the machine where is installed and the network speed / limitations.
2.8 Check Interval - The interval in milliseconds the that health checks is executed.
2.9 Failed Number - This parameter states that a server will be considered as dead after X consecutive unsuccessful health checks.
2.10 Success Number - This parameter states that a server will be considered as operational after X consecutive successful health checks.
3. Click Add.
¶ Edit Agent
- On the Agents list, click on the name of the Agent.
- Change the information.
- Click Apply
¶ Delete Agent
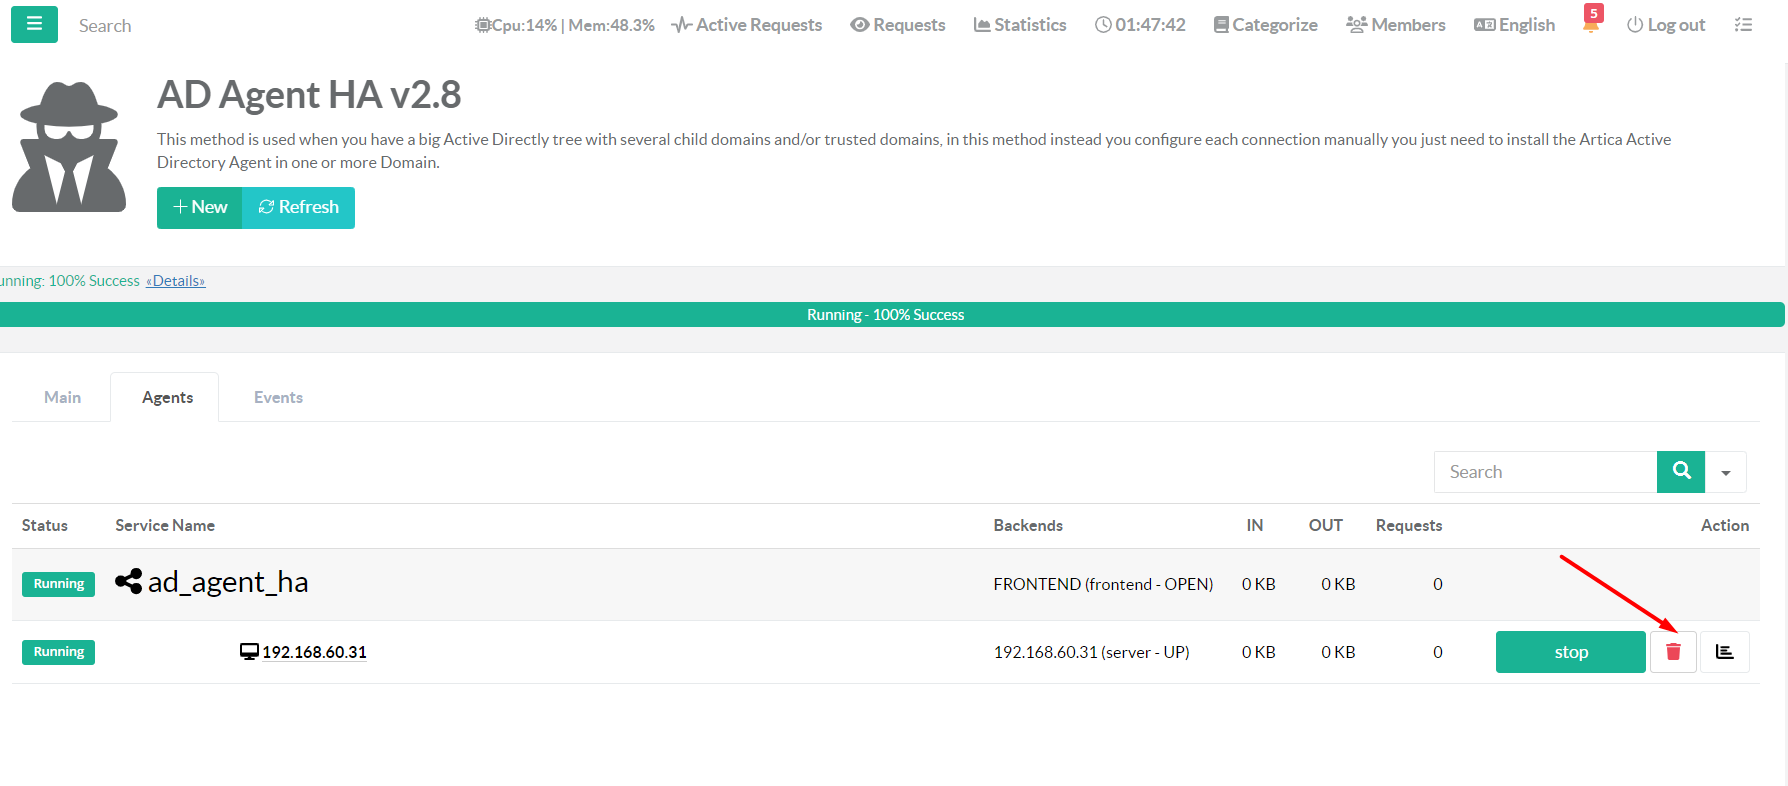
- On the Agents list, click on the Delete button.
- Confirm the operation.
¶ Get Information from Agent
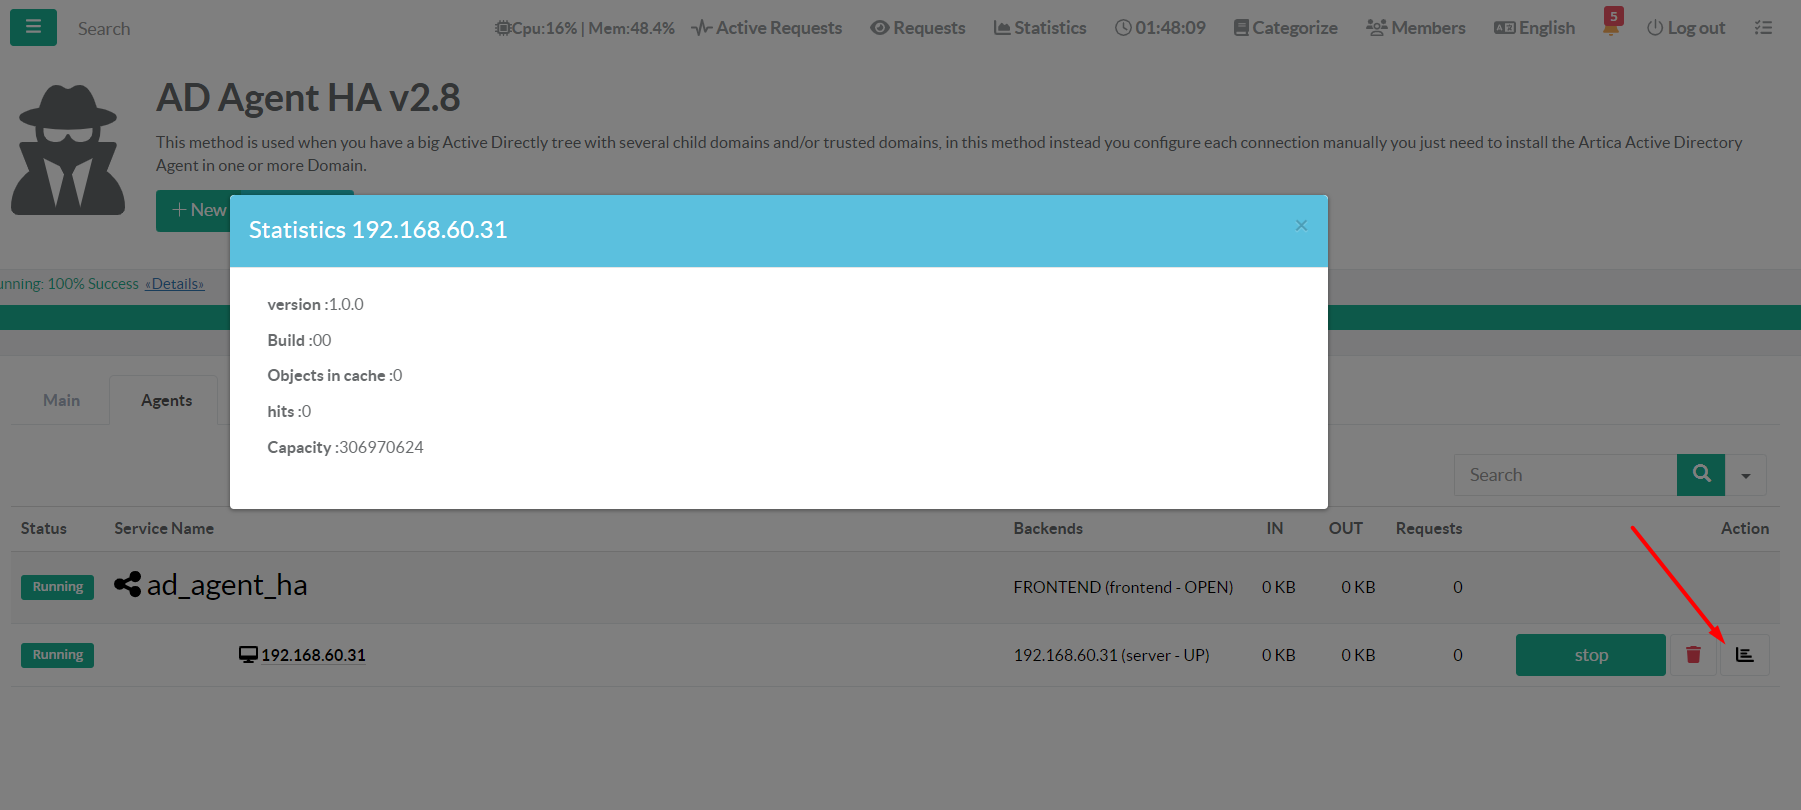
You can get some information from Agent such, Version, Build and Cache Statistics.
- On the Agents list, click on the Info button.
¶ Status of Agent
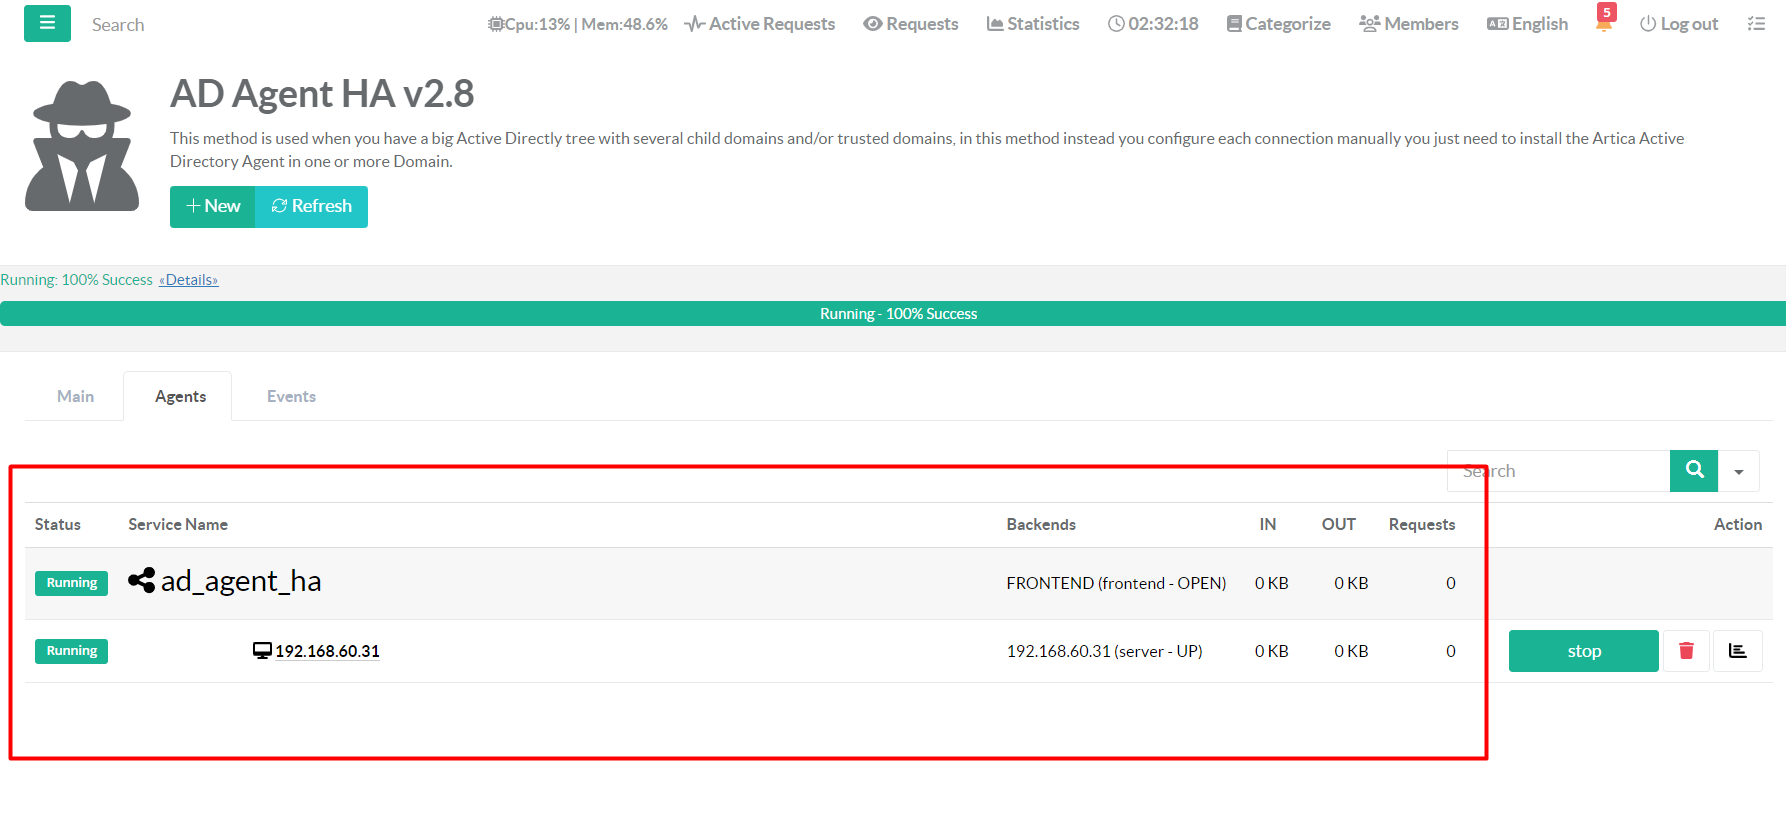
From the Agents list, you can check the status of each Agent, if they are running or not and the traffic in/ou from each Agent.
¶ Events
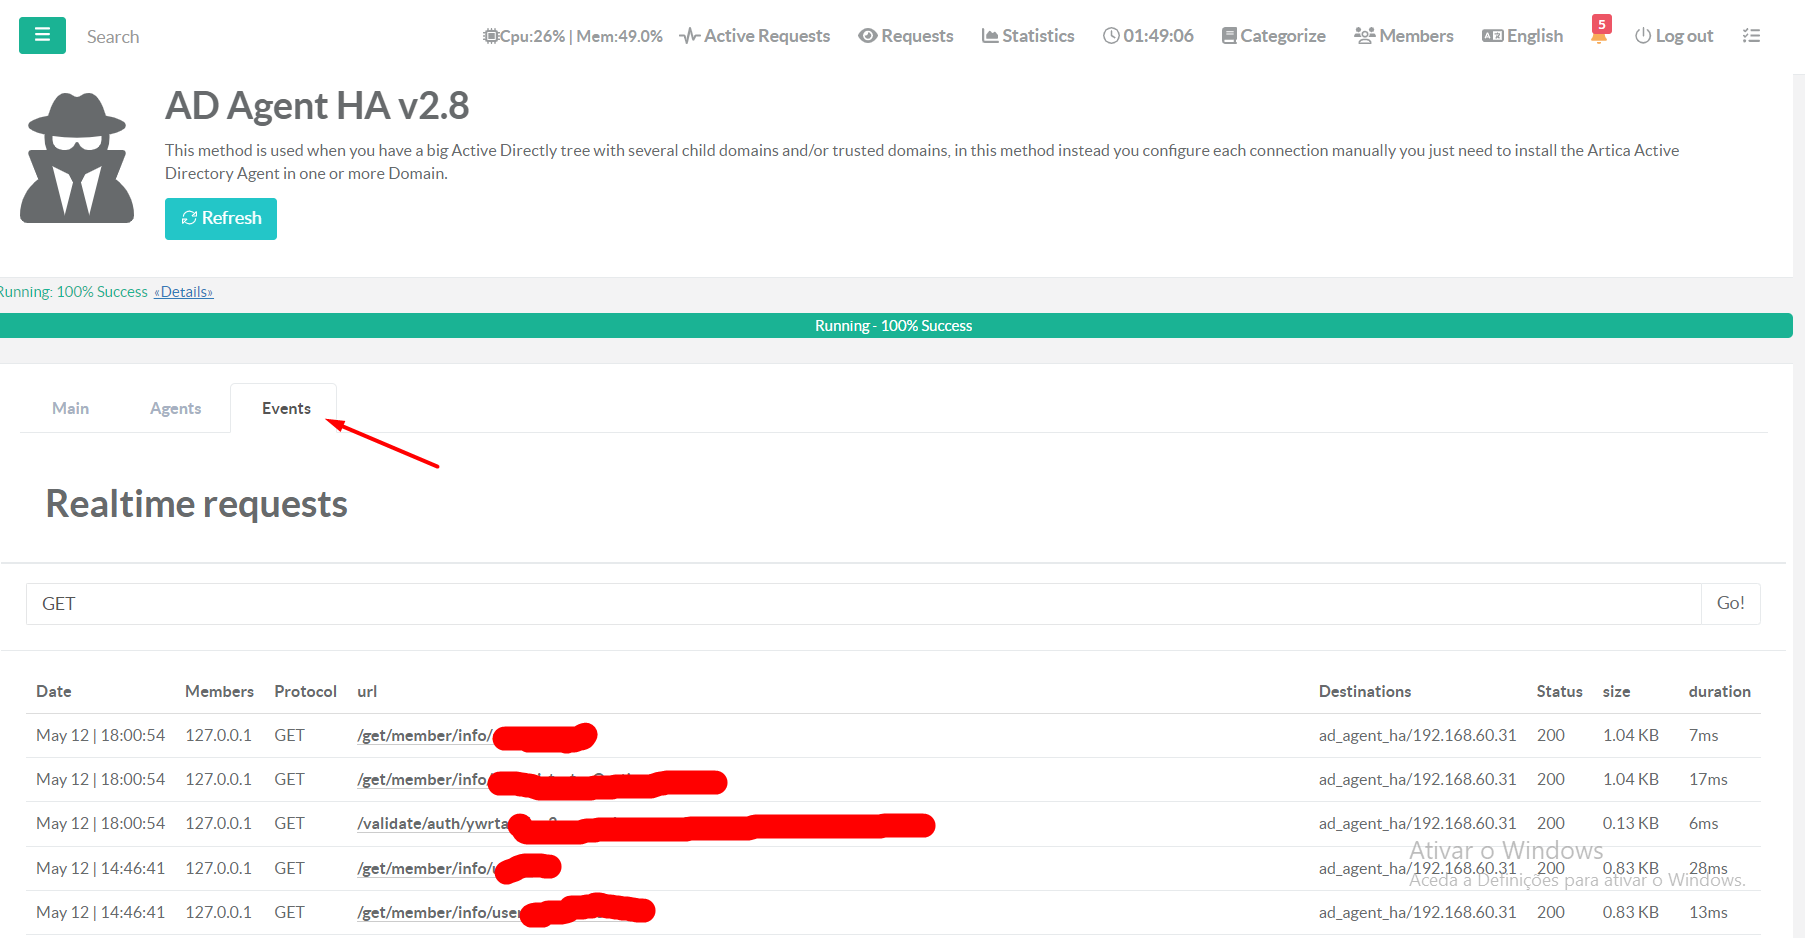
Click on Events tab check all the events of the AD Agent HA service.
¶ Purge Cache
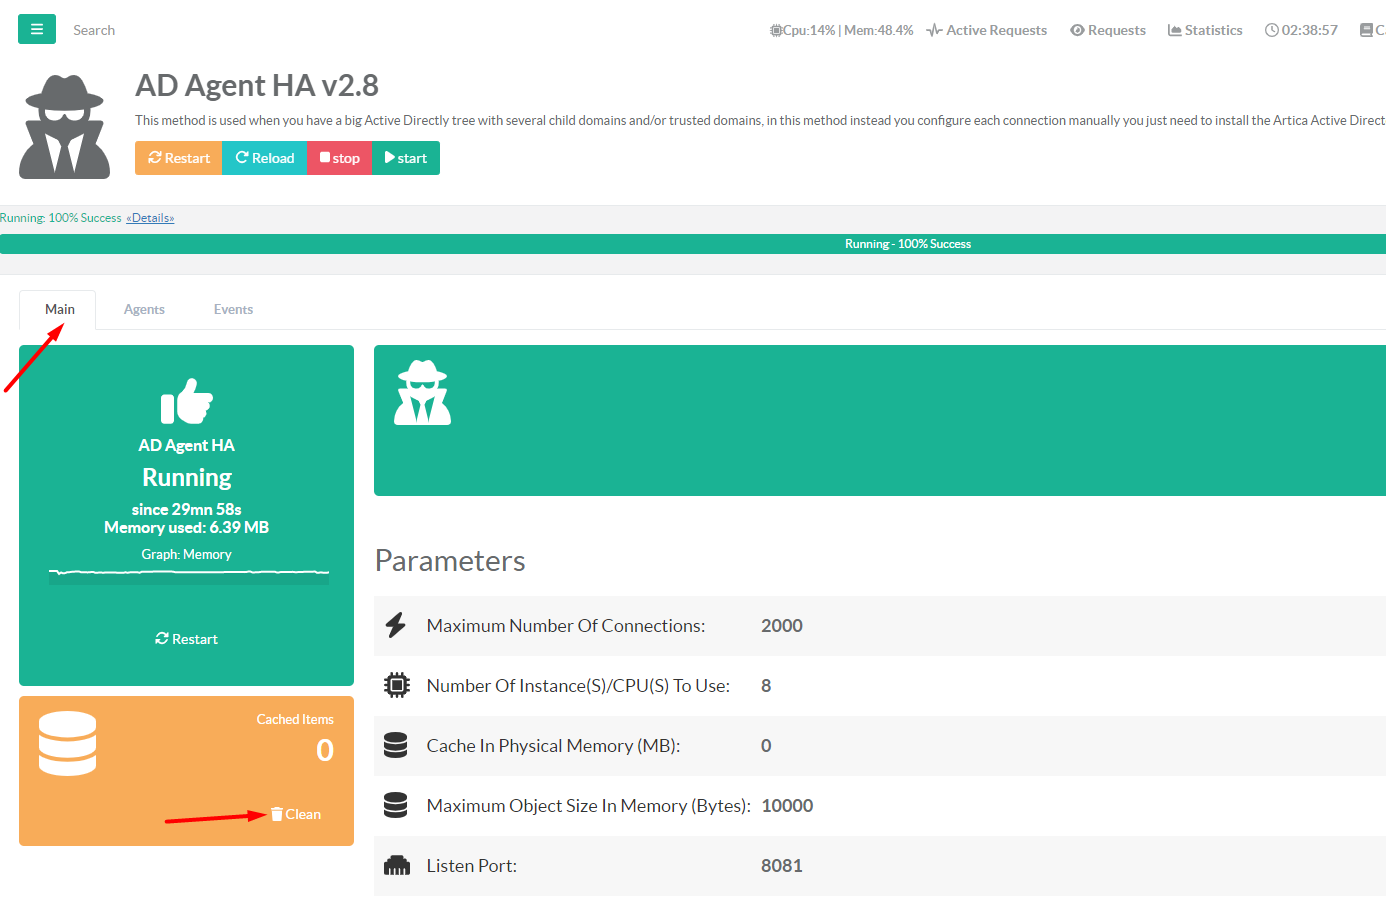
By default the cache is removed after the time define in the option Search Groups Cache Time on main service,but if you want to remove it before that time, click on Main tab and then on Cache section, click on Clean button.
¶ Uninstall
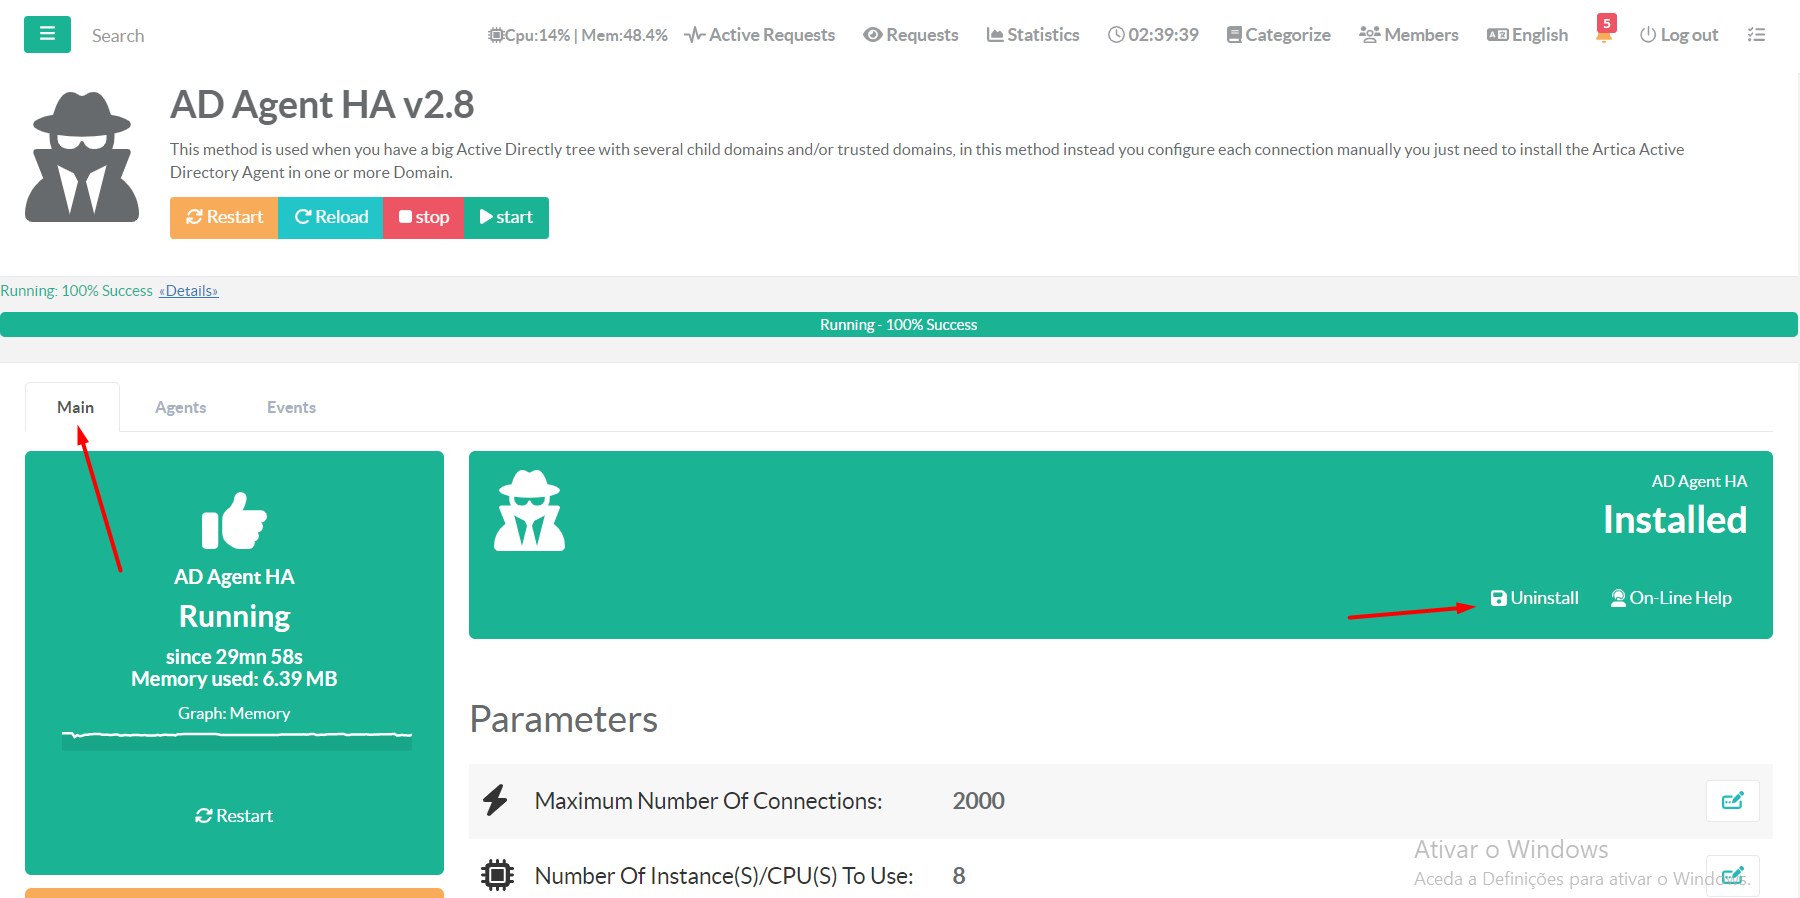
To fully uninstall the AD Agent HA service from Artic Web Console, click on Main tab and then click on Uninstall button.
¶ AD Agent Connector
Only if you use the Proxy Service.
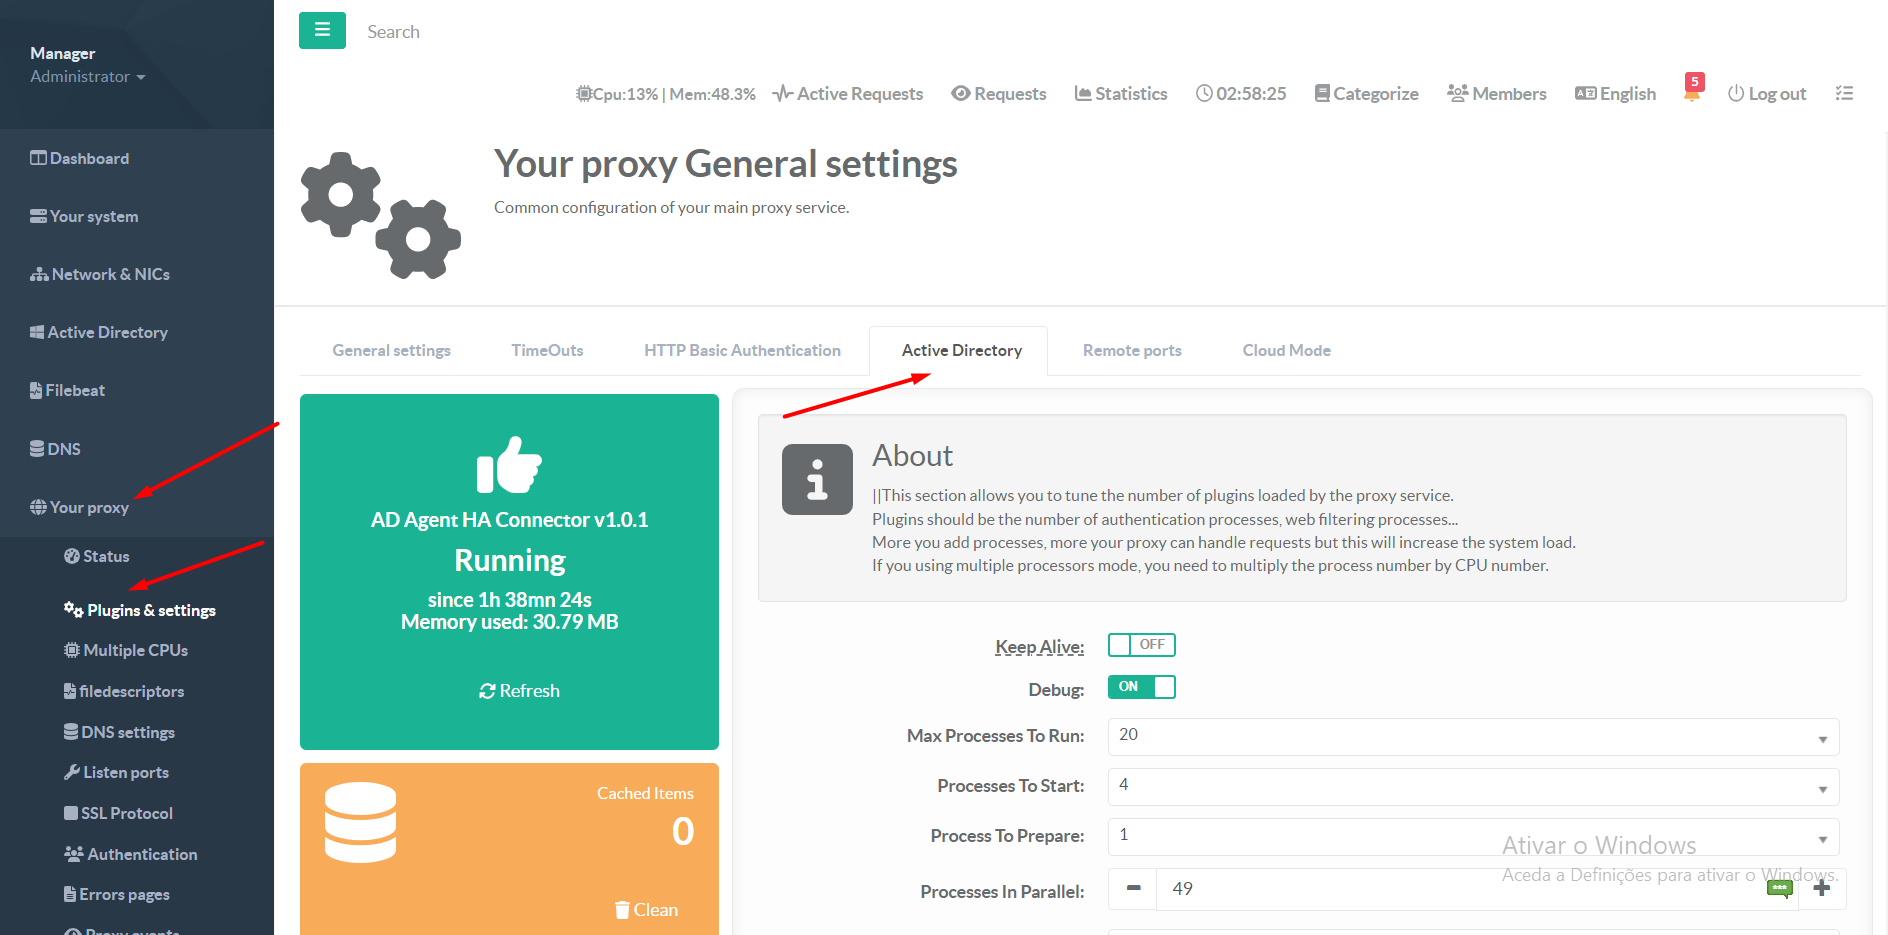
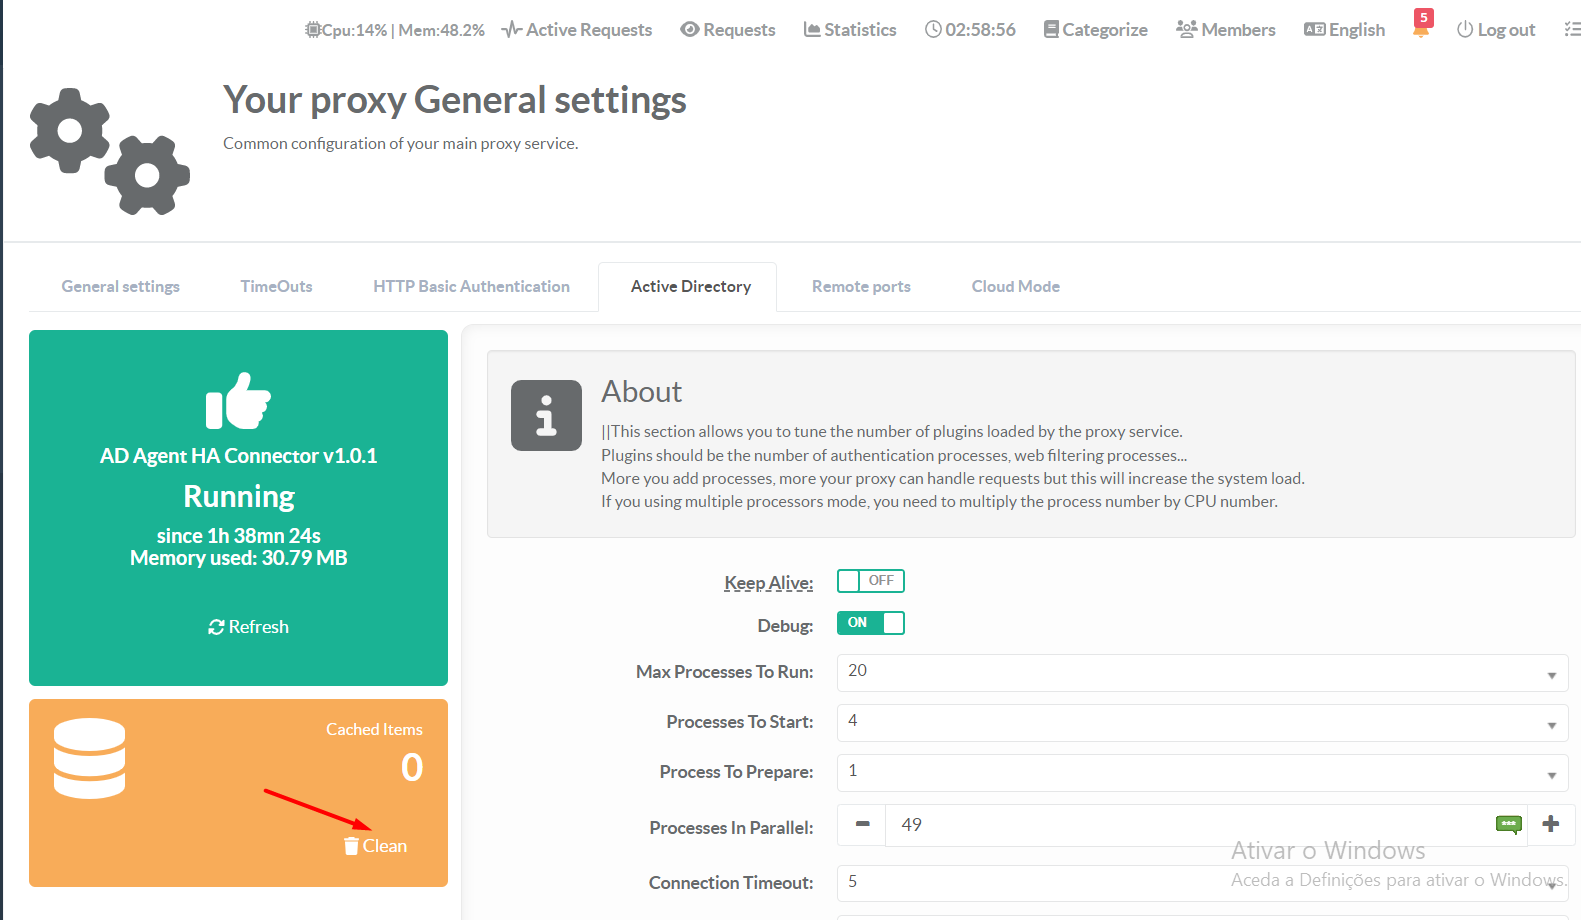
To configure the AD Agent Connector, on left menu click Your Proxy / Plugins & Settings / Active Directory tab
¶ Paremeters
- Keep Alive - If you experience problems with PUT/POST requests when using the NTLM or Negotiate schemes then you can try setting this to off. This will cause Squid to forcibly close the connection on the initial request where the browser asks which schemes are supported by the proxy. (Only for auth_param ntlm/kerberos)
- Debug - Enable/Disable debug mode.
- Max Processes To Run - The maximum number of authenticator processes to spawn. If you start too few Squid will have to wait for them to process a backlog of credential verifications, slowing it down. When password verifications are done via a (slow) network you are likely to need lots of authenticator processes. (Only for auth_param ntlm/kerberos)
- Processes To Start and Processes In Parallel - The startup= and idle= options permit some skew in the exact amount run. A minimum of startup=N will begin during startup and reconfigure. Squid will start more in groups of up to idle=N in an attempt to meet traffic needs and to keep idle=N free above those traffic needs up to the maximum. (Only for auth_param ntlm/kerberos)
- Processes In Parallel - The number of concurrent requests the helper can process. (for auth_param ntlm/kerberos and AD Agent Connector)
- Connection Timeout - Define the connection timeout between AD Agent Connector and AD Agent HA
- Search Timeout - Define the search timeout for the request between AD Agent Connector and AD Agent HA
- Search Groups Cache Time - Define the time to live (TTL) that the results will be keeped in cache on AD Agent Connector.
- MAX Processes - Maximum number of acl helper processes spawned to service external acl lookups of this type. (Only for AD Agent Connector)
- Preload Processes - Minimum number of acl helper processes to spawn during startup and reconfigure to service external acl lookups of this type. (Only for AD Agent Connector)
- Prepare Processes - Number of acl helper processes to keep ahead of traffic loads. Squid will spawn this many at once whenever load rises above the capabilities of existing processes. Up to the value of children-max. (Only for AD Agent Connector)
¶ Purge Cache
By default the cache is removed after the time define in the option Search Groups Cache Time,but if you want to remove it before that time, on Cache section, click on Clean button.
¶ FAQ
¶ Update the AD Agent HA engine
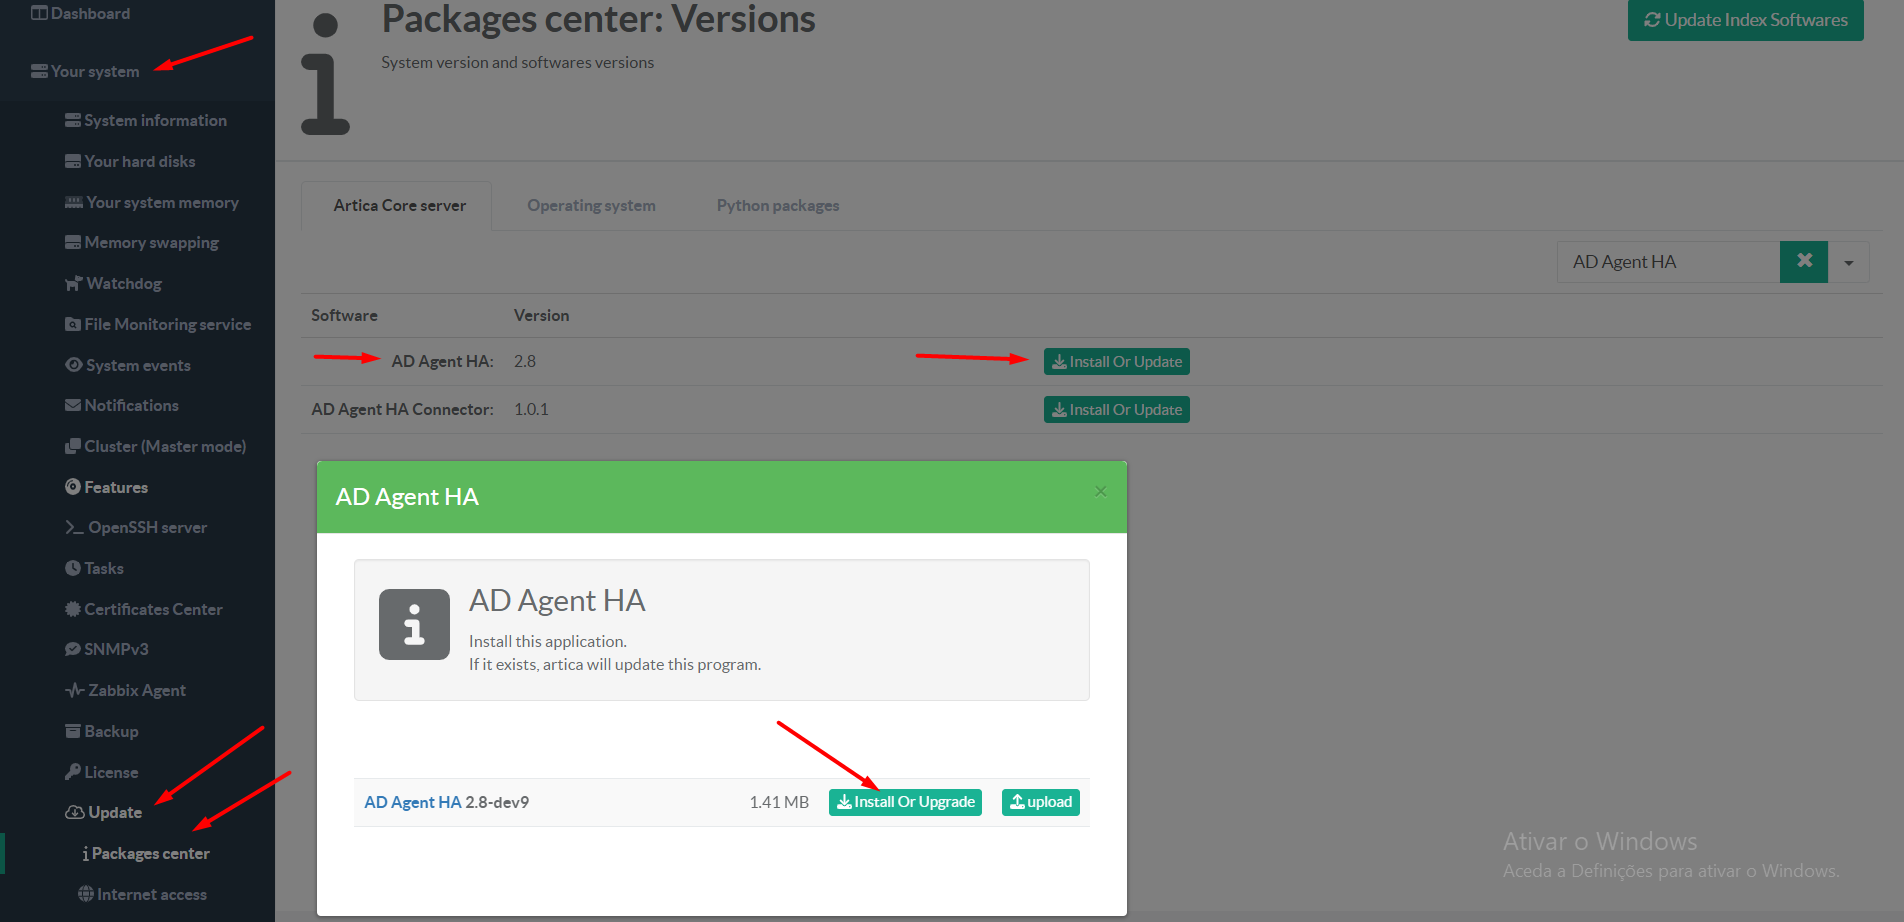
- On left menu, click Your System / Update / Package Center
- Find the program AD Agent HA
- Click on the button Install or Update
- Install / Update the latest version
¶ Update the AD Agent Connector
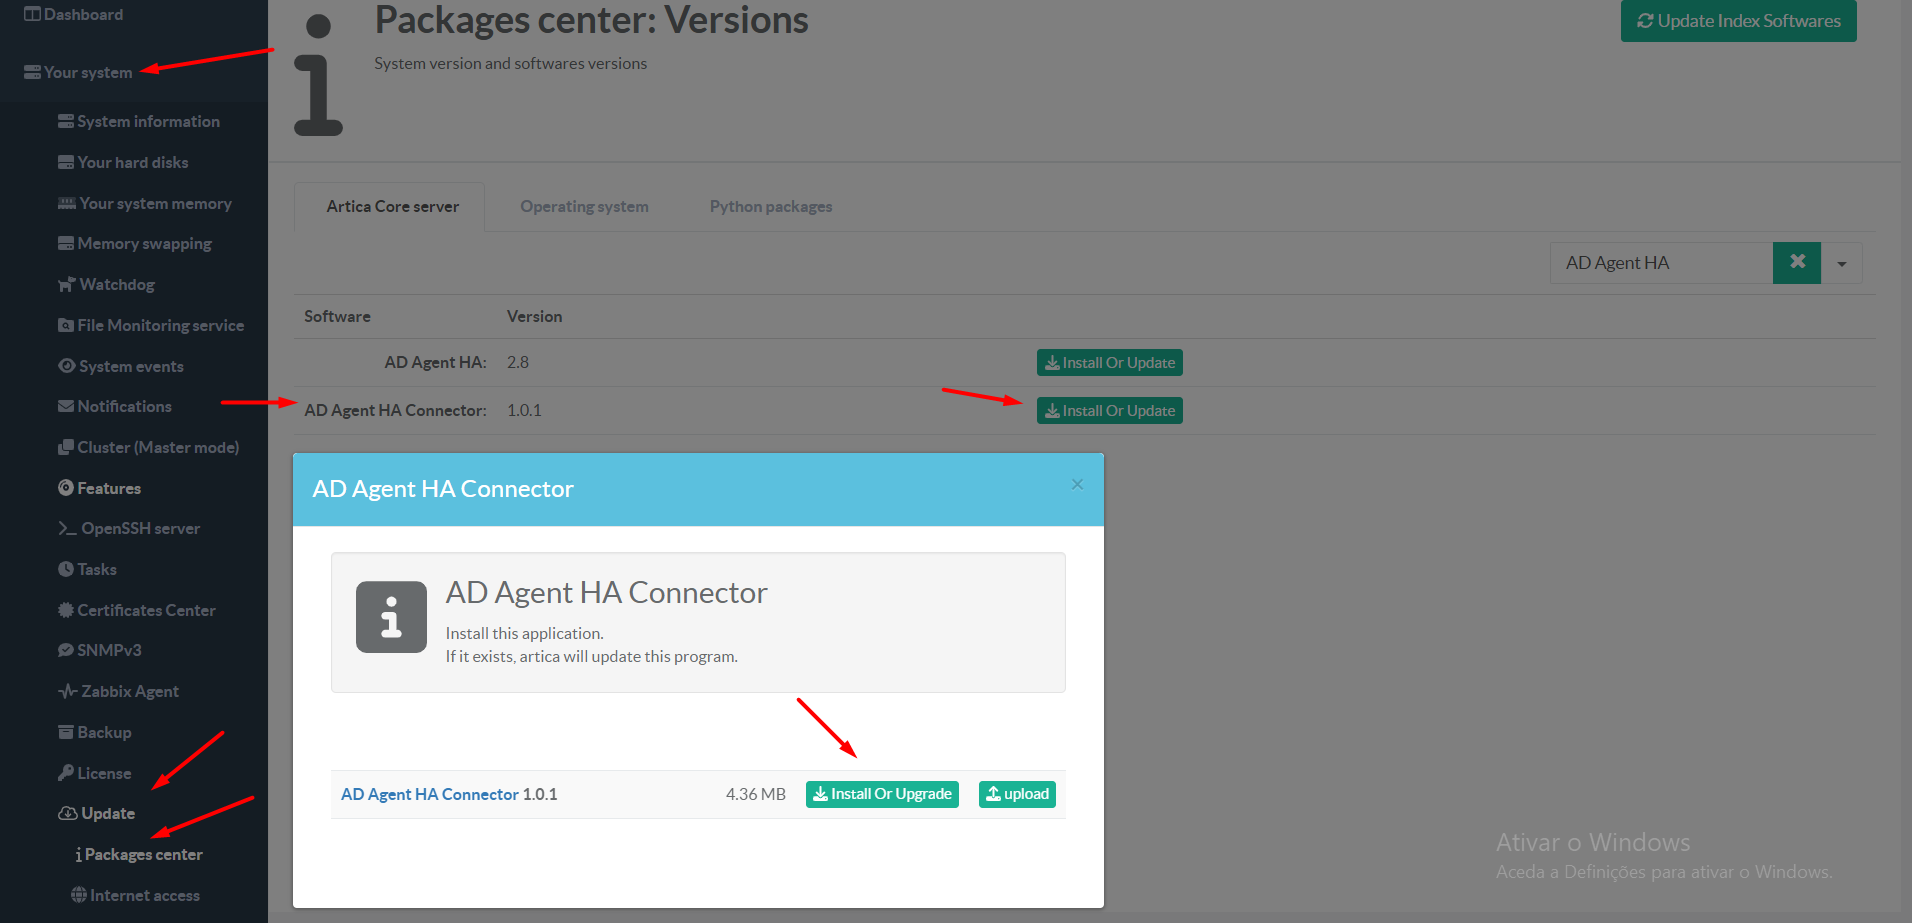
- On left menu, click Your System / Update / Package Center
- Find the program AD Agent Connector
- Click on the button Install or Update
- Install / Update the latest version
¶ Update the Agent on Windows.
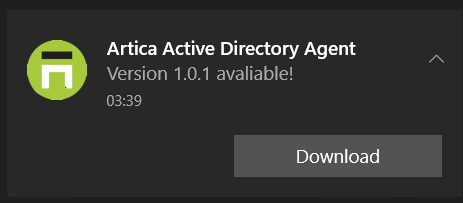
When a new version of the Agent is released, you will receive a pop up notification on Windows Notification Center, click on the button download and installed it.
¶ This feature is not installed (AD Agent HA)
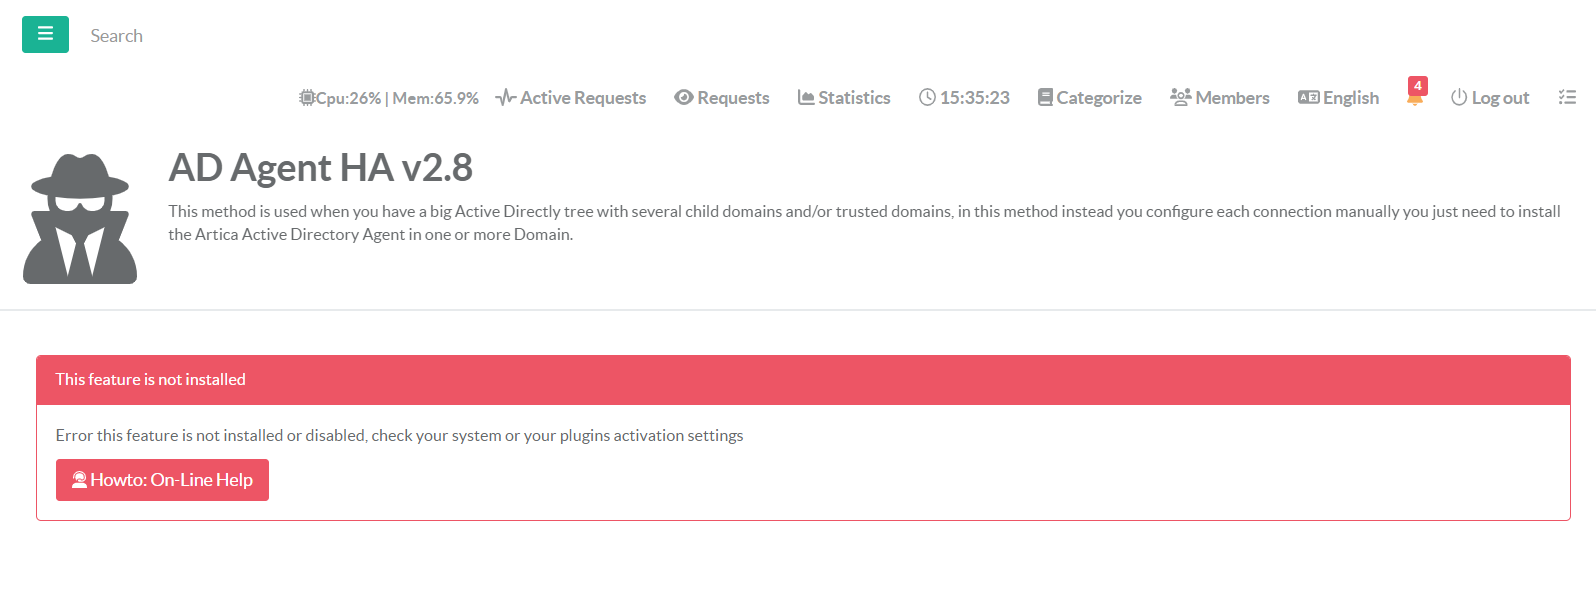
This message means that the software is not enable on your system yet. To fix it, go to Your System / Features and install the AD Agent HA feature

If the button says "Not Installed"
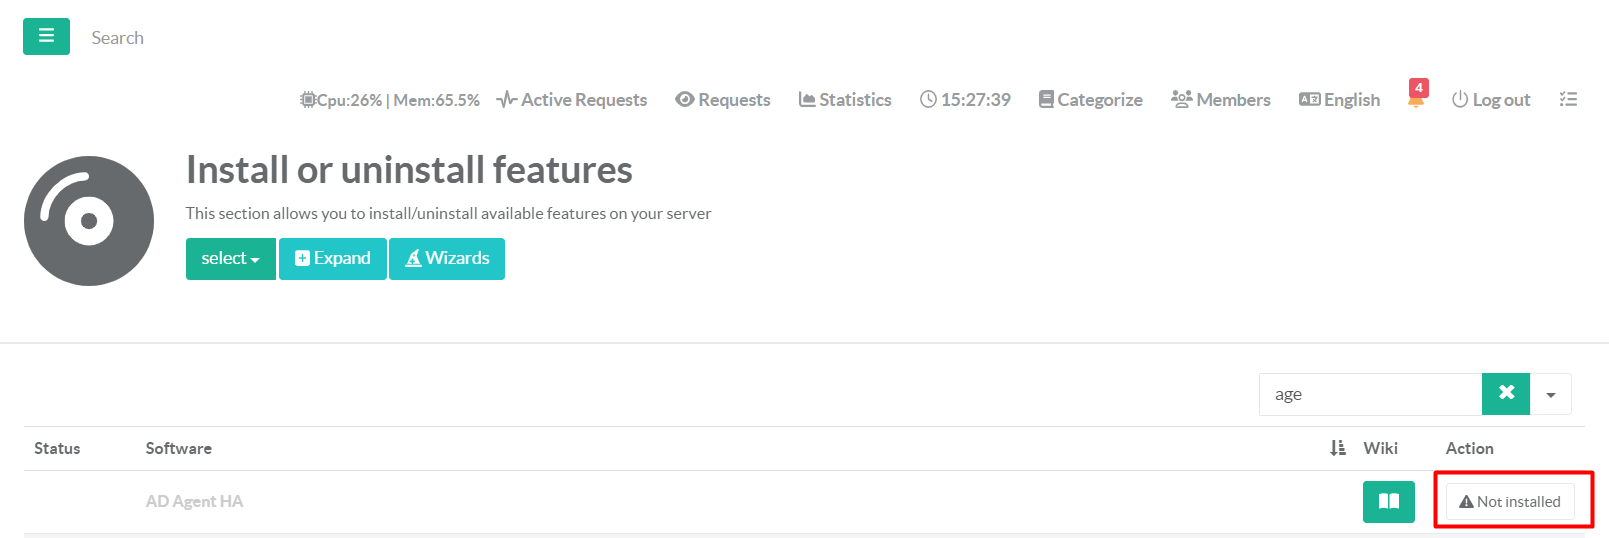
This means that the software binary is not installed on your system. To fix it, go to Your System / Update / Package Center and install the lasted version of AD Agent HA
