Installing an Artica AI appliance
Step-by-step installation of an Artica AI appliance, authorization of the client appliances and connection of Artica AI to it.
This page installs an AI appliance and connects the first client appliance to it.
Read Artica AI appliance first for the concepts and the prerequisites.
Count about 20 minutes, most of it spent downloading the model.
1. Prepare the machine
- Install a standard Artica appliance, physical or virtual.
- Give it 8 to 12 processors with AVX2, 16 GB of memory and 30 GB of free disk space.
- On a virtual machine, reserve 100 % of the memory and do not overcommit the cores.
- Give it a DNS name that the client appliances can resolve, for example
ai.example.lan. - Allow outbound HTTPS to GitHub and to the Ollama registry, directly or through the proxy of the appliance.
Do not use an appliance that already runs the Artica AI client for its own needs.
The installation removes that client.
2. Check the hardware
Open Your system › AI appliance.
The page shows the hardware check of the machine.
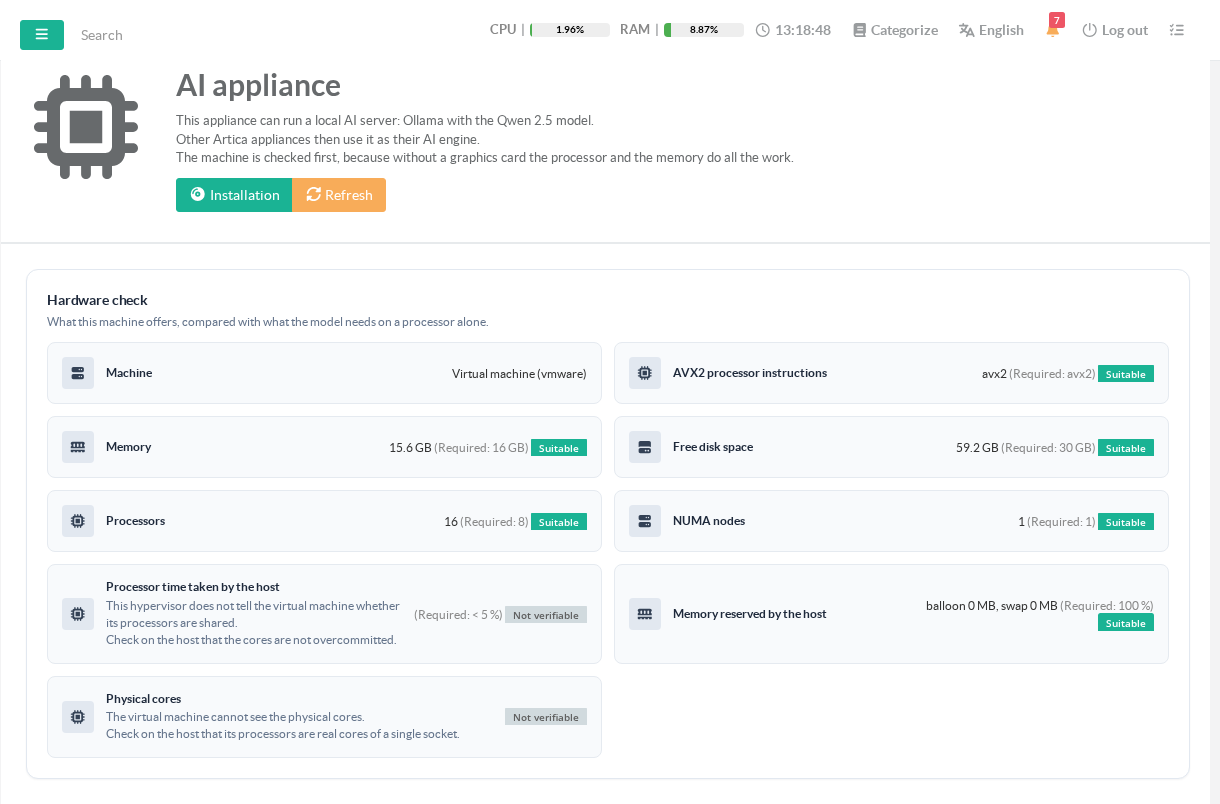
Each line compares what the machine offers with what the model needs.
- Suitable means the criterion is met.
- Slow means the model will run, but answers will take longer.
- Blocking disables the Install button and tells you what to fix.
- Not verifiable means the value cannot be seen from this machine.
- Check it on the host.
3. Install
- Click Installation in the header.
Two progress bars appear.
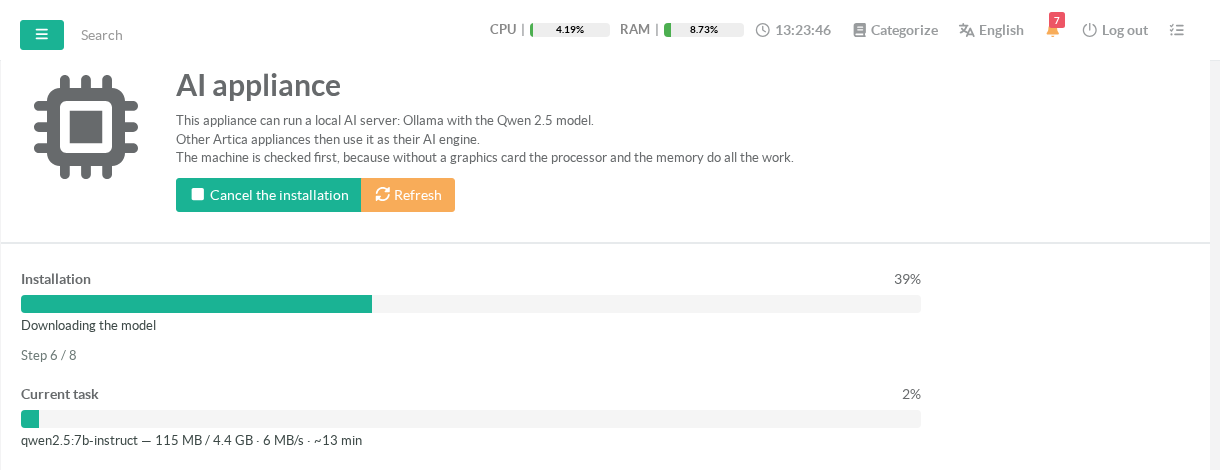
The Installation bar covers the whole installation.
It never goes back, even after a resume.
The Current task bar shows the download or the task in progress.
During a download, it shows the size received, the speed and the time left.
The installation runs in eight steps.
| Step | What it does |
|---|---|
| 1. Checking the hardware | Runs the hardware check again. A blocking criterion stops here. |
| 2. Removing the Artica AI client | Uninstalls the Artica AI client of this appliance. If it fails, nothing is downloaded. |
| 3. Downloading Ollama | Downloads the latest stable Ollama release from GitHub, about 1.3 GB. |
| 4. Installing Ollama | Verifies the checksum, extracts the archive, creates the ollama account and the service. |
| 5. Starting Ollama | Starts Ollama on 127.0.0.1:11434 and waits for its API. |
| 6. Downloading the model | Downloads qwen2.5:7b-instruct from the Ollama registry, about 4.7 GB. |
| 7. Opening the service to the other appliances | Creates the certificate authority and the server certificate, then opens port 11443. |
| 8. Measuring the speed | Generates a short answer and records the speed in tokens per second. |
Port 11443 opens only once the model is installed.
Before that, the client appliances get no answer at all.
If something interrupts the installation
- Network cut:
The download retries every 5 to 60 seconds.
The task bar shows how long no data has been received. - Long network cut:
After 30 minutes without data, the installation stops.
Click Resume.
Nothing already downloaded is lost. - Restart of the Web API service, or reboot:
The installation resumes by itself where it stopped. - Closing the browser:
The installation goes on.
Open the page again to see both bars.
When a download resumes, Ollama may download again the parts it could not keep.
The task bar then says so, and the installation bar does not move back.
Cancel the installation stops it and removes what was installed.
4. Check the result
When the installation ends, the page shows four tabs.
The Status tab shows the service, the model and its measured speed.
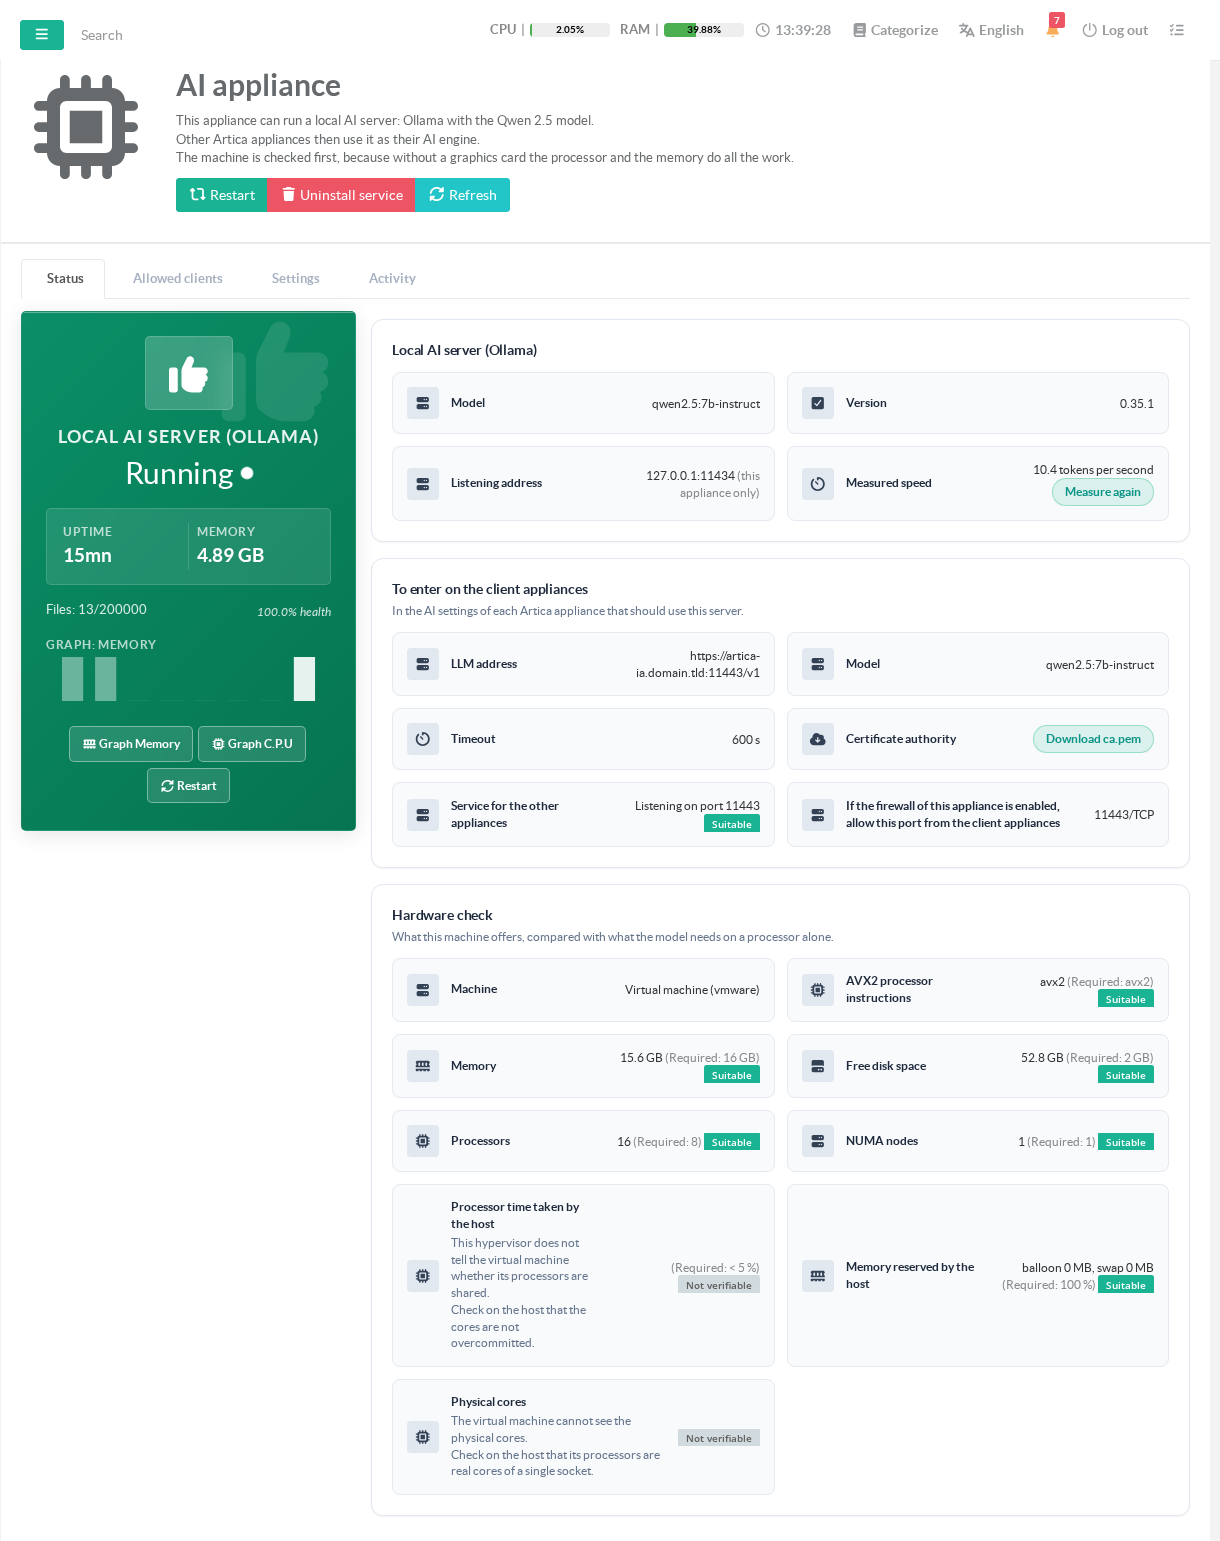
- Local AI server (Ollama): the model, the Ollama version, the listening address and the measured speed.
- To enter on the client appliances: the values to type on each client appliance.
The AI appliance line gives the name to type.
The next line lists its addresses, to type instead when the client appliances cannot resolve the name.
Each of them is in the certificate.
The Port line gives the port to keep. - Download ca.pem: the certificate authority that the client appliances must trust.
- Service for the other appliances: the HTTPS port and its state.
- Hardware check: the criteria of the machine, measured again.
Ollama is watched by the Artica watchdog and restarted if it stops.
The header also offers Restart and Uninstall service.
5. Allow the client appliances
Nobody can connect until you allow it.
Open the Allowed clients tab and click New client.
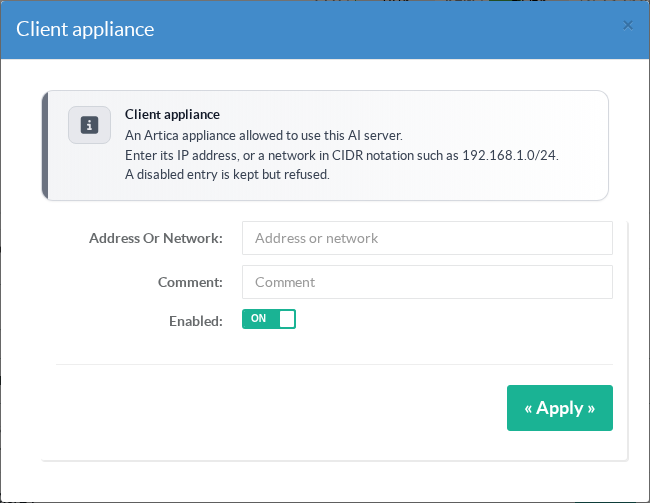
- Address or network: the IP address of a client appliance, or a network in CIDR notation such as
10.20.0.0/24. - Comment: a free text, up to 128 characters.
- Enabled: a disabled entry is kept but refused.
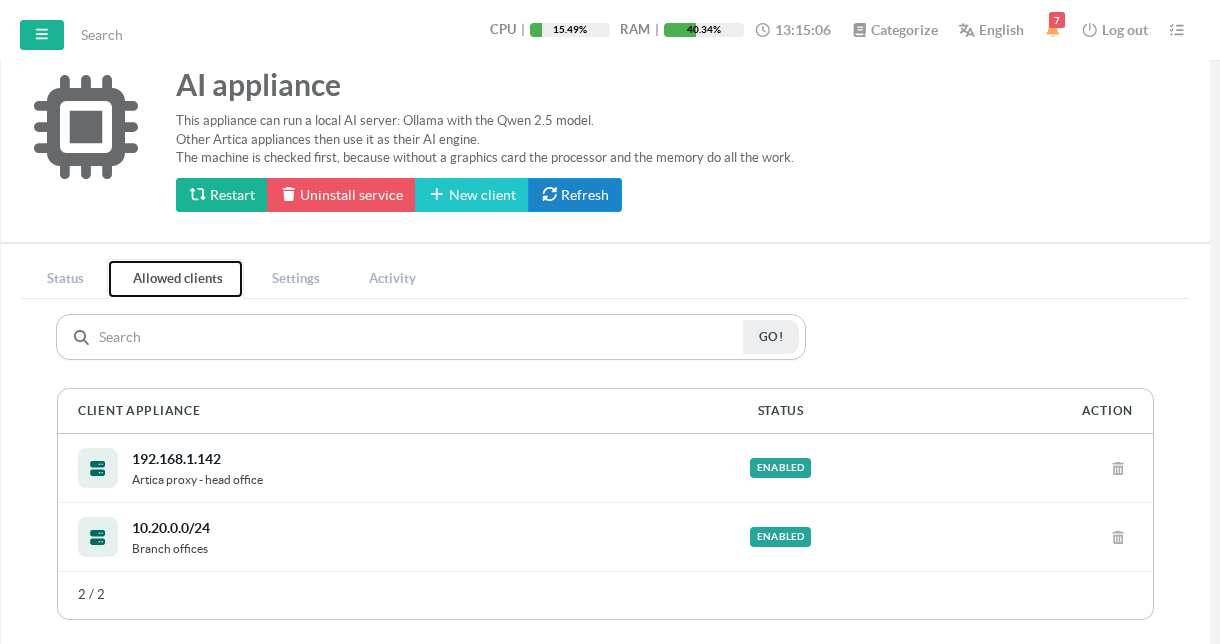
Changes apply at once, without cutting the answers in progress.
Up to 256 entries can be declared.
The address that counts is the one the AI appliance sees.
Behind a NAT, it is the translated address, not the address of the client appliance.
The Activity tab shows it.
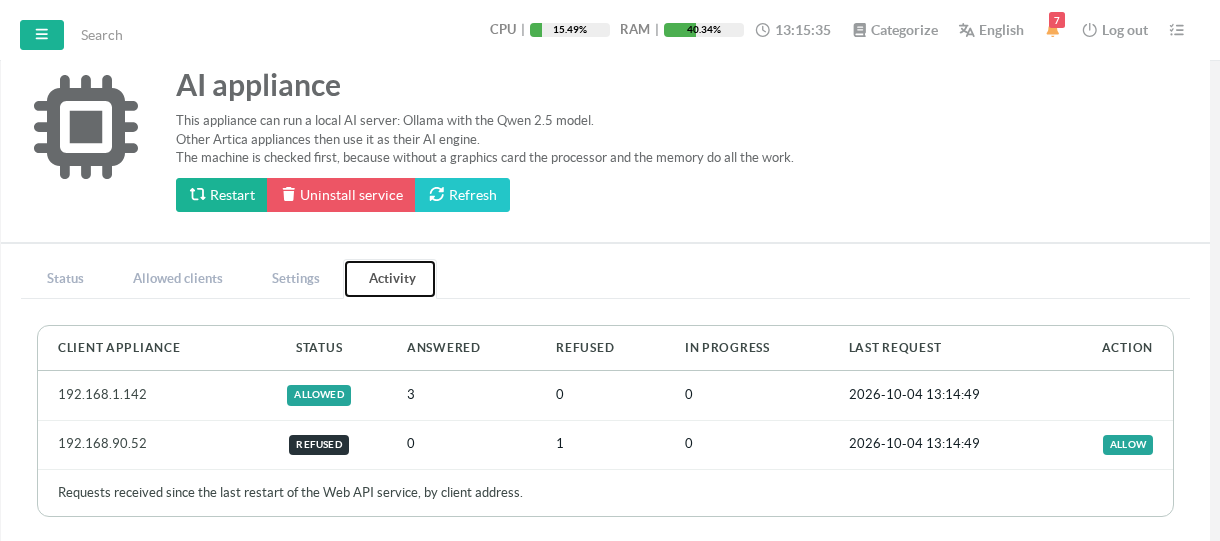
Each address that contacted the AI appliance is listed with its counters.
A refused address has an Allow button.
One click adds it to the allowed clients.
The counters restart from zero when the Web API service restarts.
6. Open the firewall
If the firewall of the AI appliance is enabled, allow TCP port 11443 from the client appliances.
The Status tab reminds you of the port to open.
7. Connect each client appliance
On the AI appliance, click Download ca.pem in the Status tab.
Then, on each client appliance running Artica AI:
- Open the Artica AI status page and edit the Language model API.
- Choose the provider Artica AI appliance (LocalIA).
- In AI Appliance, type the name or one of the addresses shown in the Status tab of the AI appliance.
- Type the port shown in the Status tab, 11443 by default.
- Paste the content of
ca.pemin Certificate authority (ca.pem). - Keep the timeout of 600 seconds.
- Click Apply.
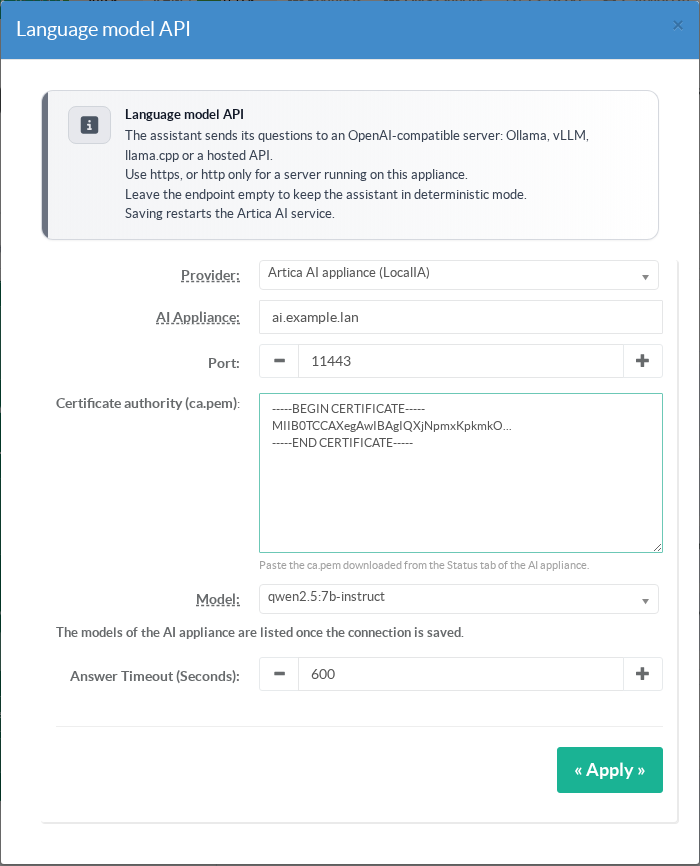
The model qwen2.5:7b-instruct is selected for you.
No API key is sent: the AI appliance recognizes its clients by their address.
Saving restarts the Artica AI service of the client appliance.
The name you type must be in the certificate of the AI appliance.
The certificate carries the name of the AI appliance and all its addresses.
To use another name, such as a DNS alias, add it in Settings › Extra names in the certificate.
Any other OpenAI-compatible client can use the AI appliance the same way:
- Endpoint:
https://ai.example.lan:11443/v1 - Model:
qwen2.5:7b-instruct - Certificate authority:
ca.pem - Timeout: 600 seconds
To test from a client appliance:
curl --cacert ca.pem https://ai.example.lan:11443/v1/models
The answer lists qwen2.5:7b-instruct.
A 403 answer means that the address is not allowed.
8. Tune the settings
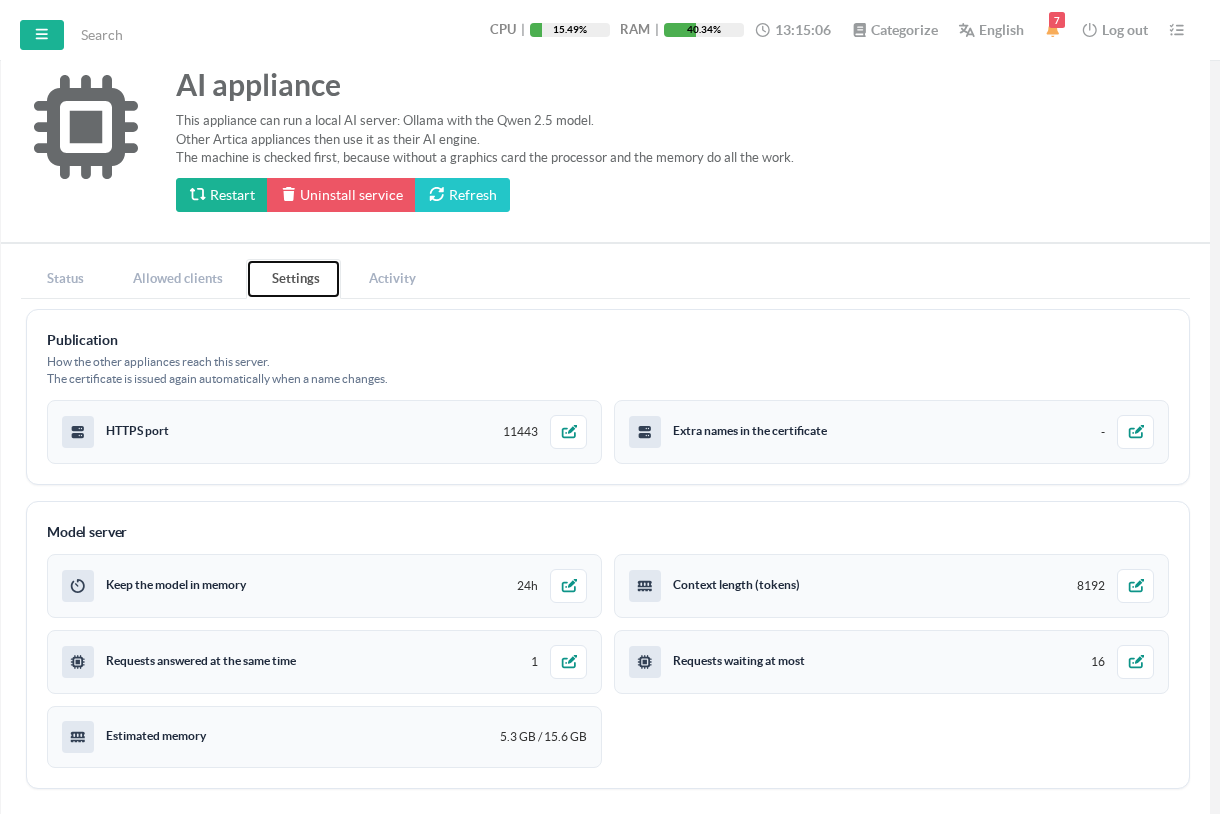
| Setting | Default | Range | Effect |
|---|---|---|---|
| HTTPS port | 11443 | 1024 to 65535 | Applied at once. A port already used by another service is refused. |
| Extra names in the certificate | none | 16 DNS names or addresses | The certificate is issued again at once. |
| Keep the model in memory | 168h | 5 minutes to 168 hours | After this time without any request, the model leaves memory. The next answer reloads it and reads again the instructions of the assistant. |
| Context length (tokens) | 32768 | 2048 to 32768 | The longest question and answer the model can handle at once. The Artica AI assistant needs 16384 at least. Its instructions alone are about 9000 tokens long. |
| Requests answered at the same time | 1 | 1 to 8 | Each extra request costs memory and slows the others down. |
| Requests waiting at most | 16 | 1 to 512 | Beyond this queue, requests are refused. |
Estimated memory shows what the model needs with these settings.
The page warns when it exceeds the memory of the machine.
An AI appliance installed with an older version keeps its own values.
The Settings tab marks a context below 16384 as Too short for the Artica AI assistant.
Set it to 32768.
With a shorter context, Ollama cuts the instructions of the assistant, and its investigations end in protocol errors.
Changing one of the last four settings restarts Ollama.
The editing window warns you before you save.
The answers in progress are lost, and the next answer reloads the model.
Uninstalling
Click Uninstall service in the header.
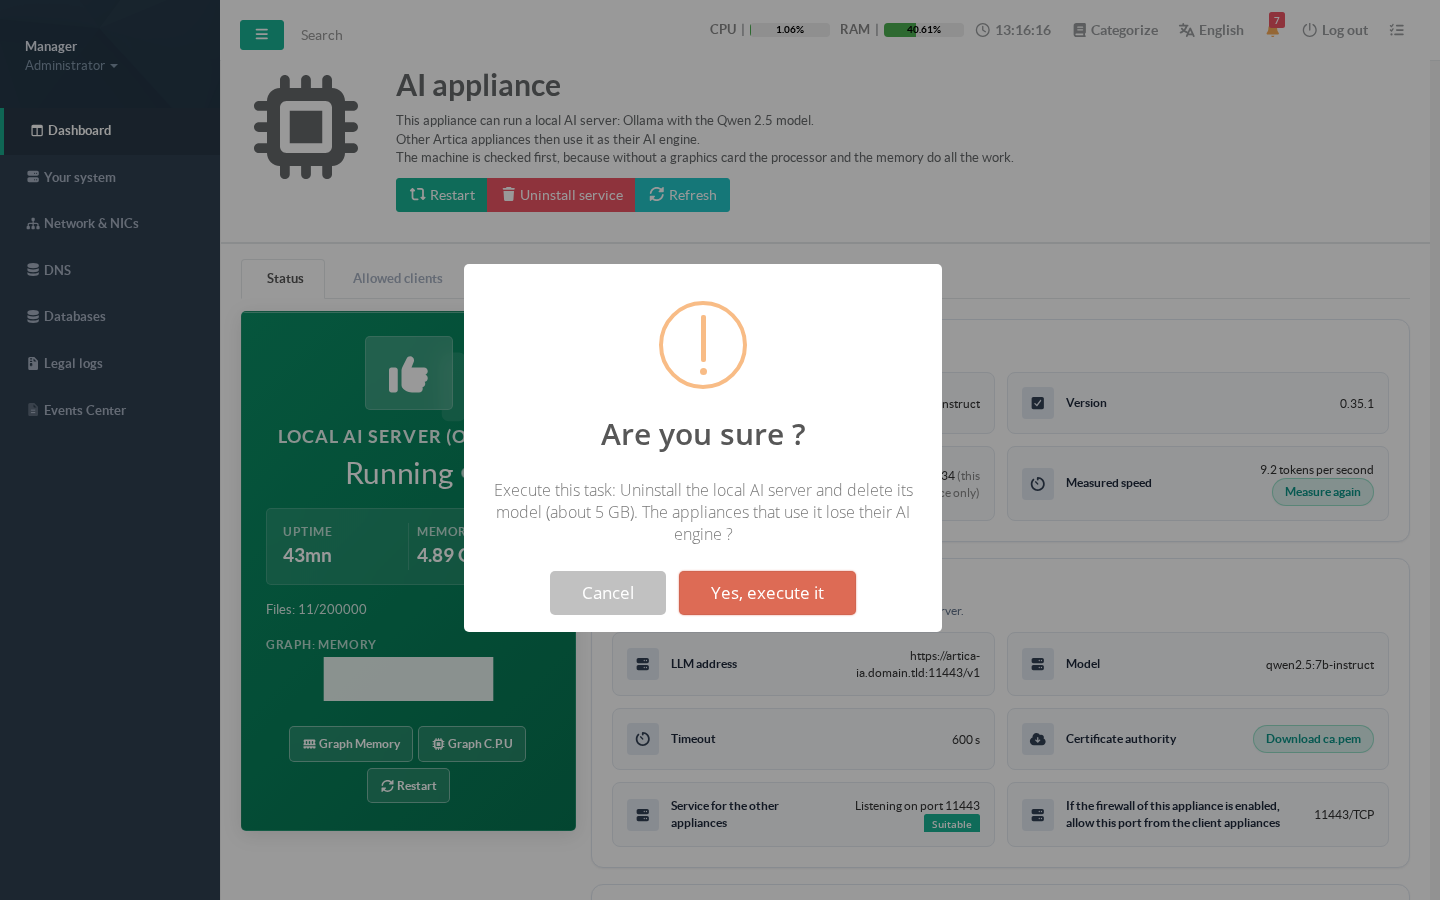
The uninstallation removes Ollama, its service and the model.
The client appliances then lose their AI engine.
The certificate authority and the settings, including the allowed clients, are kept.
After a reinstallation, the client appliances work again without any change.
The Artica AI client can be installed again on this appliance once the AI appliance is removed.
Troubleshooting
| Symptom | Cause and fix |
|---|---|
| The Install button is disabled | A criterion is blocking. Read its message in the hardware check. |
| AVX2 is missing on a virtual machine | The CPU compatibility mode (EVC) of the host hides it. Change it on the host, then restart the virtual machine. |
| The installation stopped | Read the cause shown on the page, fix it, then click Resume. |
| The client appliance gets a 403 | Its address is not allowed. The Activity tab shows the address really seen, with an Allow button. |
| Certificate error on the client appliance | The ca.pem is missing, or the name typed is not in the certificate. Add it in Extra names in the certificate. |
| No answer at all on port 11443 | The firewall of the AI appliance blocks the port, or the installation is not finished. |
| The client appliance gets a 502 | Ollama is stopped. The watchdog restarts it. Check the Status tab. |
| Answers are very slow | Check the measured speed. Below 2 tokens per second, the host is probably overcommitted, or its memory is not reserved. |
| Investigations of the assistant end in a protocol error | The context is too short. Set Context length (tokens) to 32768 in the Settings tab. |
| Artica AI cannot be installed on this appliance | It is an AI appliance. Uninstall the AI appliance first. |