Enable Active Directory LDAP SSL on Windows 2019/2022
Adding certificate on WINDOWS Server 2019/2022 for LDAP | Active Directory for secure connection.
Setup LDAPS (LDAP over SSL)
A) Install Active Directory Certificate Services (AD CS)
First, install Active Directory Certificate Services (AD CS) by doing the following:
- Open Server Manager.
- Select
Dashboard→Add roles and features. - In the section
Before You Begin, simply select the buttonNext >. - In the section
Installation Type, keep the radio buttonRole-based or feature-based installationenabled and select the buttonNext >. - In the section
Server Selection, choose the server that you wish to be the root CA and select the buttonNext >.
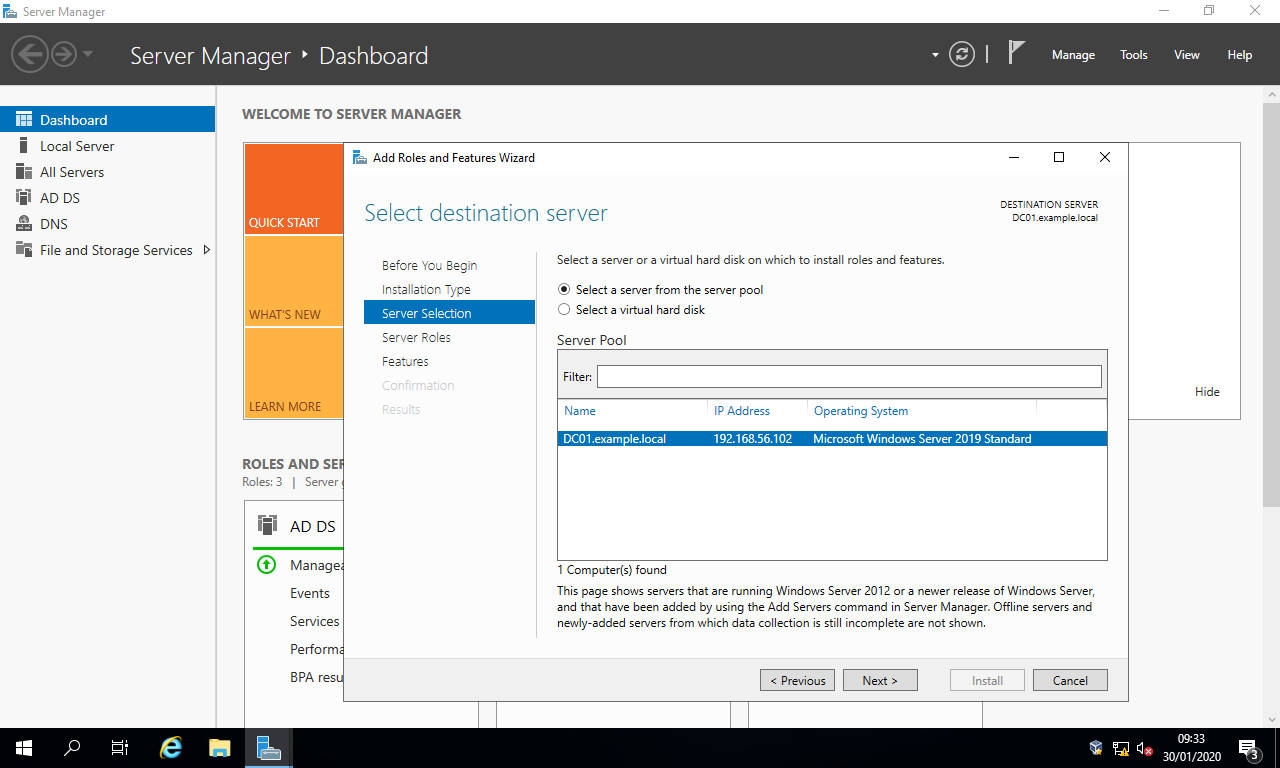
- In the section
Server Roles, tickActive Directory Certificate Services, select the buttonAdd Features, and select the buttonNext >.
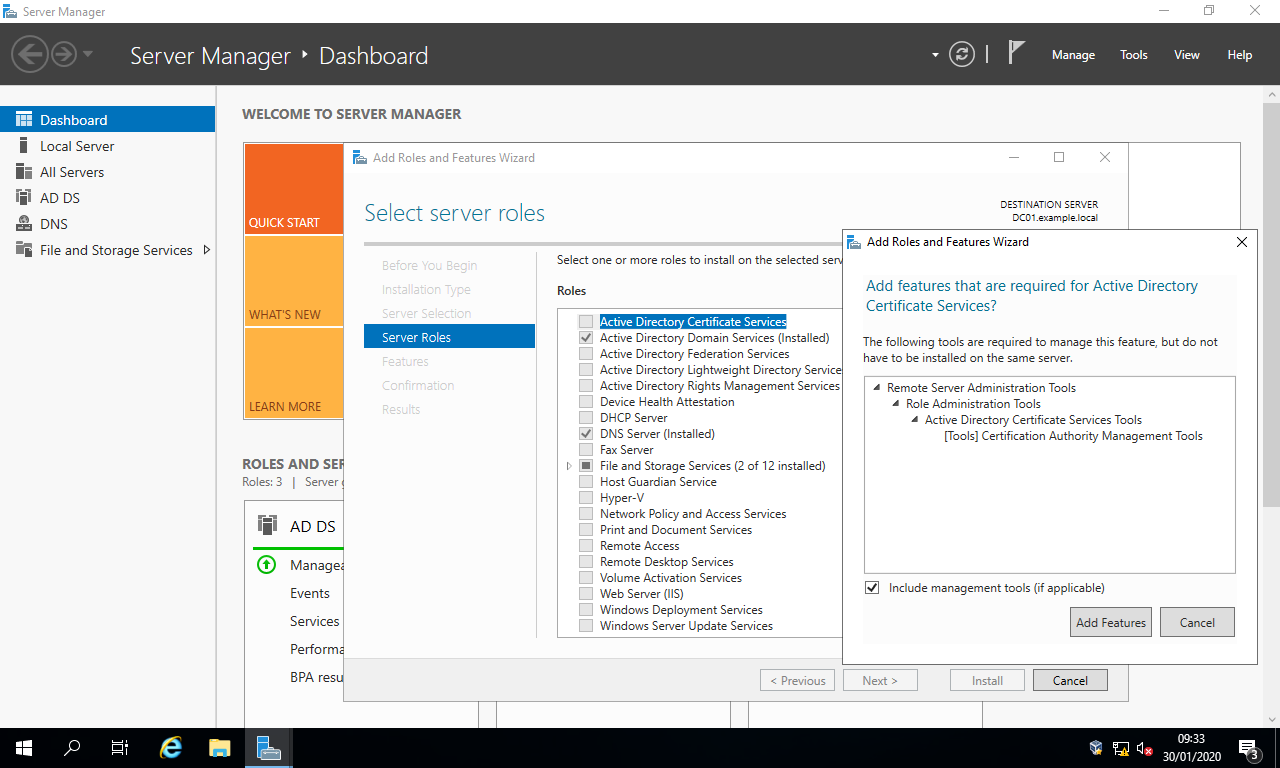
- In the section
Features, simply select the buttonNext >. - In the section
AD CS, select the buttonNext >. - In the section
Role Services, simply select the buttonNext >.
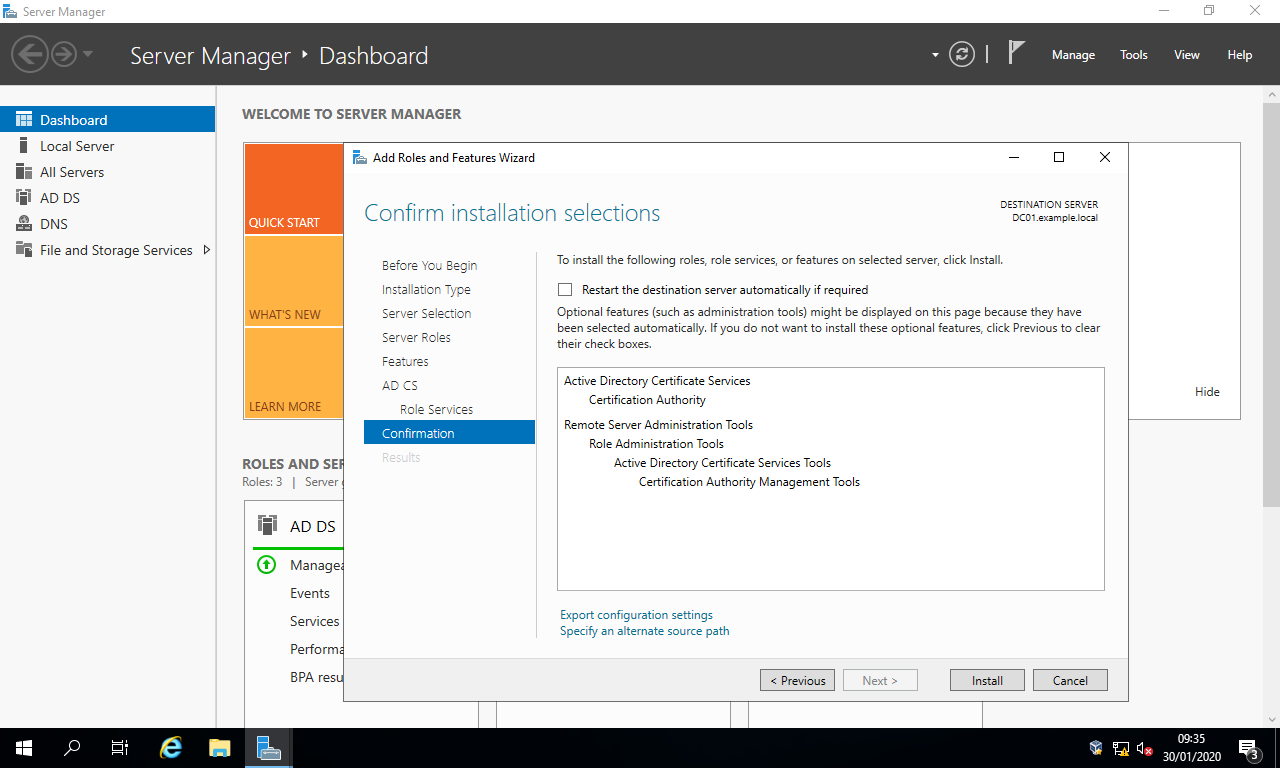
- In the section
Confirmation, simply select the buttonInstall.
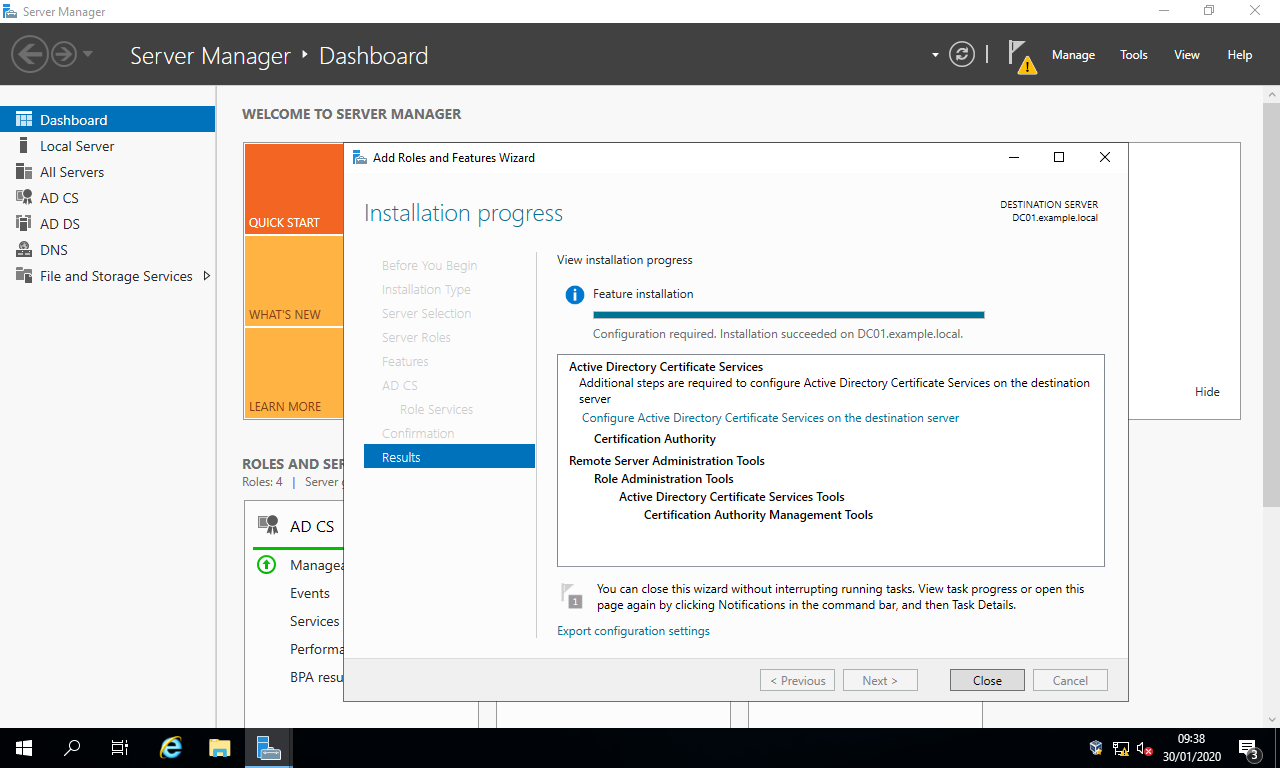
B) Configure AD CS
- Open Server Manager.
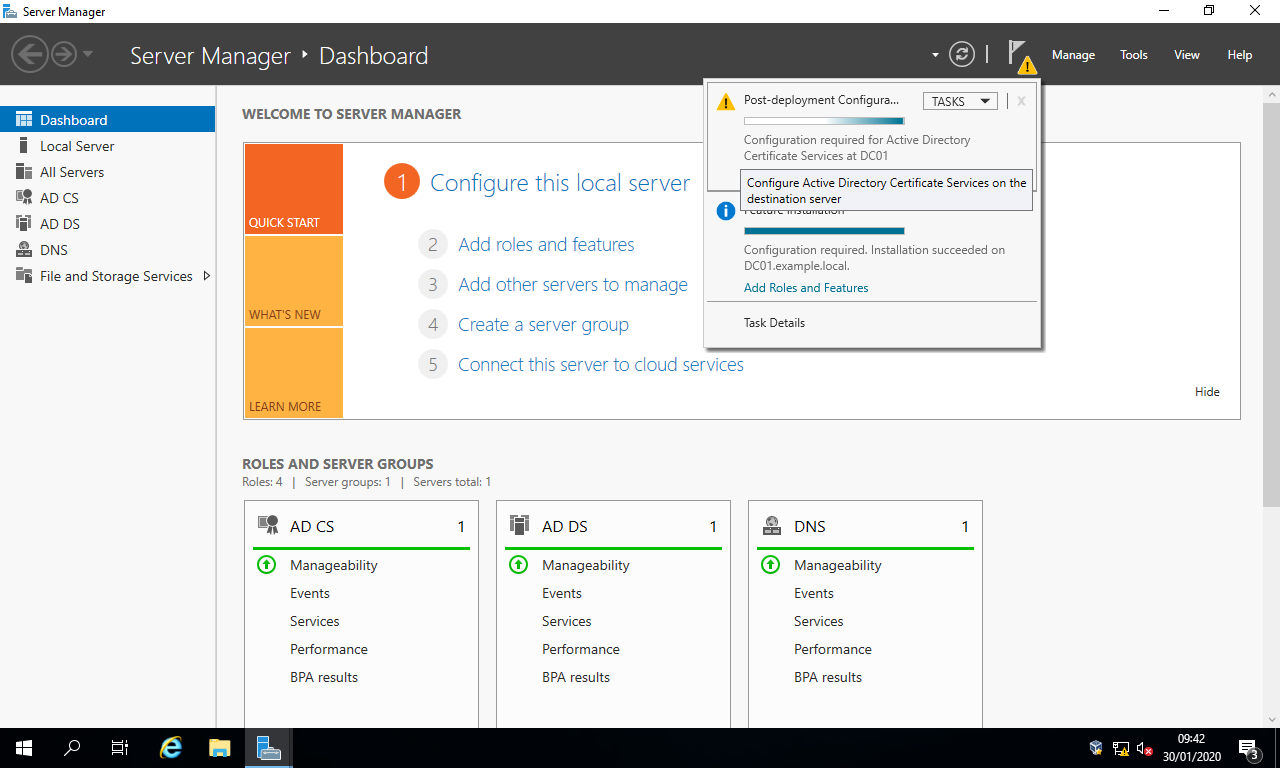
- Select the flag and warning symbol then the link
Configure Active Directory Certificate Services on the destination server.
- In the section
Credentials, assuming you’re signed in as an administrator, simply select the buttonNext >. - In the section
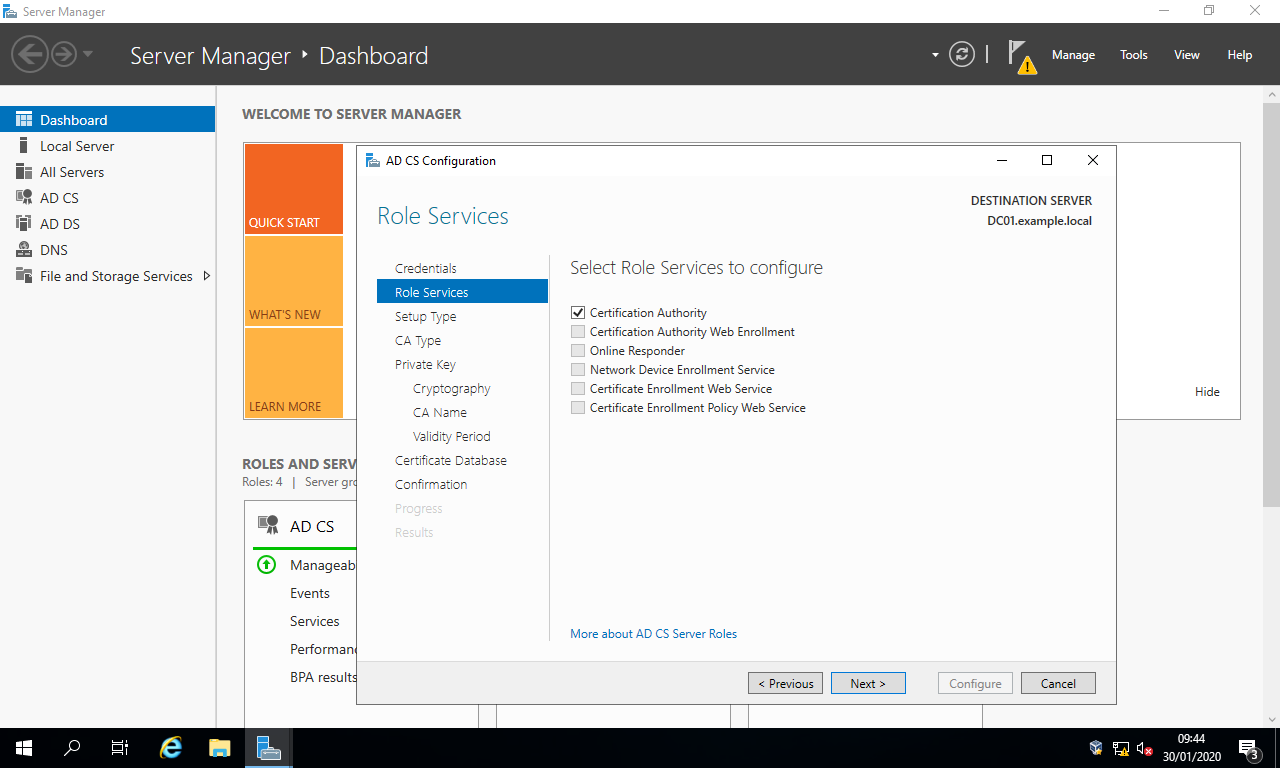
Role Services, check the tickboxCertification Authoritythen select the buttonNext >.
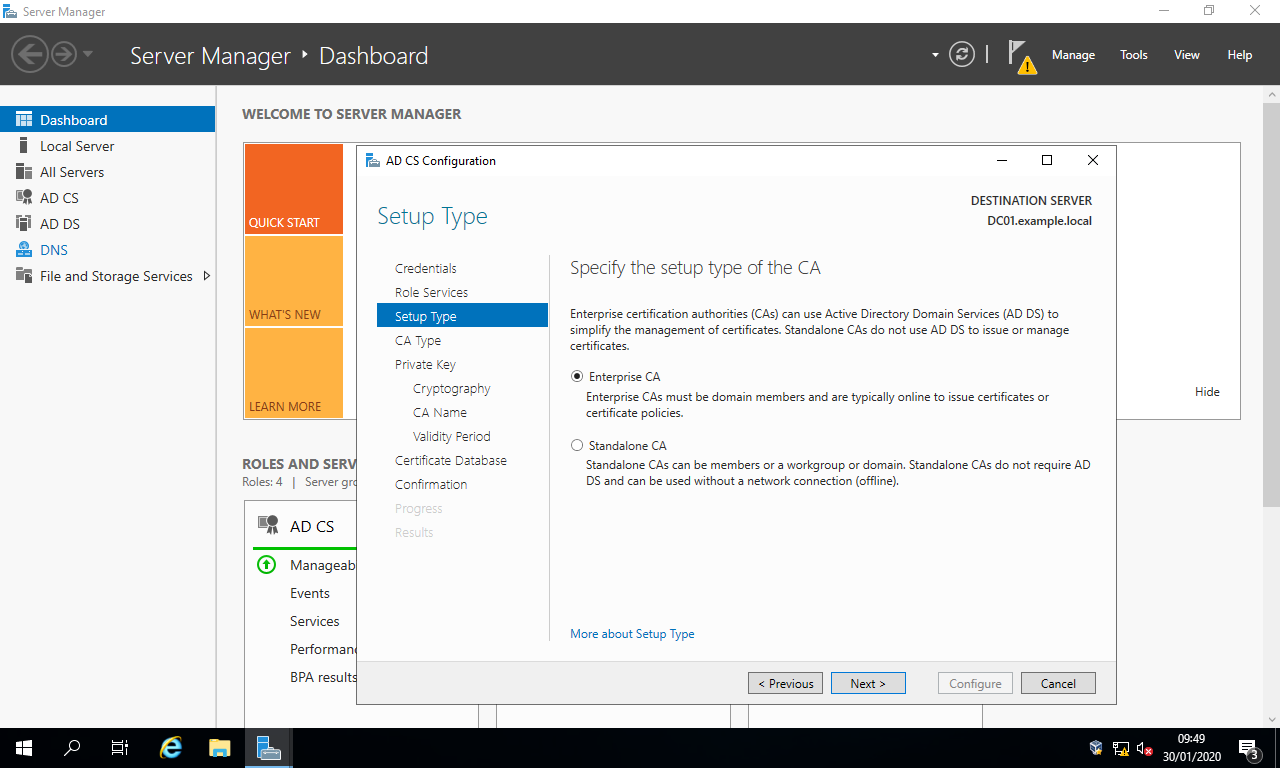
In the section Setup Type, choose your preferred CA type (prefered Entreprise CA ) then select the button Next >.
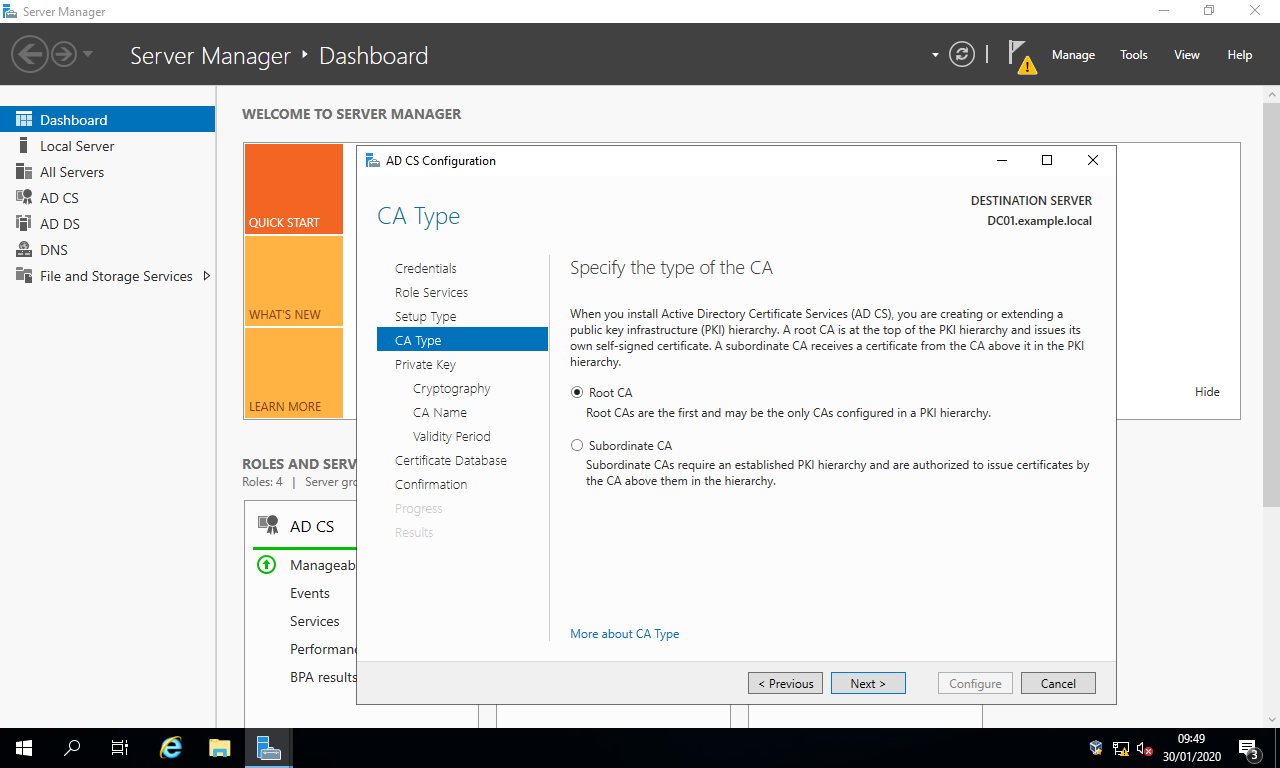
In the section CA Type, select the radio button Root CA then select the button Next >.
- In the section
Private Key, select the radio buttonCreate a new private keythen select the buttonNext >. - In the section
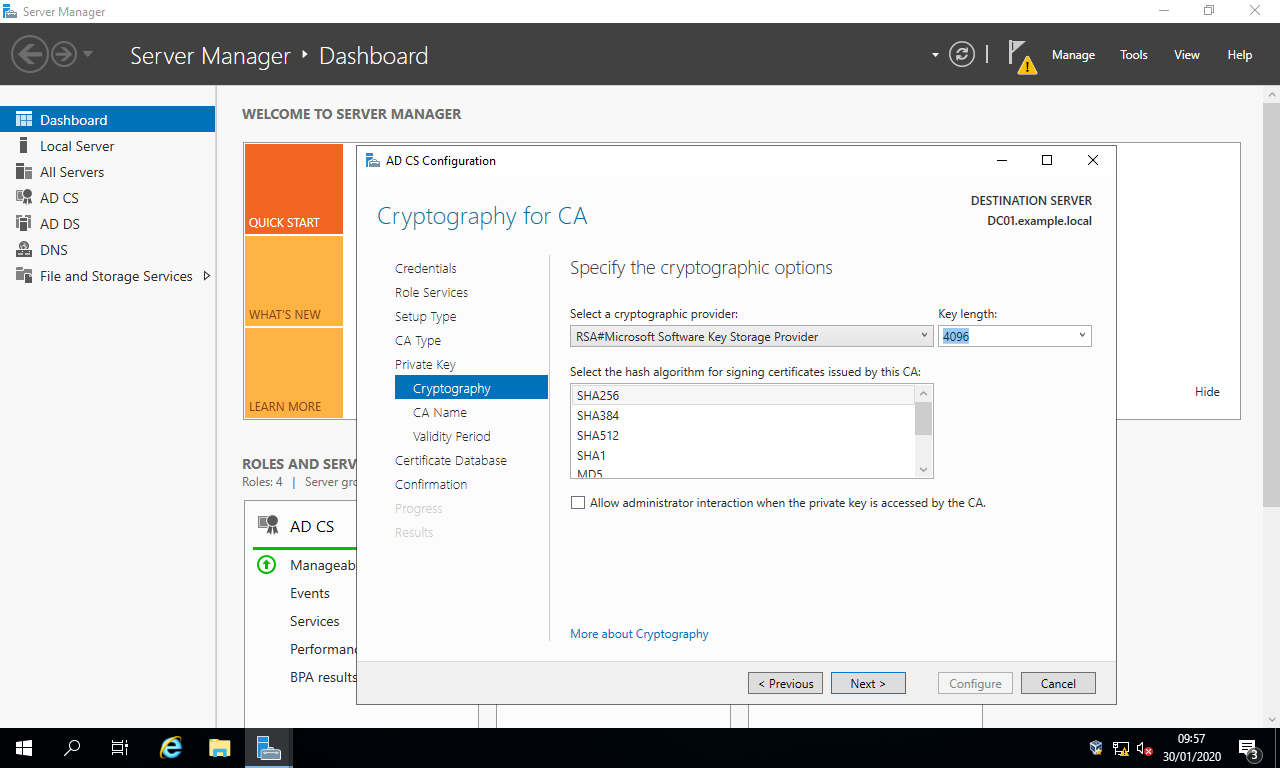
Cryptography, select :
Cryptographic provider:RSA#Microsoft Software Key Storage Provider
Key length:2048(at least) or4096(recommended)
Hash algorithm:SHA256(at least) - Select the button
Next >:
- In the section
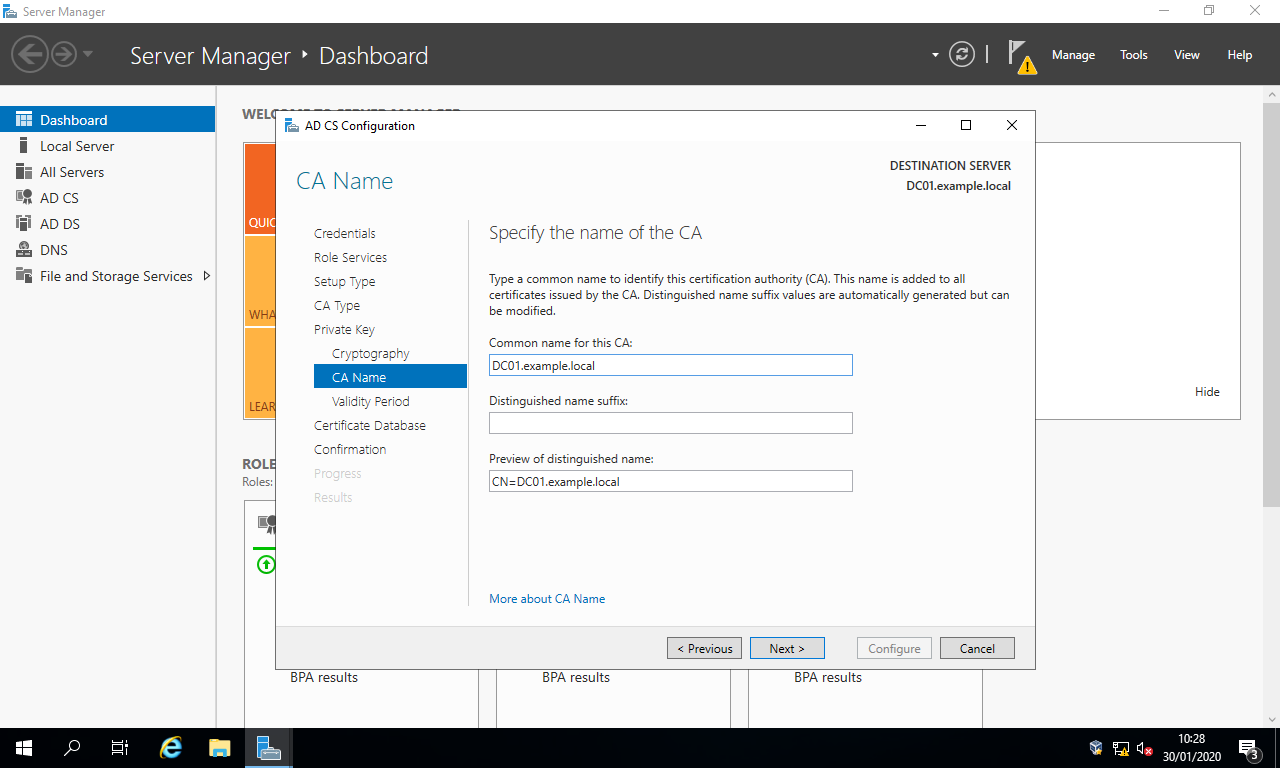
CA Name, change the defaults to
Common name for this CA: This must be the same as the server’s FQDN.DC01.example.local, for example.
Distinguished name suffix: Blank.
Preview of distinguished name: This should automatically beCN=<server’s FQDN>. - Select the button
Next >:
- In the section
Validity Period, simply select the buttonNext >. - In the section
Certificate Database, simply select the buttonNext >. - In the section
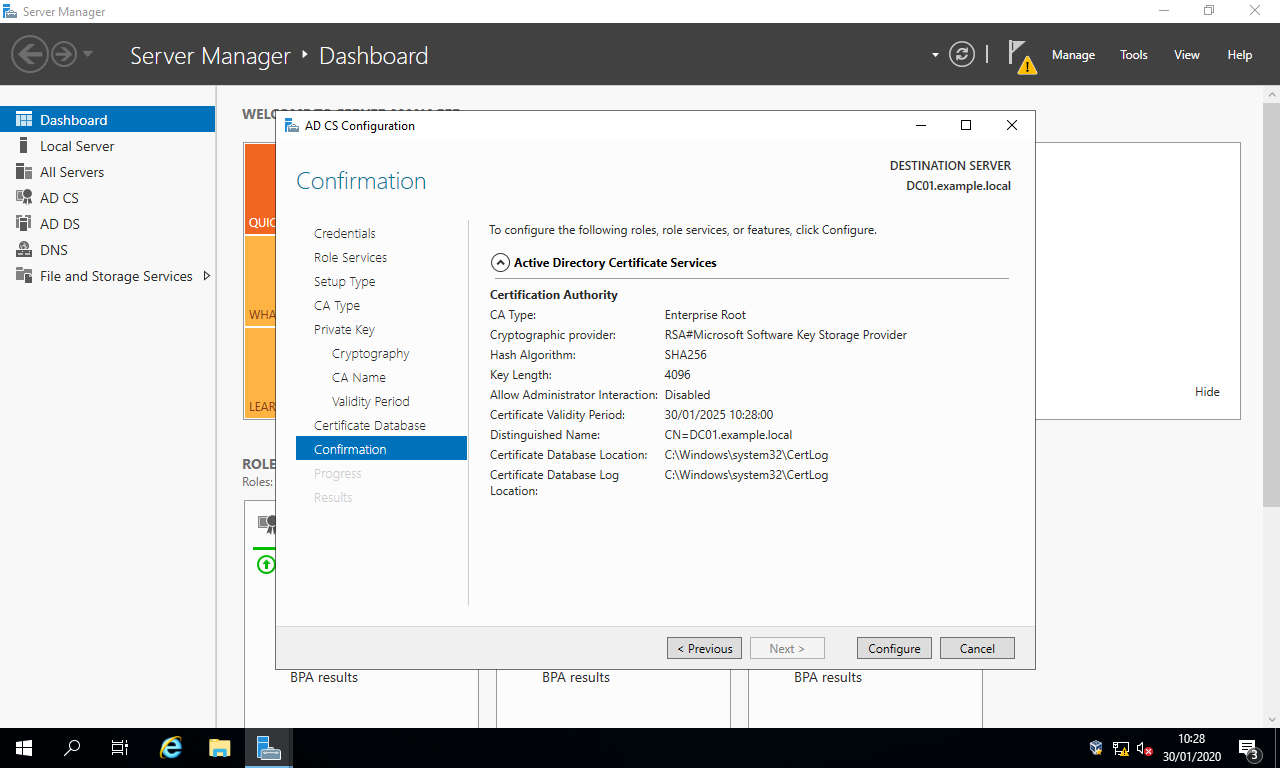
Confirmation, simply select the buttonConfigure.
- In the section
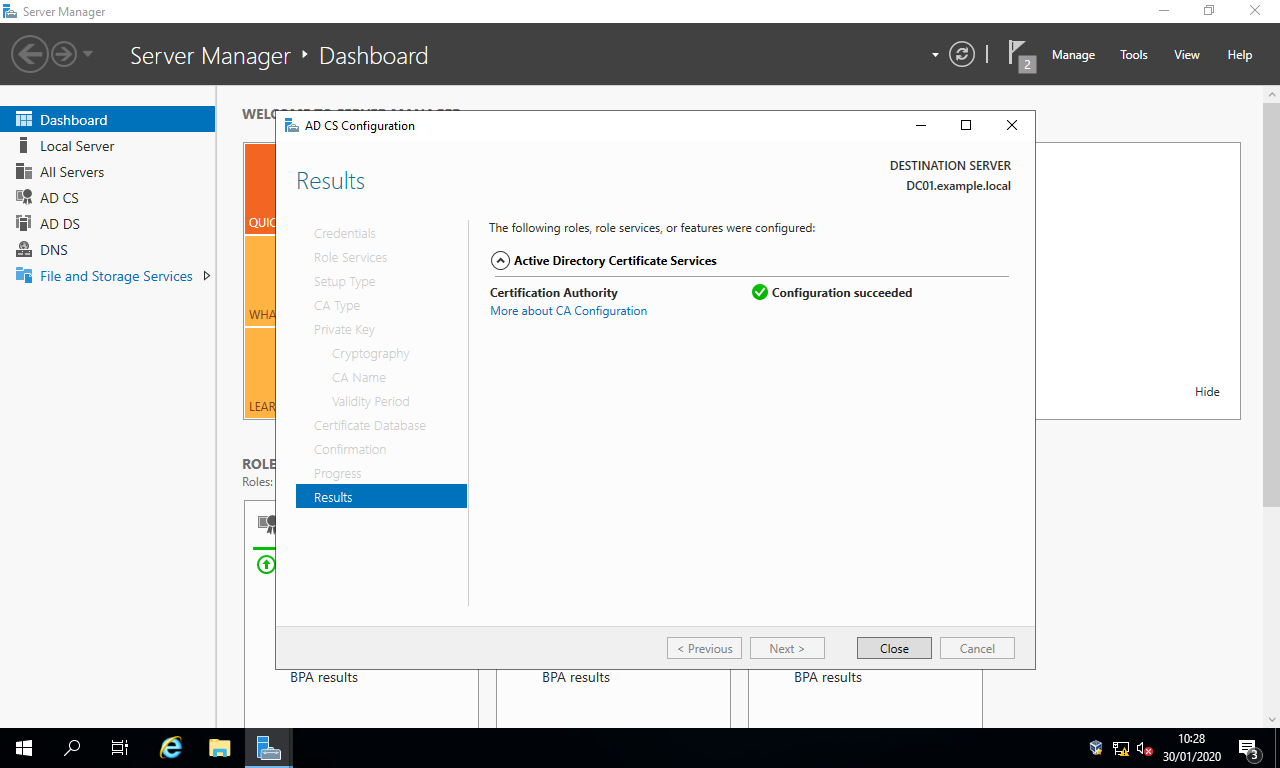
Results, simply select the buttonClose.
Activate LDAP SSL
Once the certificate has been installed, the DC server’s bindings need to be updated.
- Create a text-based file named something like
renew.txtwith the following content:
dn:
changetype: modify
add: renewServerCertificate
renewServerCertificate: 1
-
- On a PowerShell Console, run
ldifde -i -f renew.txt
To check if LDAP ssl and 636 is open, in PowerShell run
ldp ldaps://yourhostname