The pfSense mode consists in filling an alias group object with a time-limited duration.
Note that this is a "hard" method, meaning that an IP address detected by the sources will be automatically banned by your firewall without notice.
Artica PCAP filter is not able to create the Firewall alias, you have to focus on create the alias group in the pfSense Firewall and the API KEY allowed to play with the object.
¶ The method:
Artica PCAP Filter is only able to play with a pfSense alias, In pfSense, an alias is used to define a group of network ports, hosts or subnets.
These aliases can then be used in filter rules, port forwarding rules, NAT rules and so on.
Using aliases is a good practice for clear, short, simple and readable rules on our firewall.
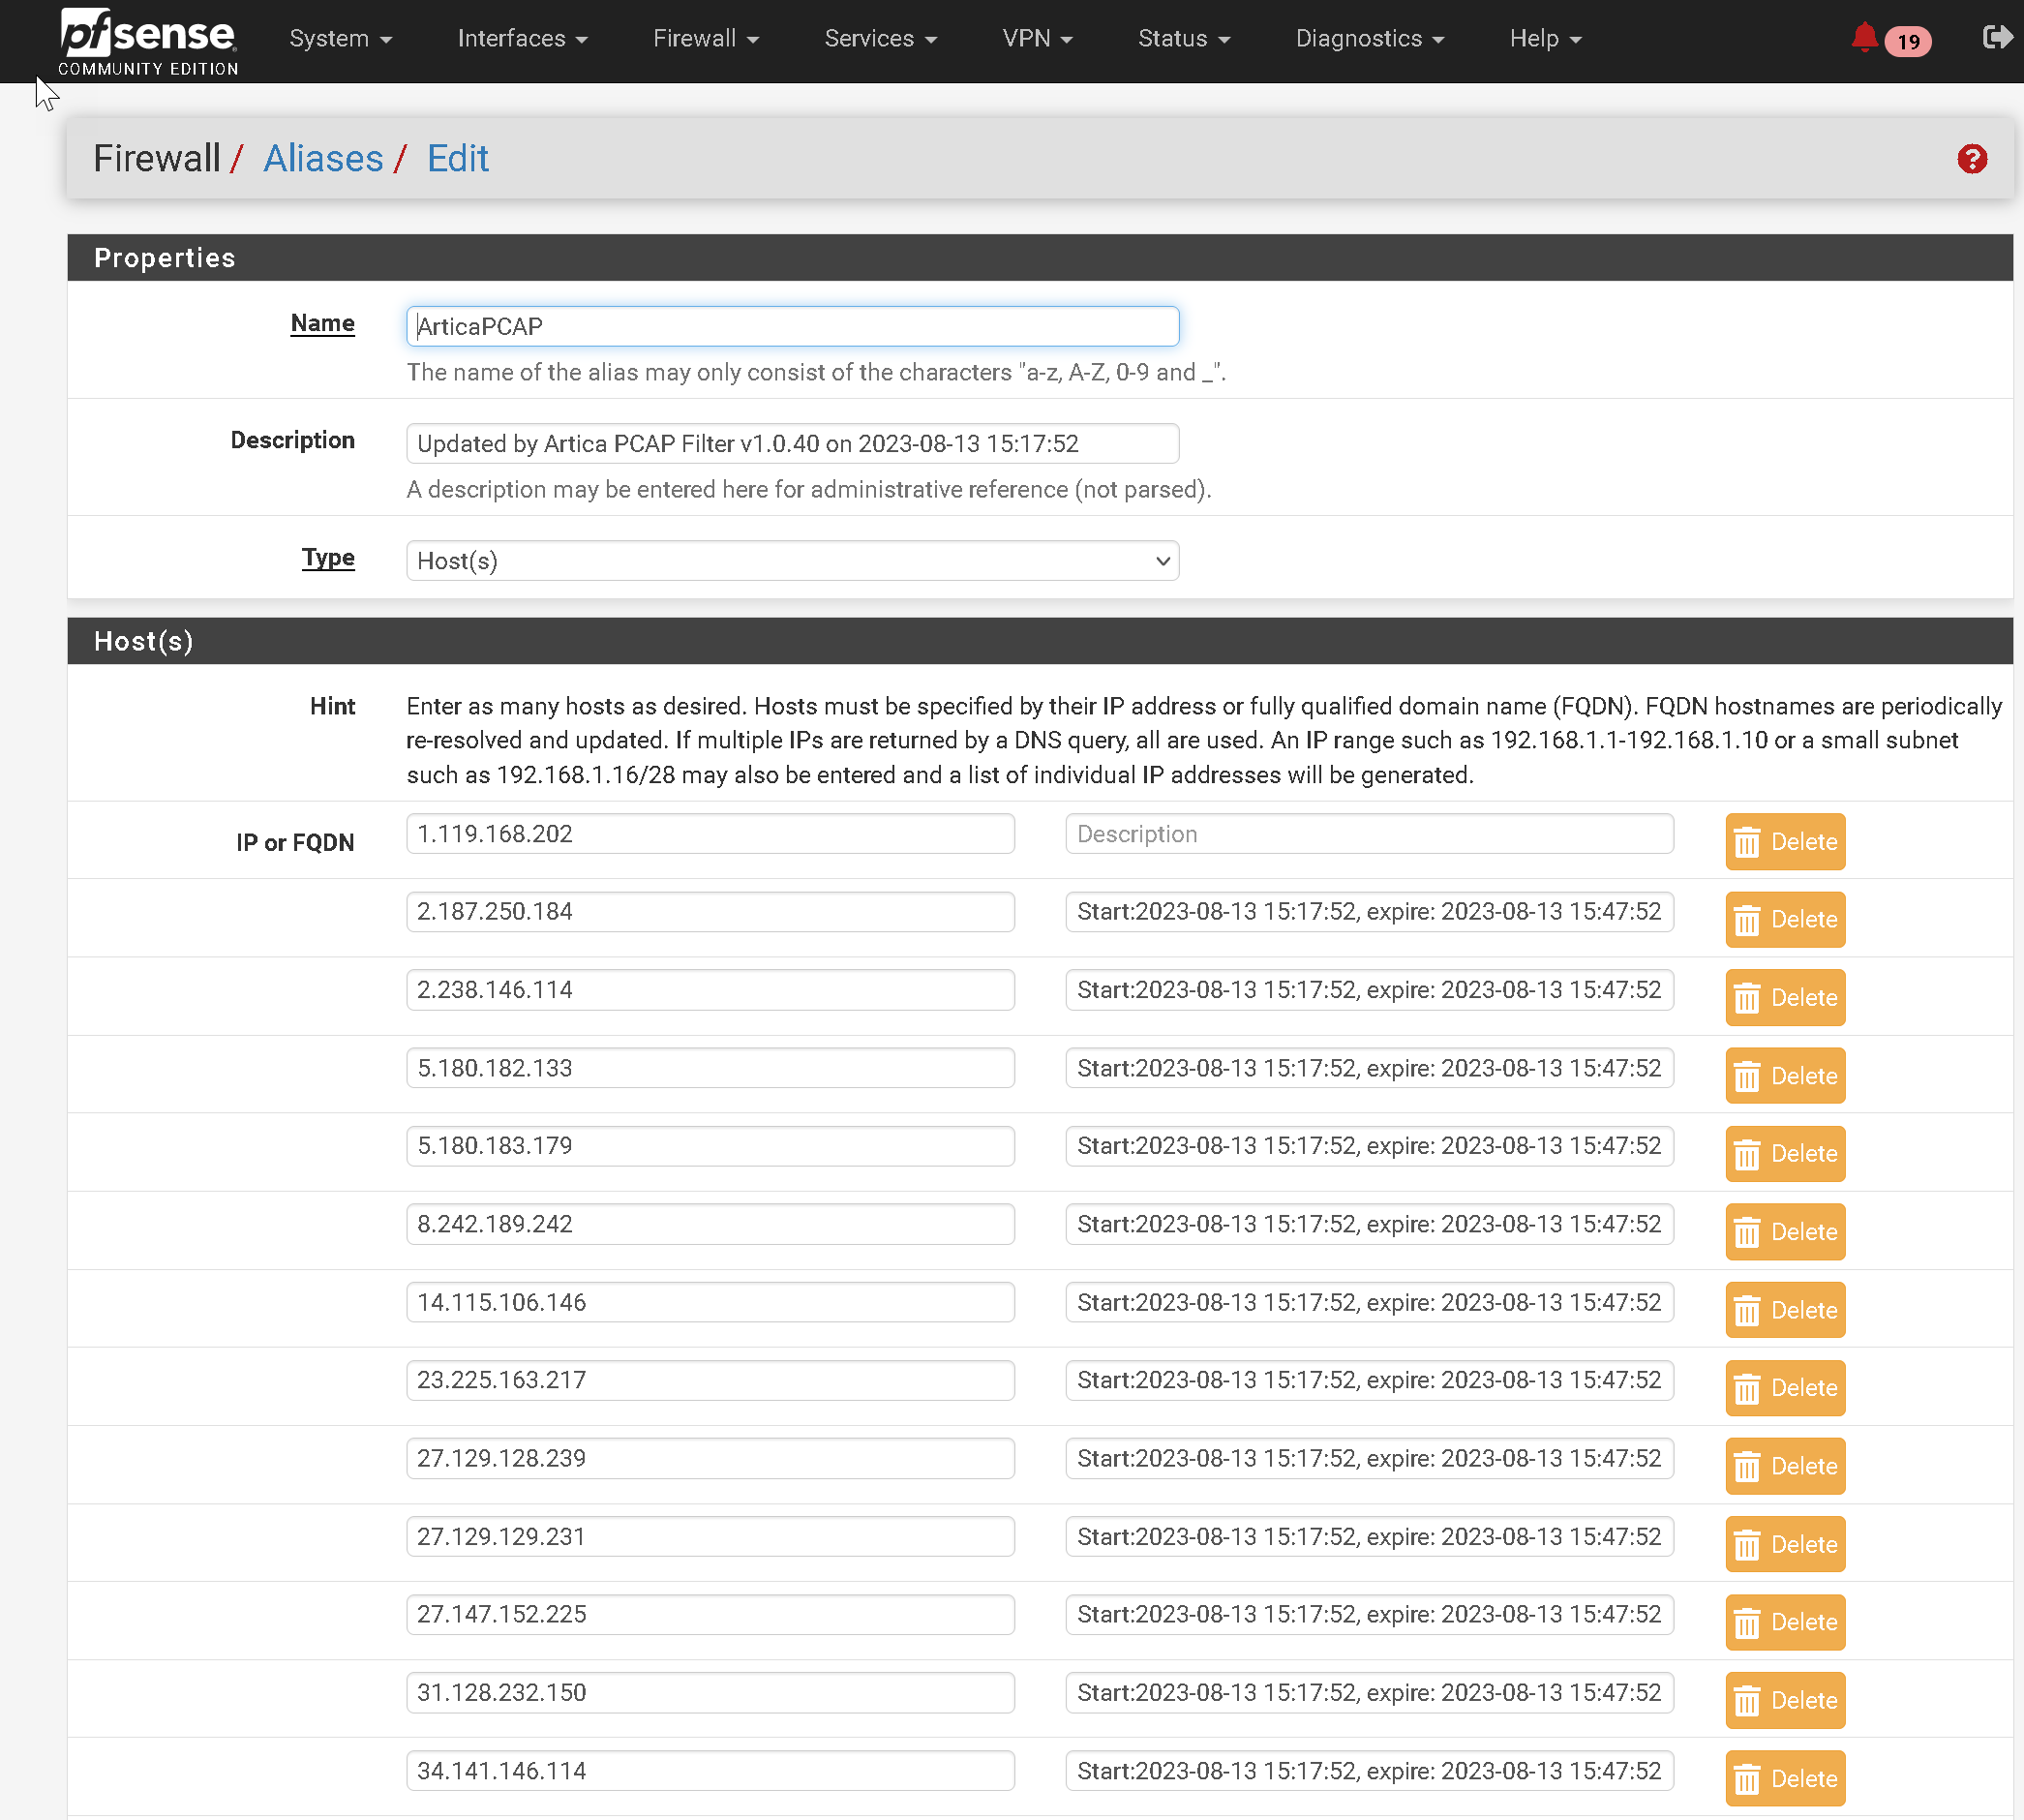
When CrowdSec or Artica PCAP Filter detects a bad reputation IP, Artica use the HTTP API to add this IP to the defined alias list in order.
You have just to create a rule associated with the defined alias to automatically ban the defined ip address.
Limits:
The total size of all tables must fit in roughly half the amount of Firewall Maximum Table Entries, which defaults to 400,000.
If the maximum number of table entries is not large enough to contain all of the entries, the rules may fail to load.
See Firewall Maximum Table Entries for information on changing that value.
¶ Enable/Disable the pfSense remediation method
Tokens -pfsense-disable or -pfsense-enable enable or disable the pfSense remediation.
¶ Set the pfSense remediation settings to the Alias object
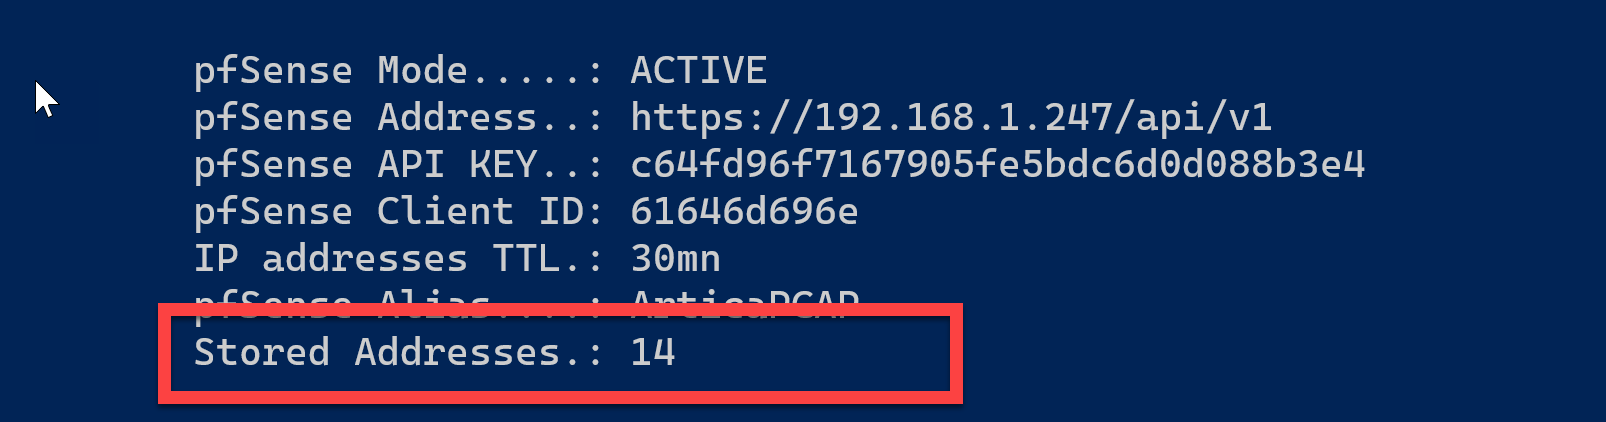
The token -pfsense-address [URL address] define your pfSense address.
The token -pfsense-alias [alias name] define your Fortigate group to populate.
The token -pfsense-apiclient defines the API Client ID to authenticate Artica PCAP.
The token -pfsense-apitoken defines the API Client Token to authenticate Artica PCAP.
The token -pfsense-ttl defines the time to live (in minutes) of a banned IP address inside your addresses group object.
You can use all commands in the same command-line
Example :
articapsniffer -pfsense-enable -pfsense-address https://192.168.1.247 -pfsense-apiclient 61646d696e -pfsense-apitoken c64fd96f7167905fe5bdc6d0d088b3e4 -pfsense-alias ArticaPCAP -pfsense-ttl 30
¶ Get configuration status
The command -pfsense-status (or -status for the global parameters ) displays the saved settings.
If you configuration is correct, you are able to see the number of stored addresses in the defined alias
¶ Add an IP address to test the link
Use the token -pfsense-add to add a new record inside your alias or instead of specify the IP, you can set a path to a list off file separated by a carriage return.
articapsniffer -pfsense-add 177.37.170.134articapsniffer -pfsense-add /home/jbea/badips.txt
You can also add a -limit when importing a file:
articapsniffer -pfsense-add /home/jbea/badips.txt -limit 500
¶ Remove an IP address from the object
Use the token -pfsense-del to remove a specific IP address from your pfSense alias.
articapsniffer -pfsense-del 177.37.170.134
¶ Reset the alias object
You can use the -pfsense-reset, this command will destroy data from your pfSense alias
¶ List the content of alias object
You can use the -pfsense-list, this command will list all stored records
¶ Scan the expired records
If you use Artica PCAP filter as daemon, this process is done automatically each 15 minutes.
You can use it manually with the token -pfsense-clean