¶ Getting started
Proceed with the following steps on Active Directory server.
¶ Create Certification Authority
1º Open the Server Manager application and access the Manage menu and click on Add roles and features.

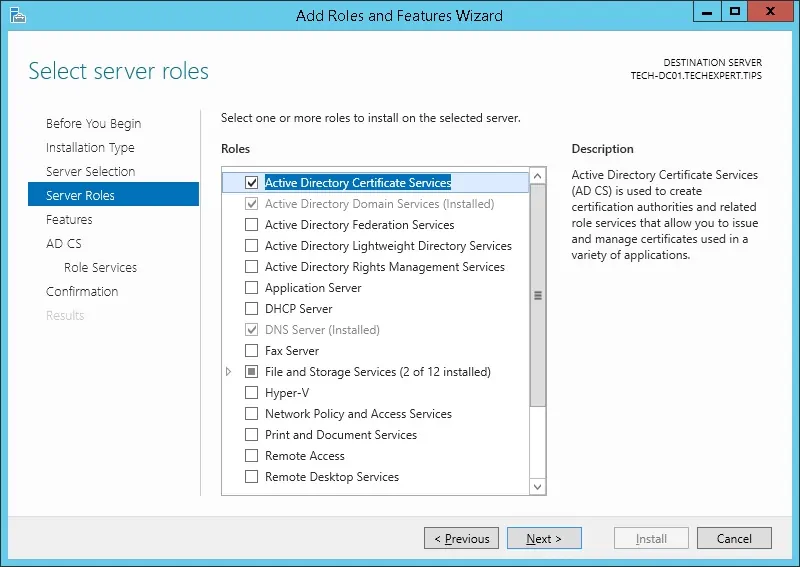
2º Access the Server role screen, select the Active Directory Certificate Services and click on the Next button.
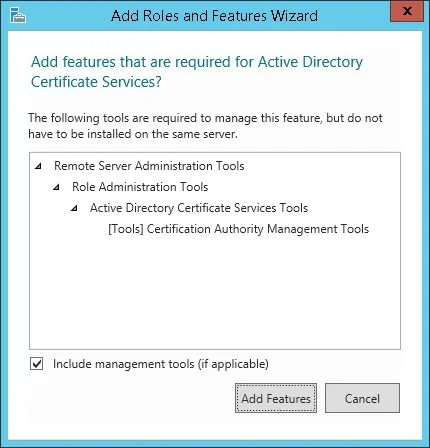
3º On the next screen, click on the Add features button.
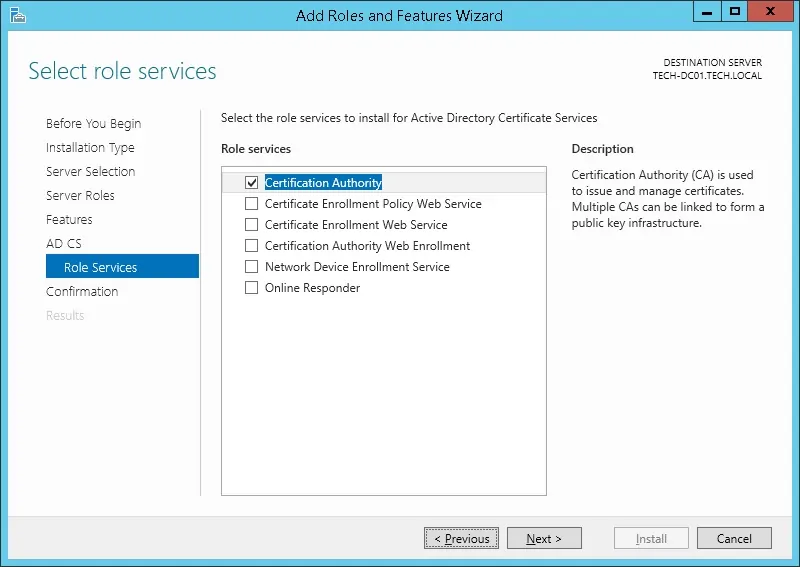
4º Keep clicking on the Next button until you reach the role service screen and enable the option named Certification Authority and click on the Next button.
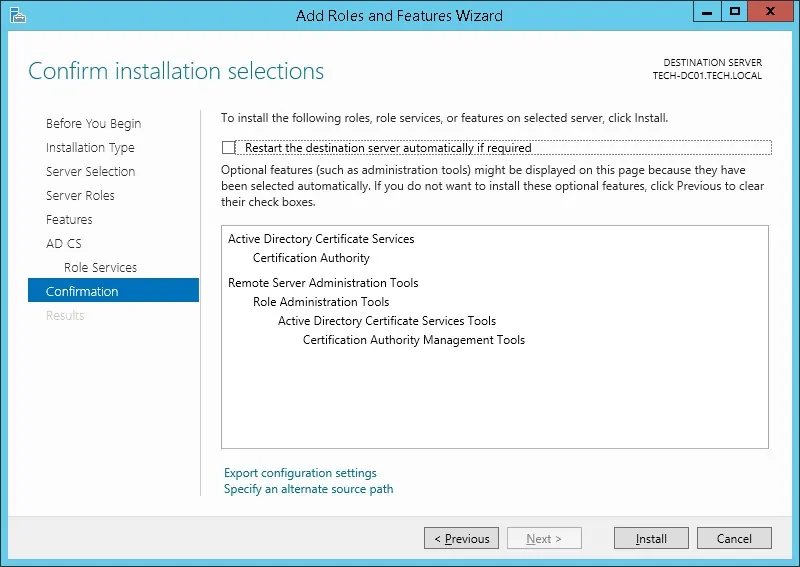
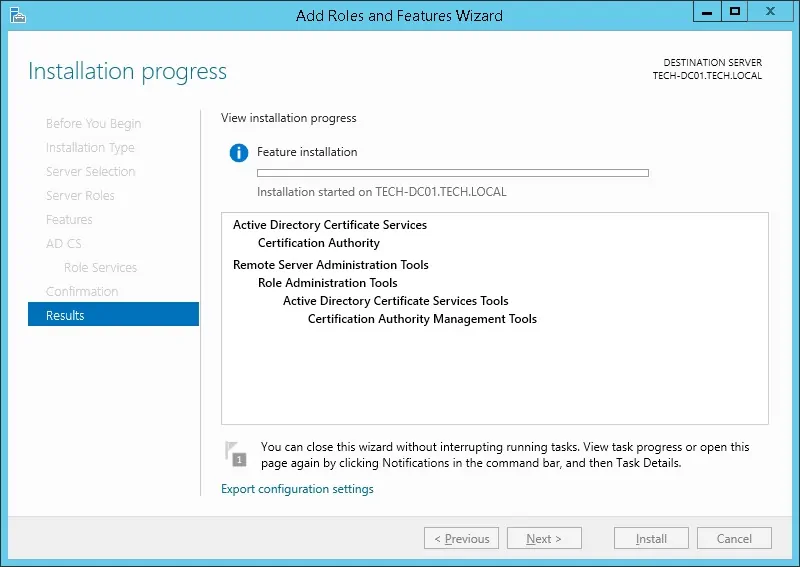
5º On the confirmation screen, click on the Install button.
6º Wait the Certification Authority installation to finish.
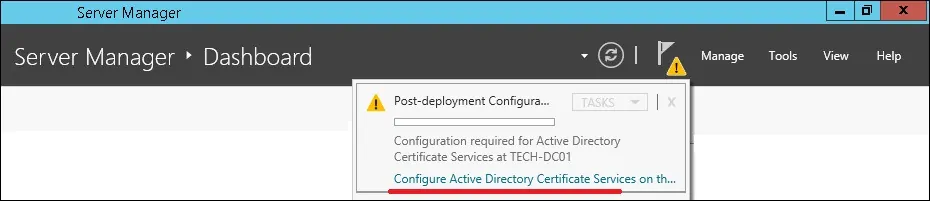
7º Open the Server Manager application again and Click on the yellow flag menu and select the option: Configure Active Directory Certificate Services
8º On the credentials screen, click on the Next button and Select the Certification Authority option and click on the Next button.

9º Select the Enterprise CA option and click on the Next button.

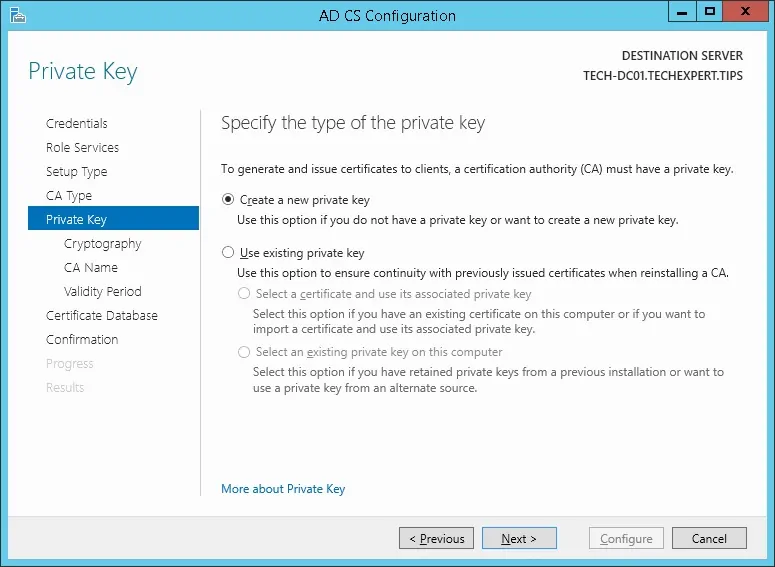
10º Select the** Create a new private key** option and click on the Next button.
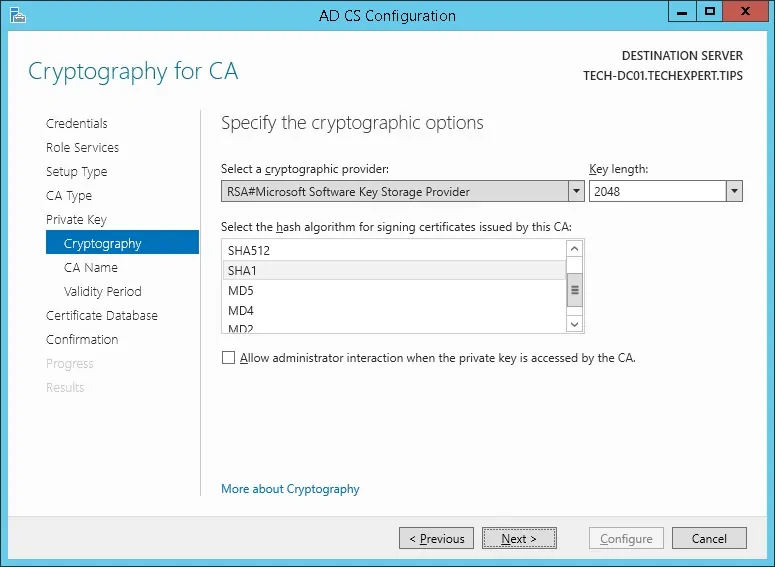
11º Keep the default cryptography configuration and click on the Next button.
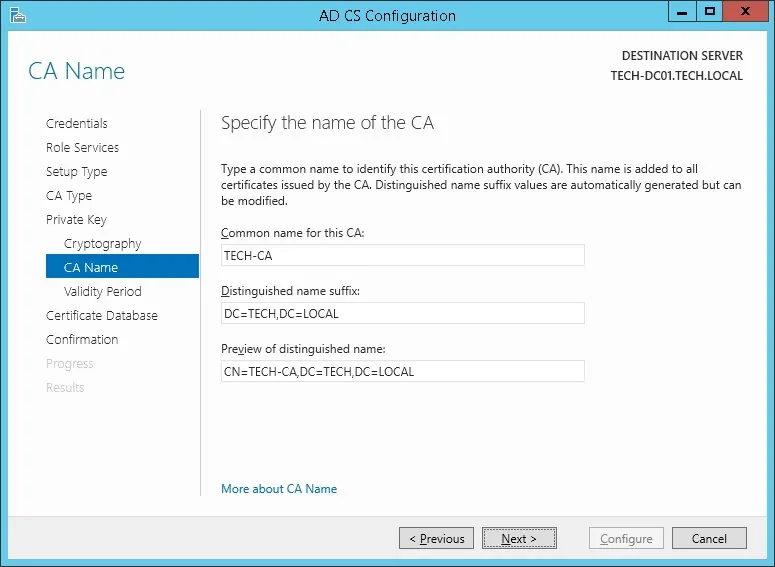
12º Set a common name to the Certification authority and click on the Next button.
13º Set the Windows Certification authority validity period.

14º Keep the default Windows Certification authority database location.

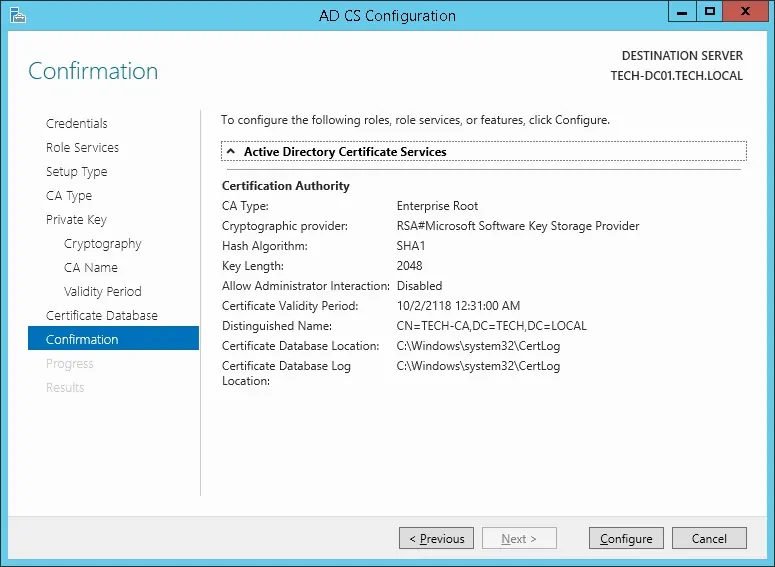
15º Verify the summary and click on the Configure button.
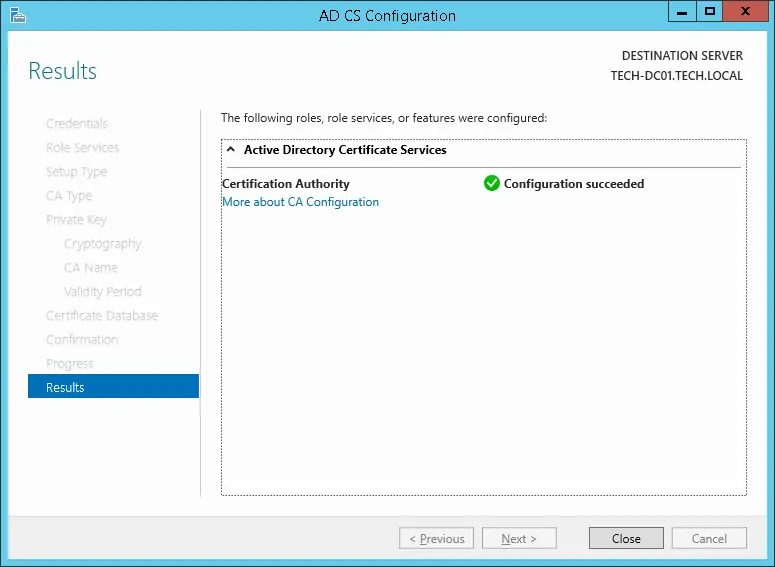
16º Wait for the Windows server certification authority installation to finish.
17º After finishing the certification authority installation, reboot your computer.
¶ Enable LDAP server signing for AD DS
1º Select Start > Run, type mmc.exe, and then select OK.
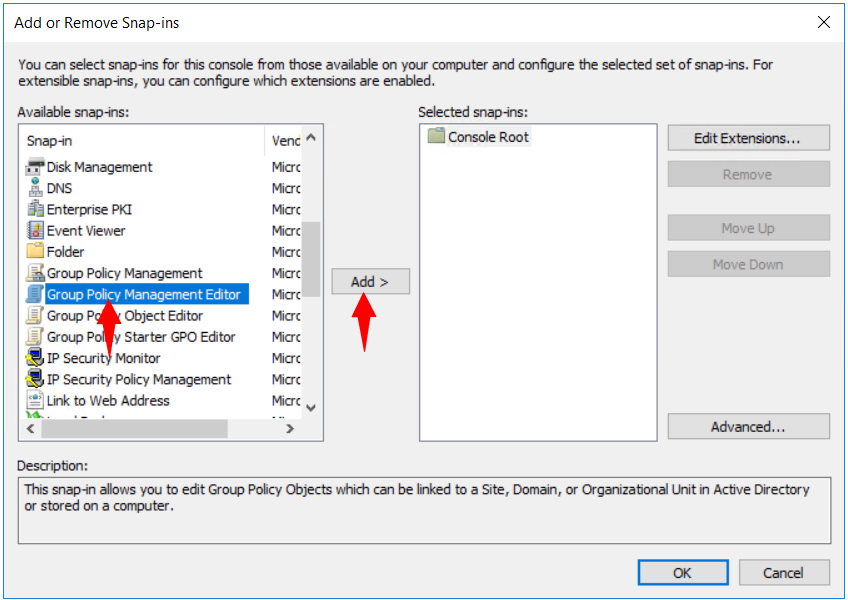
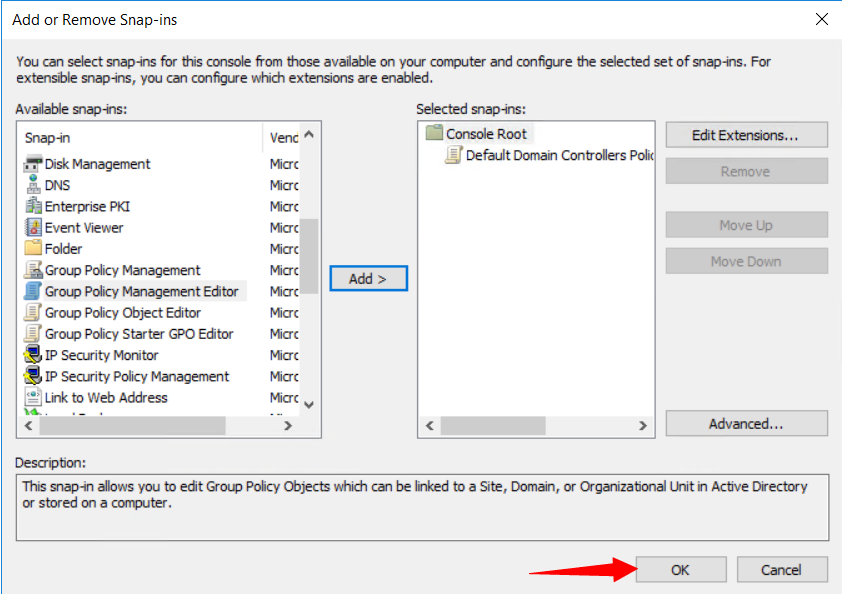
2º Select File > Add/Remove Snap-in, select Group Policy Management Editor, and then select Add.
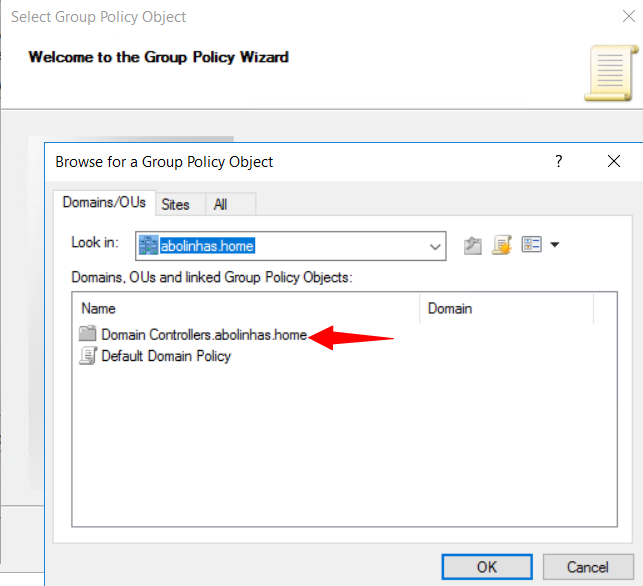
3º Select Group Policy Object > Browse.

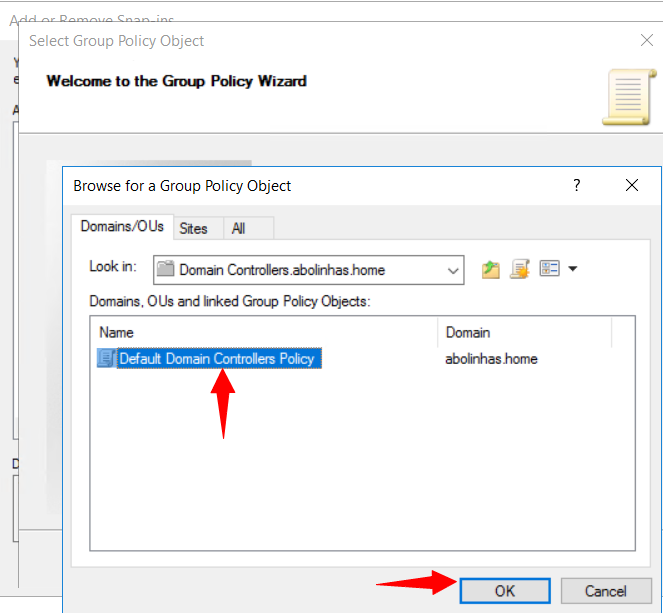
4º In the Browse for a Group Policy Object dialog box, select Default Domain Controller Policy under the Domains, OUs, and linked Group Policy Objects area, and then select OK.
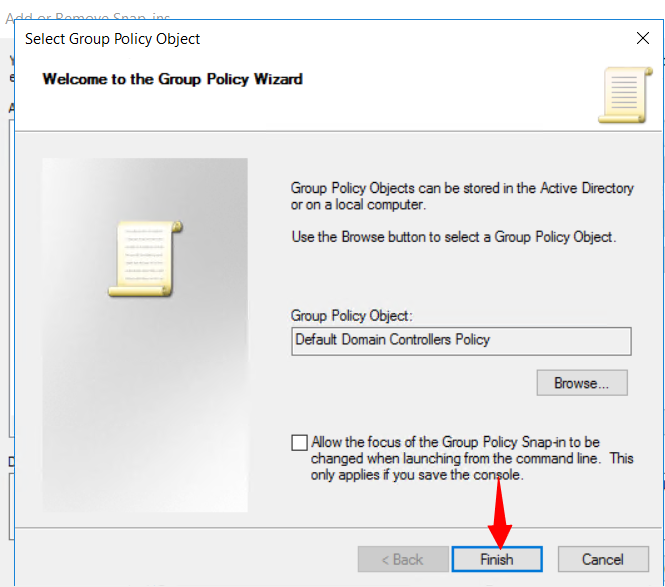
5º Select Finish.
6º Select OK.
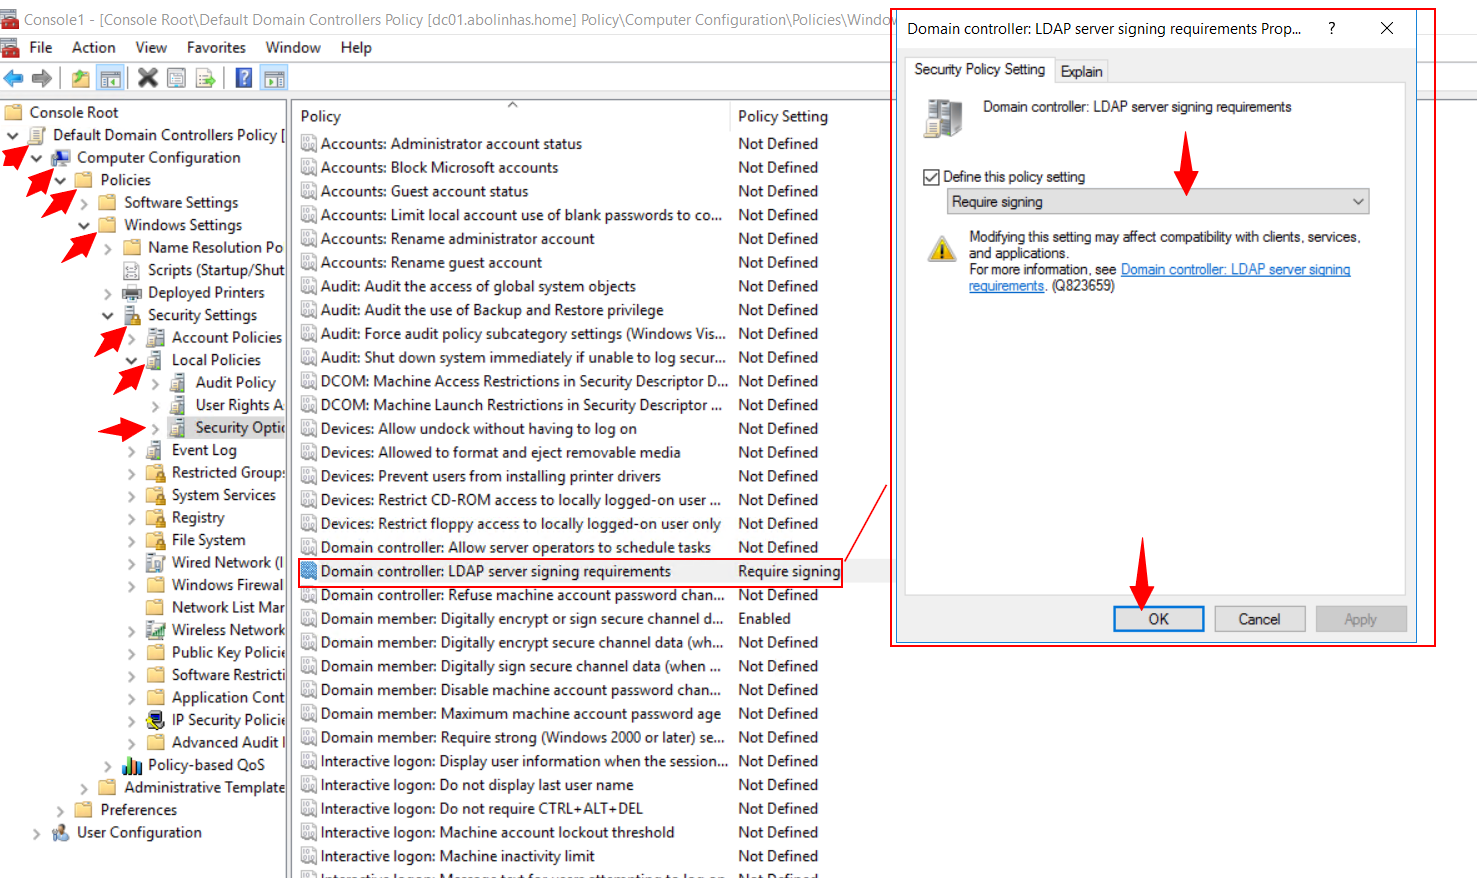
7º Select Default Domain Controller Policy > Computer Configuration > Policies > Windows Settings > Security Settings > Local Policies, and then select Security Options.
8º Right-click Domain controller: LDAP server signing requirements, and then select Properties.
9º In the Domain controller: LDAP server signing requirements Properties dialog box, enable Define this policy setting, select Require signing in the Define this policy setting list and then select OK.
10º In the Network security: LDAP client signing requirements dialog box, enable Define this policy setting, select Require signing in the Define this policy setting list and then select OK.
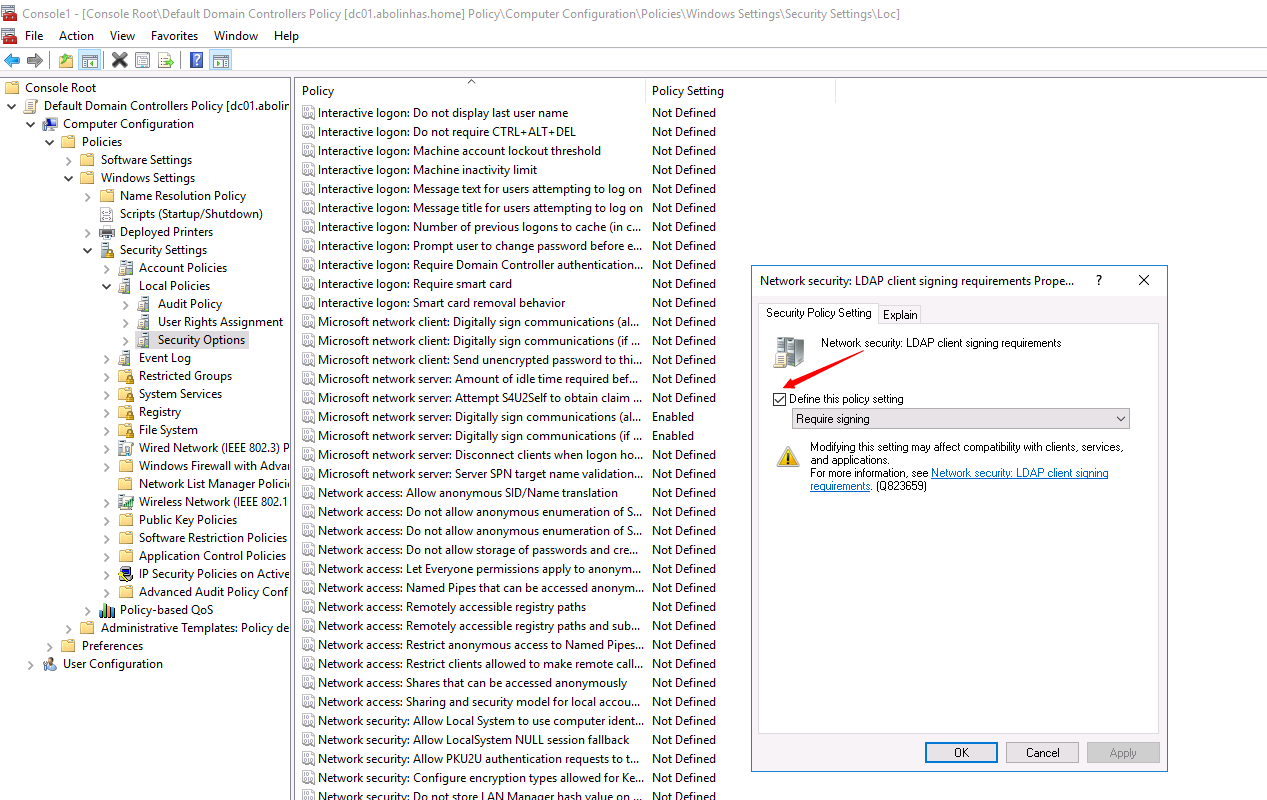
10º In the Confirm Setting Change dialog box, select Yes.
¶ Restart AD LDS
The changes above can take up to 5 minutes to be ready for production, if you want speed it, restart the AD LDS instance.
1º Open Server Manager.
2º In the console tree, double-click Roles, and then click Active Directory Lightweight Directory Services.
3º In the details pane, in the System Services list, click the AD LDS instance that you want to manage.
4º Click Restart.
¶ Testing
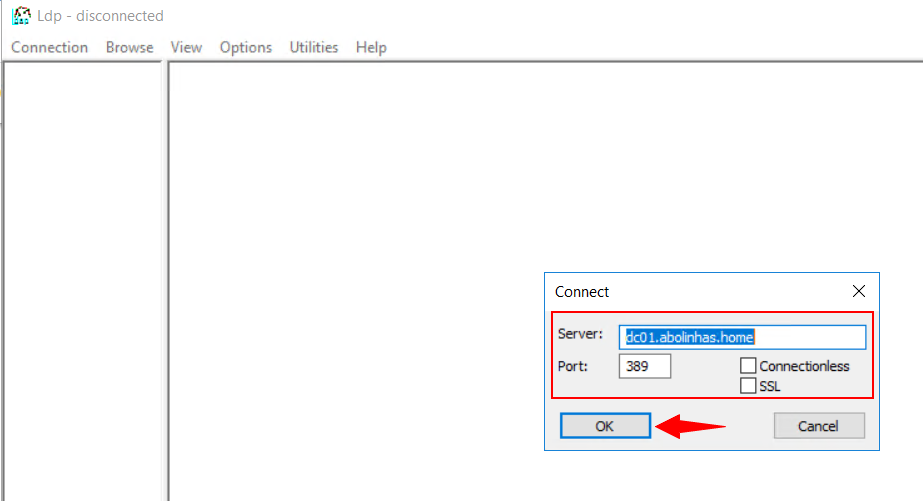
1º Select Start > Run, type ldp.exe, and then select OK.
2º Select Connection > Connect.
3º In Server and in Port, type the server name and the non-SSL/TLS port of your directory server, and then select OK.
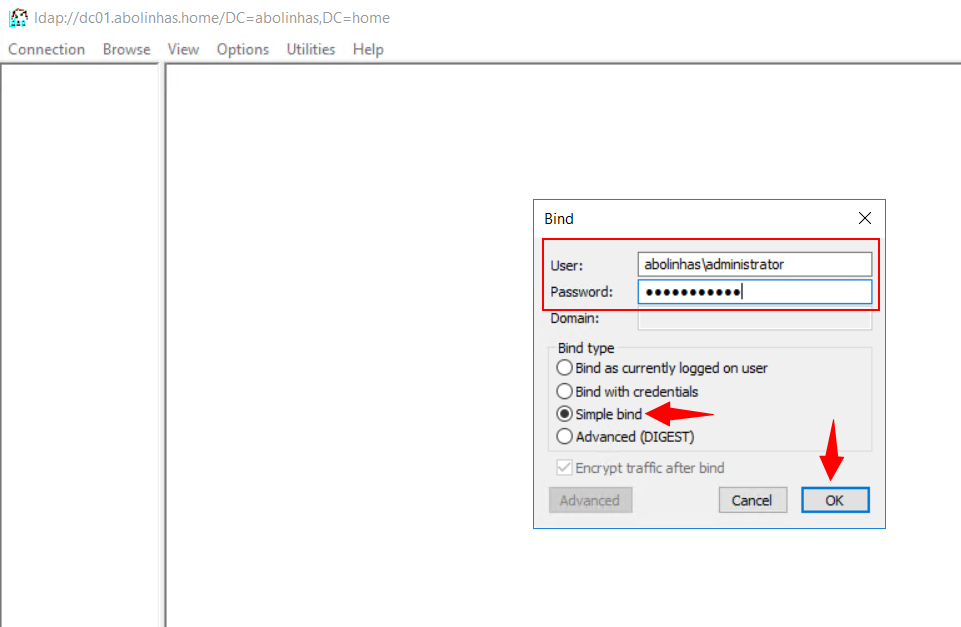
4º After a connection is established, select Connection > Bind.
5º Under Bind type, select Simple bind.
6º Type the domain\username and password, and then select OK.
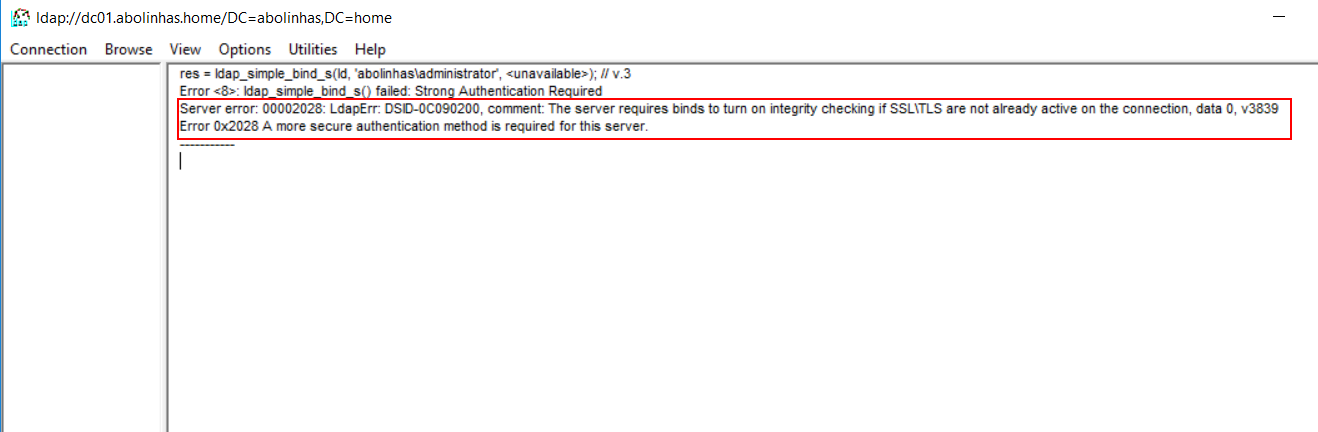
If you receive the following error message, you have successfully configured your directory server:
Ldap_simple_bind_s() failed: Strong Authentication Require