Operation is carried out in 3 steps:
- Create your virtual machine in the traditional way,
- Download the qcow2 file,
- import it into the previously created machine.
These operations must be performed via the command line on the ProxMox server.
These operations cannot be performed via the Web interface.
¶ Create your virtual machine
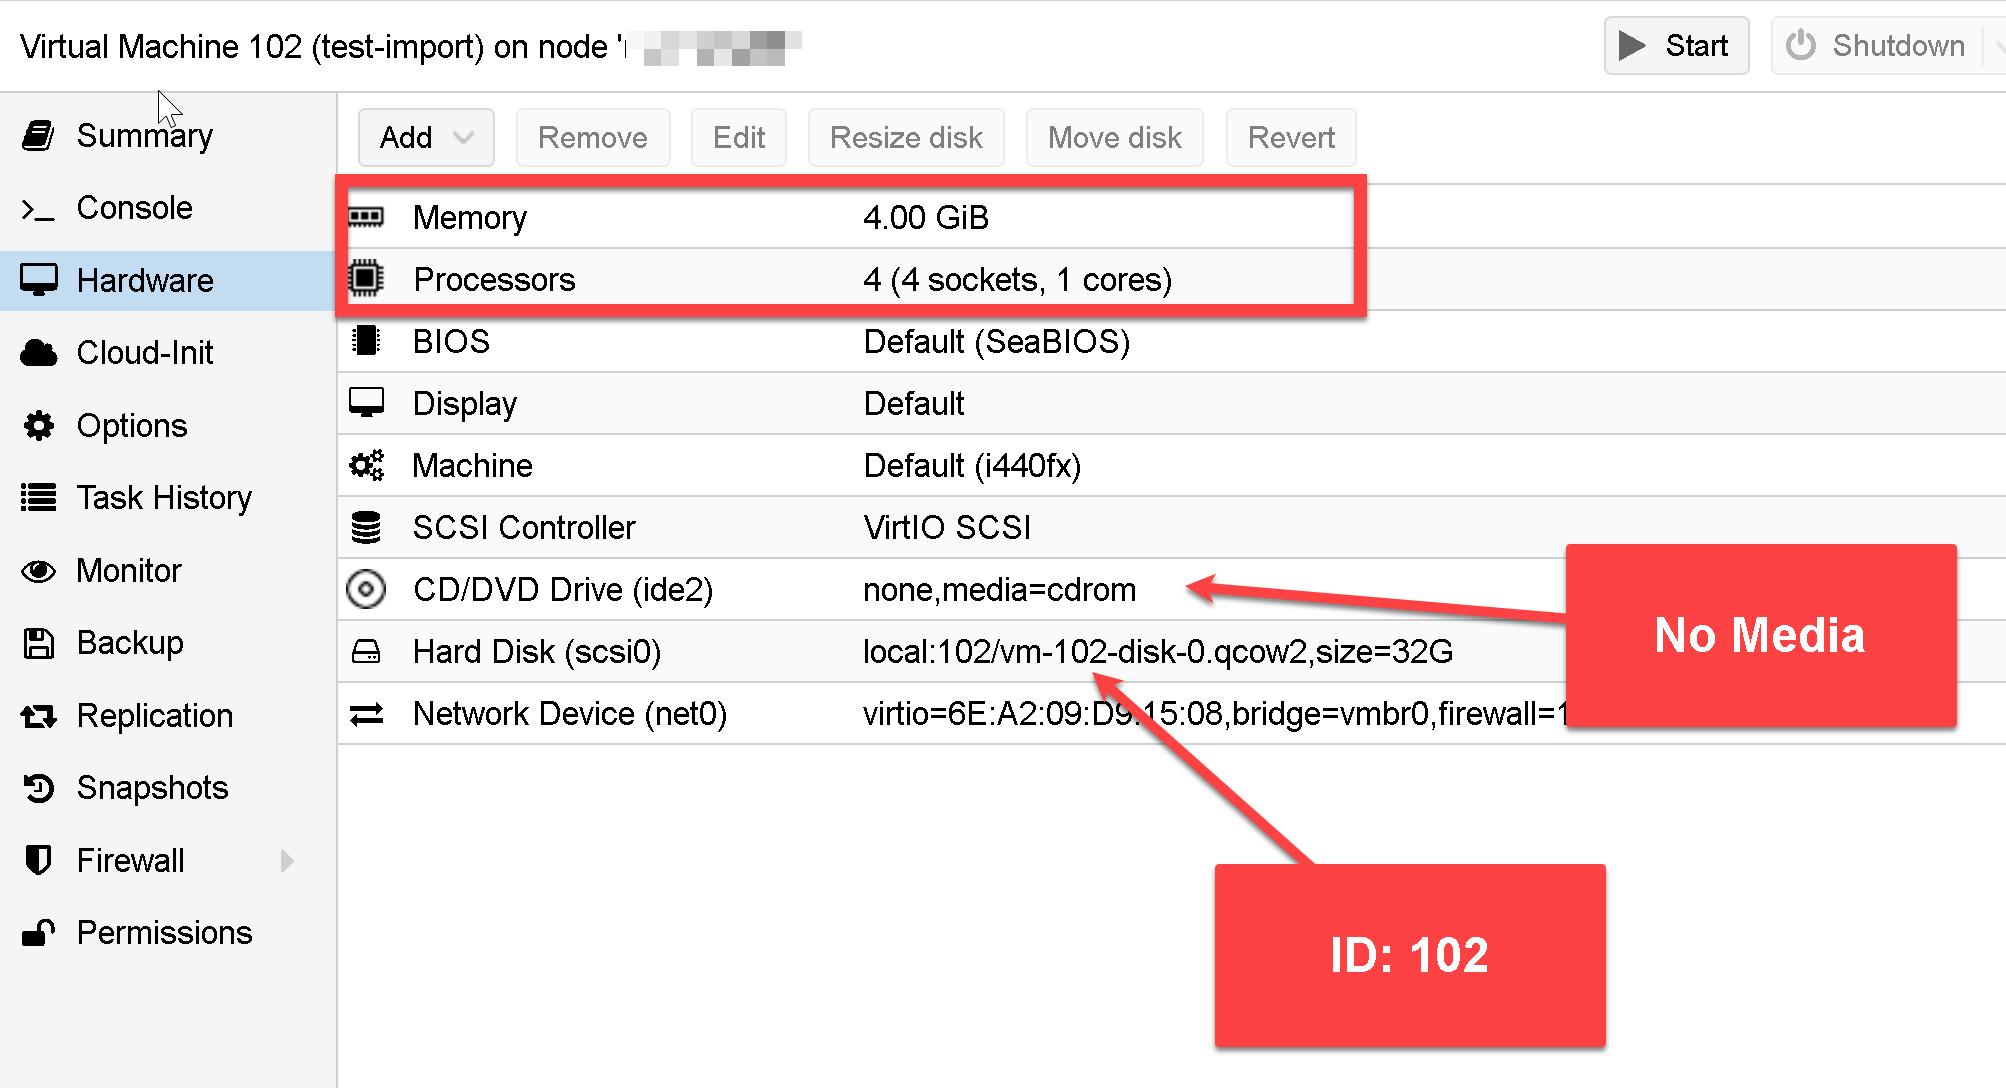
- On the ProxMox server, create a blank virtual machine with no media. ( We recommend at least 4 CPUs and 4GB of memory).
- Use a small disk, as it won't be used; the import operation will create a second disk, which you'll need to reattach instead.
- Lets this machine turned off.
- Once the machine is created, take it's ID number ( in our case it is the 102 machine ID )
¶ Download the qcow2 image.
Connect to your ProxyMox console and run this command: ( go to a directory with at least 3.2gb of free space)
wget https://esxi.b-cdn.net/artica-proxy-4.50.000000.qcow2 -O artica.qcow2
¶ Import the qcow2 image
Run this command :
qm importdisk [vm-id] artica.qcow2 [storage pool]
Where vm-id is the ID number of your created virtual machine ( in our case 102 ) and storage pool is name of the storage system for your virtual machine ( in our case local )
The command wil be
qm importdisk 102 artica.qcow2 local
and the results will be :
Successfully imported disk as 'unused0:local:102/vm-102-disk-1.raw'
¶ Attach the Virtual Disk To VM and remove the old one
Click on the Virtual machine that you created.
Select "Hardware" tab.
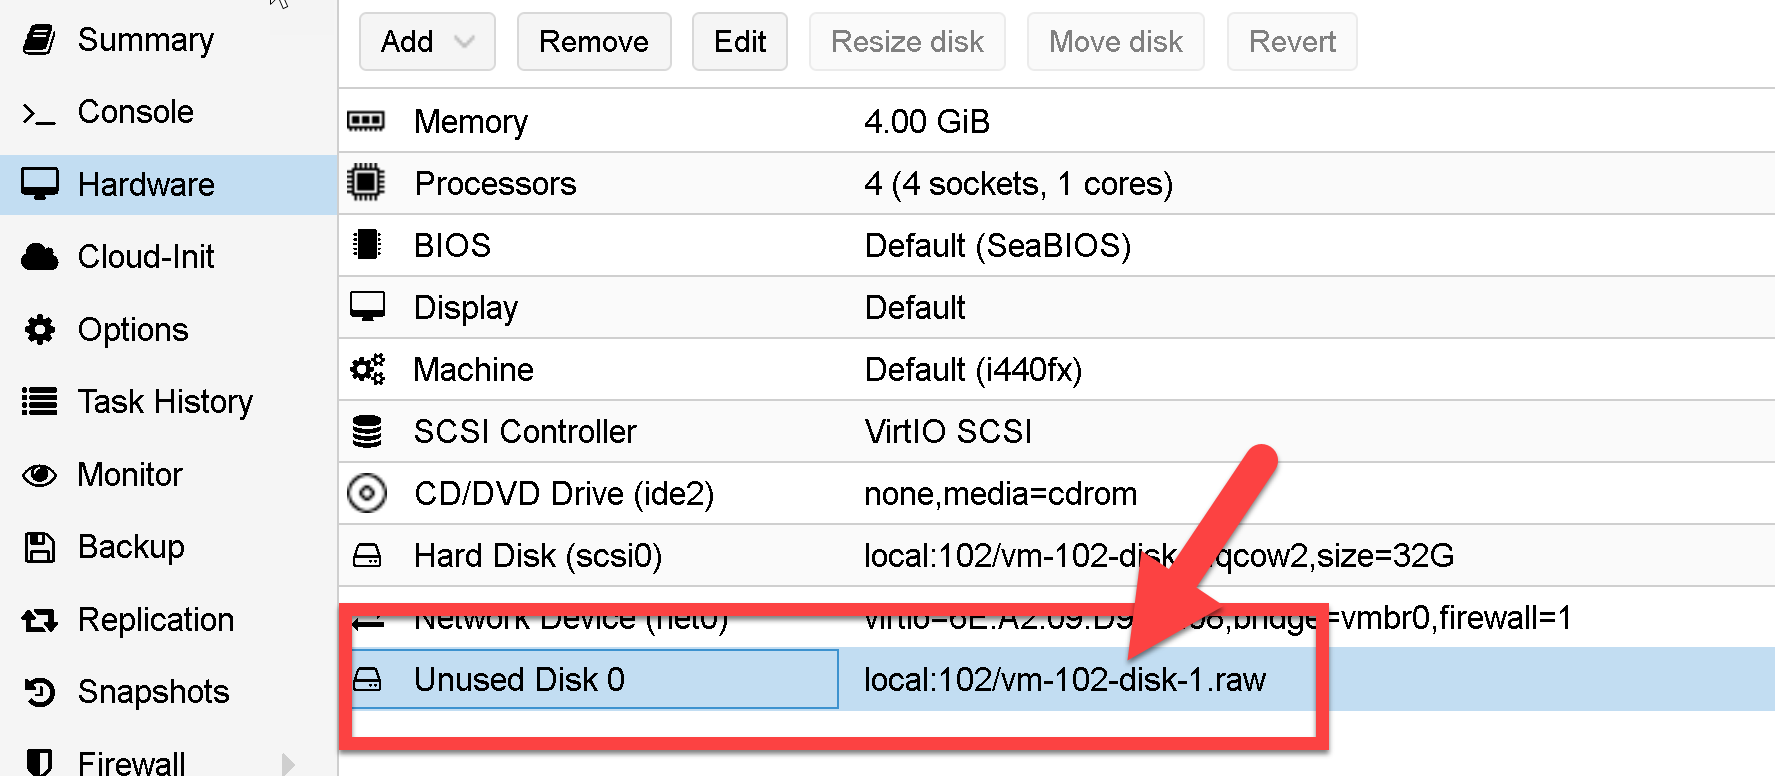
On the right hand side, you will see the newly imported QCOW2 disk as unused disk.
Select the unused disk and then click "Edit" button.
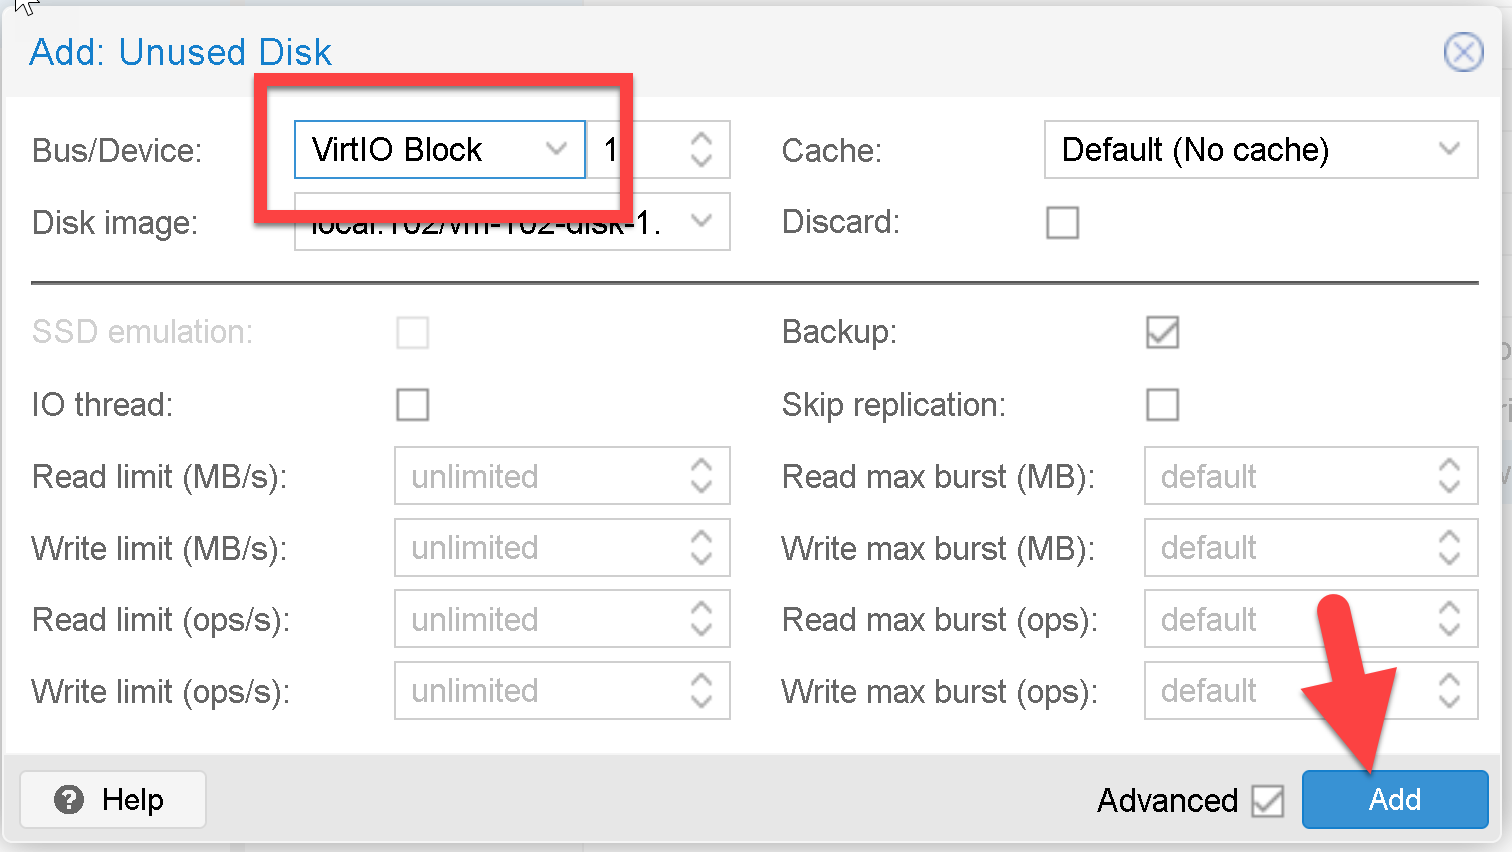
- Choose the bus type as "VirtIO Block" to get best disk I/O performance and hit "Add" button.
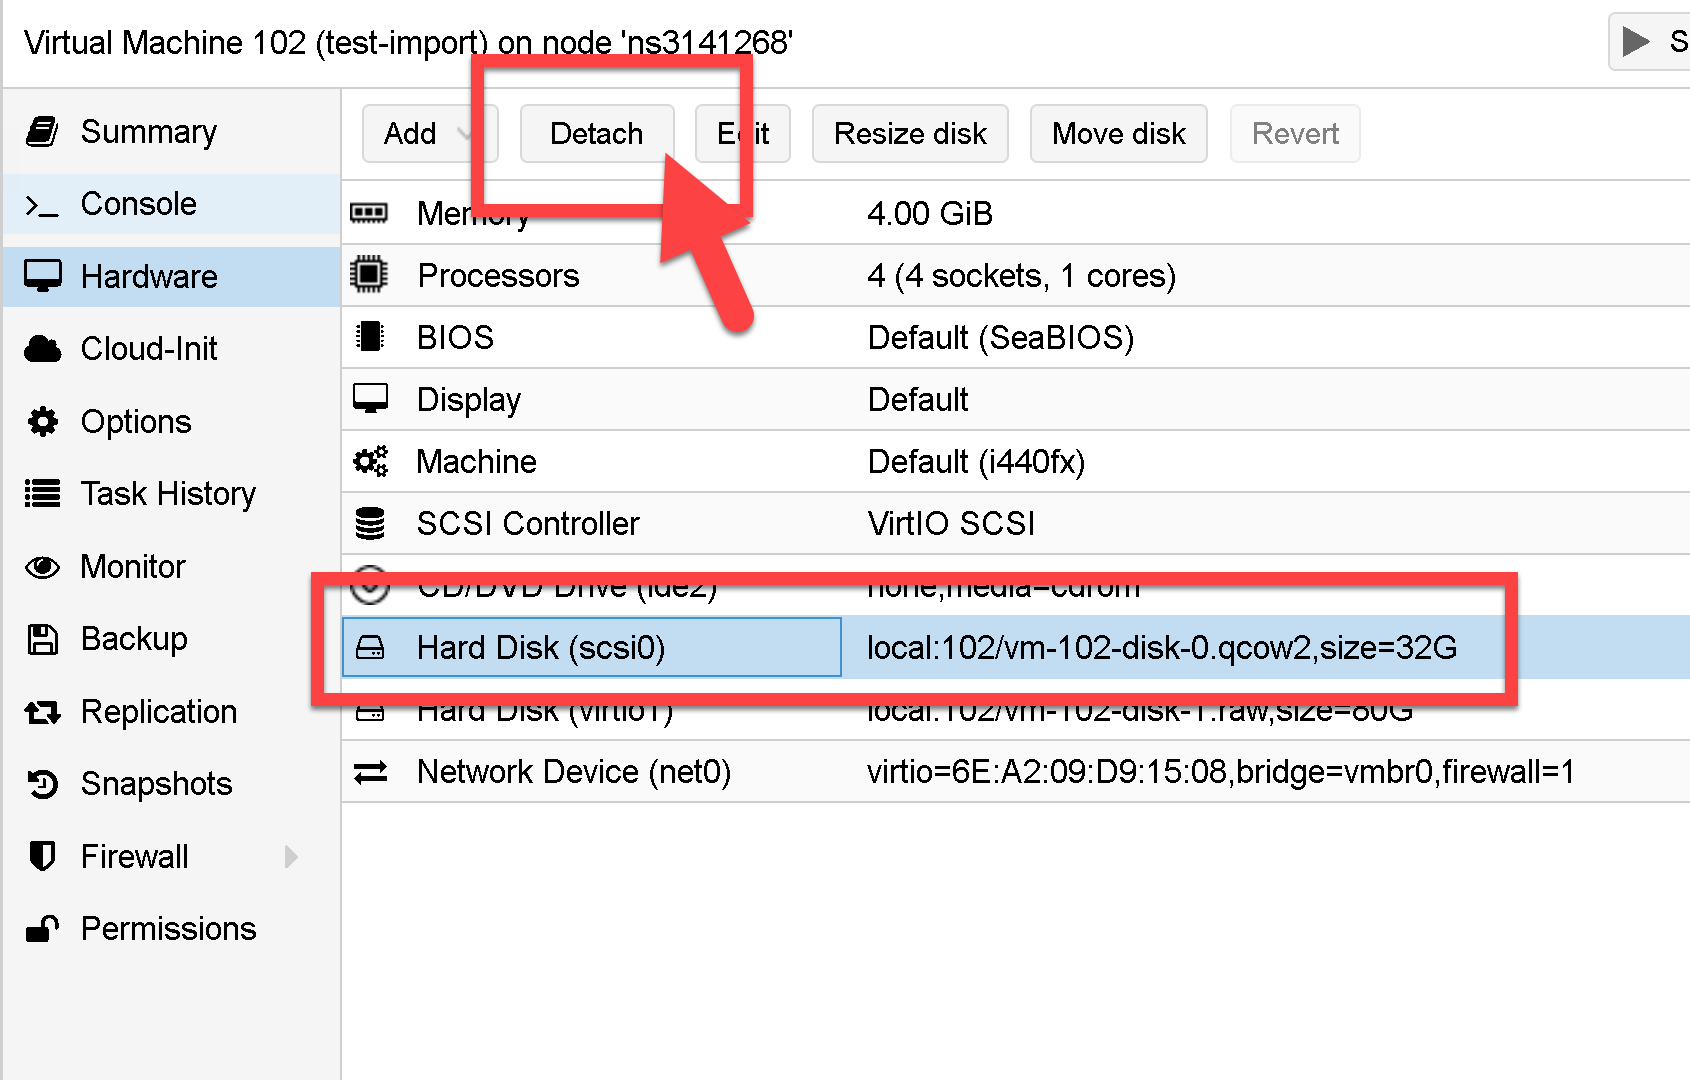
- Now detach the first created disk, select it and click on the Detach button.
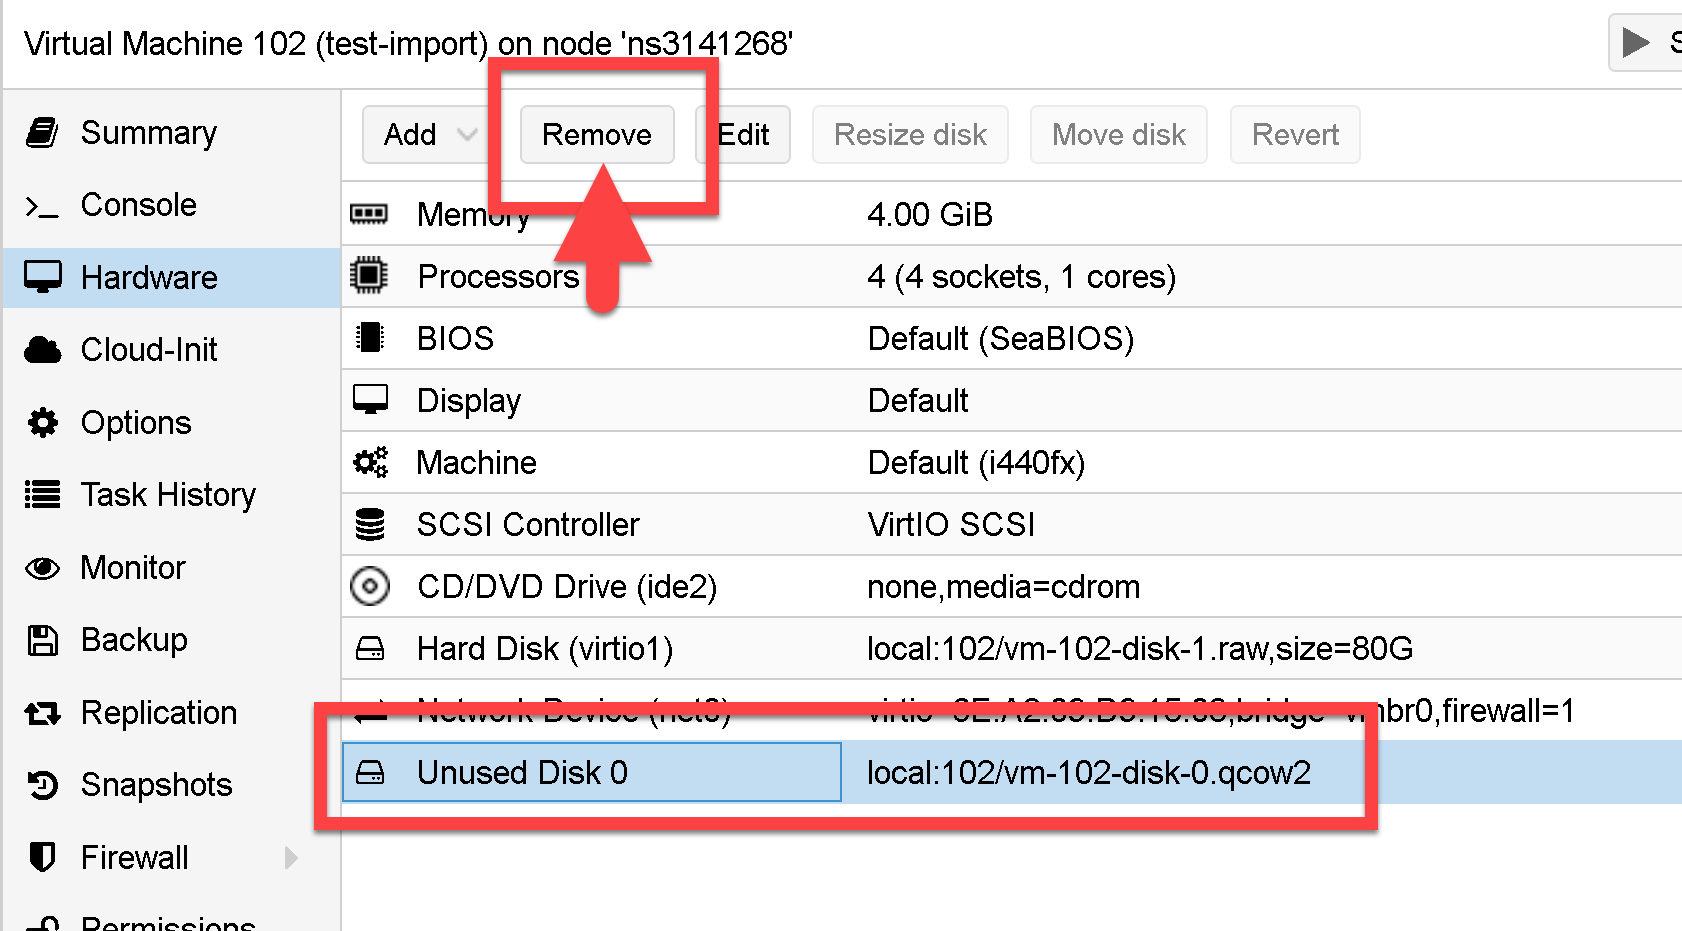
- The first disk will appear as Unused Disk, select it and click on the Remove button.
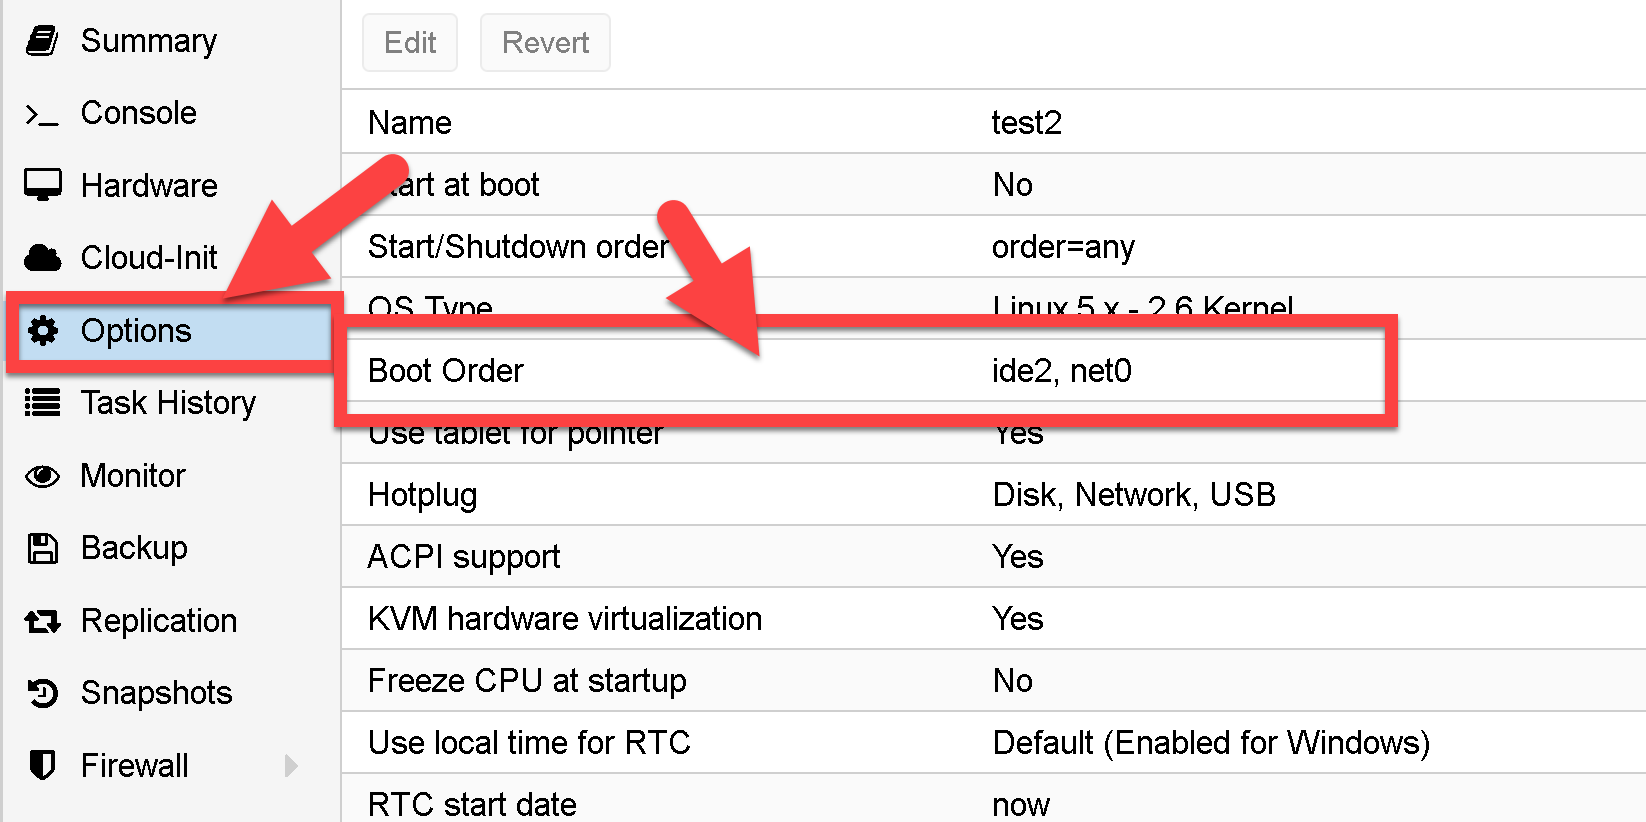
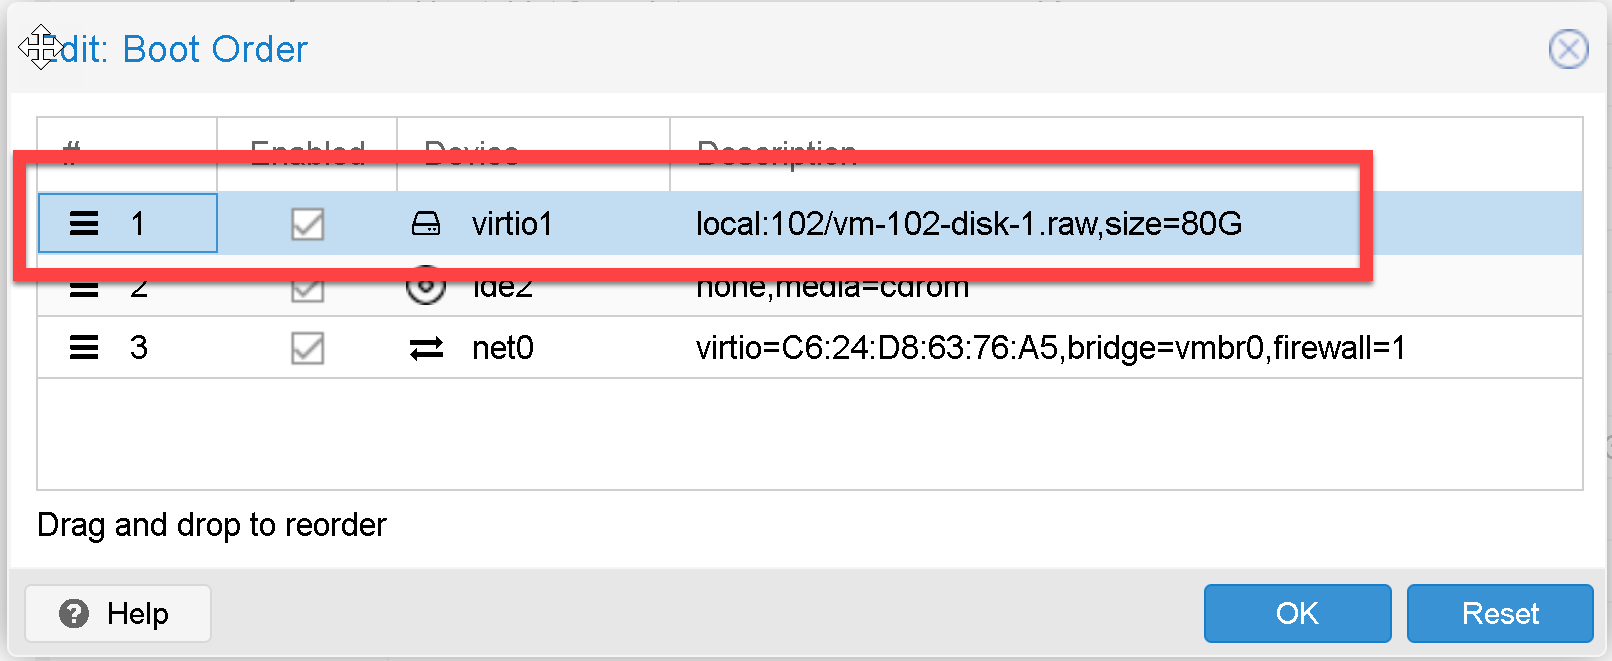
- On the left menu, select “Options” and choose “Boot Order”
- You will see that your new disk is not enabled in the Boot and it is in last order.
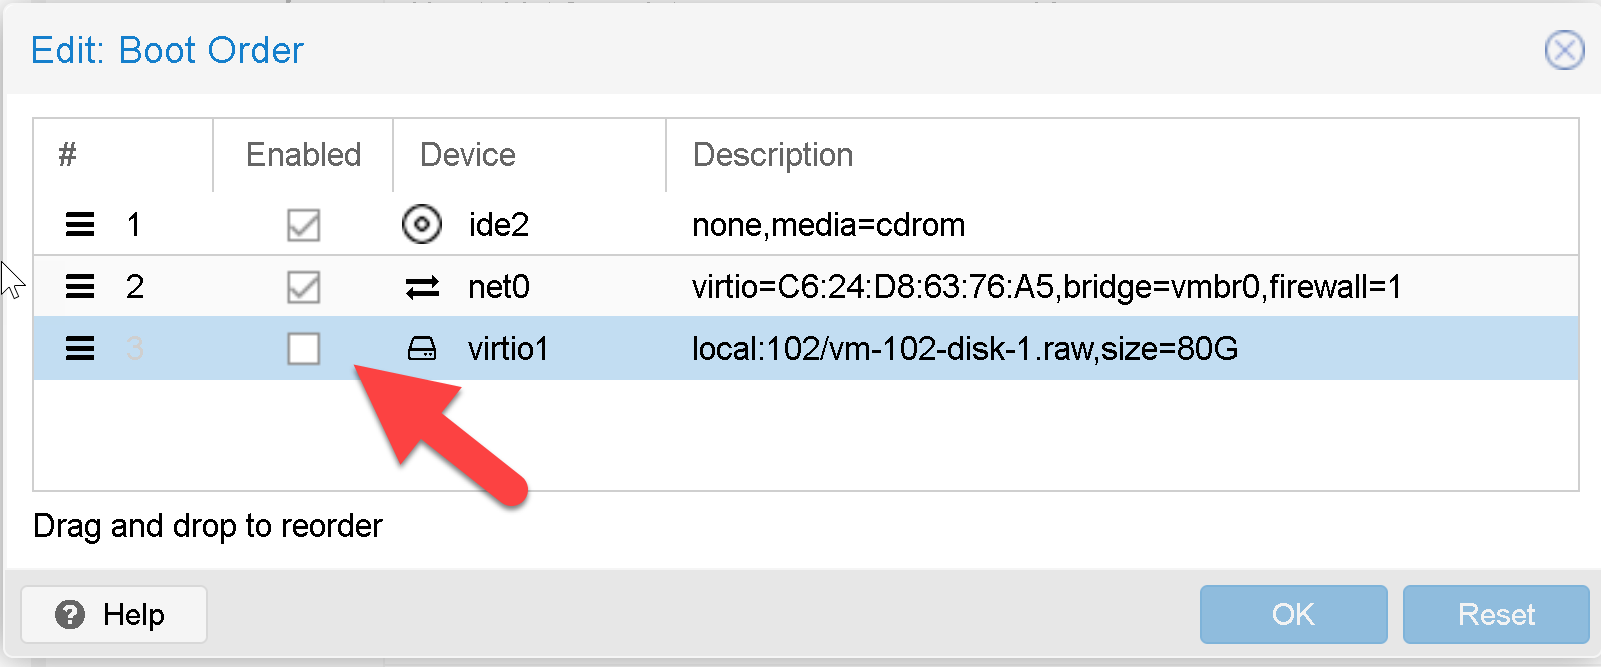
- Change it to enabled and move it to the first order
¶ Start the VM
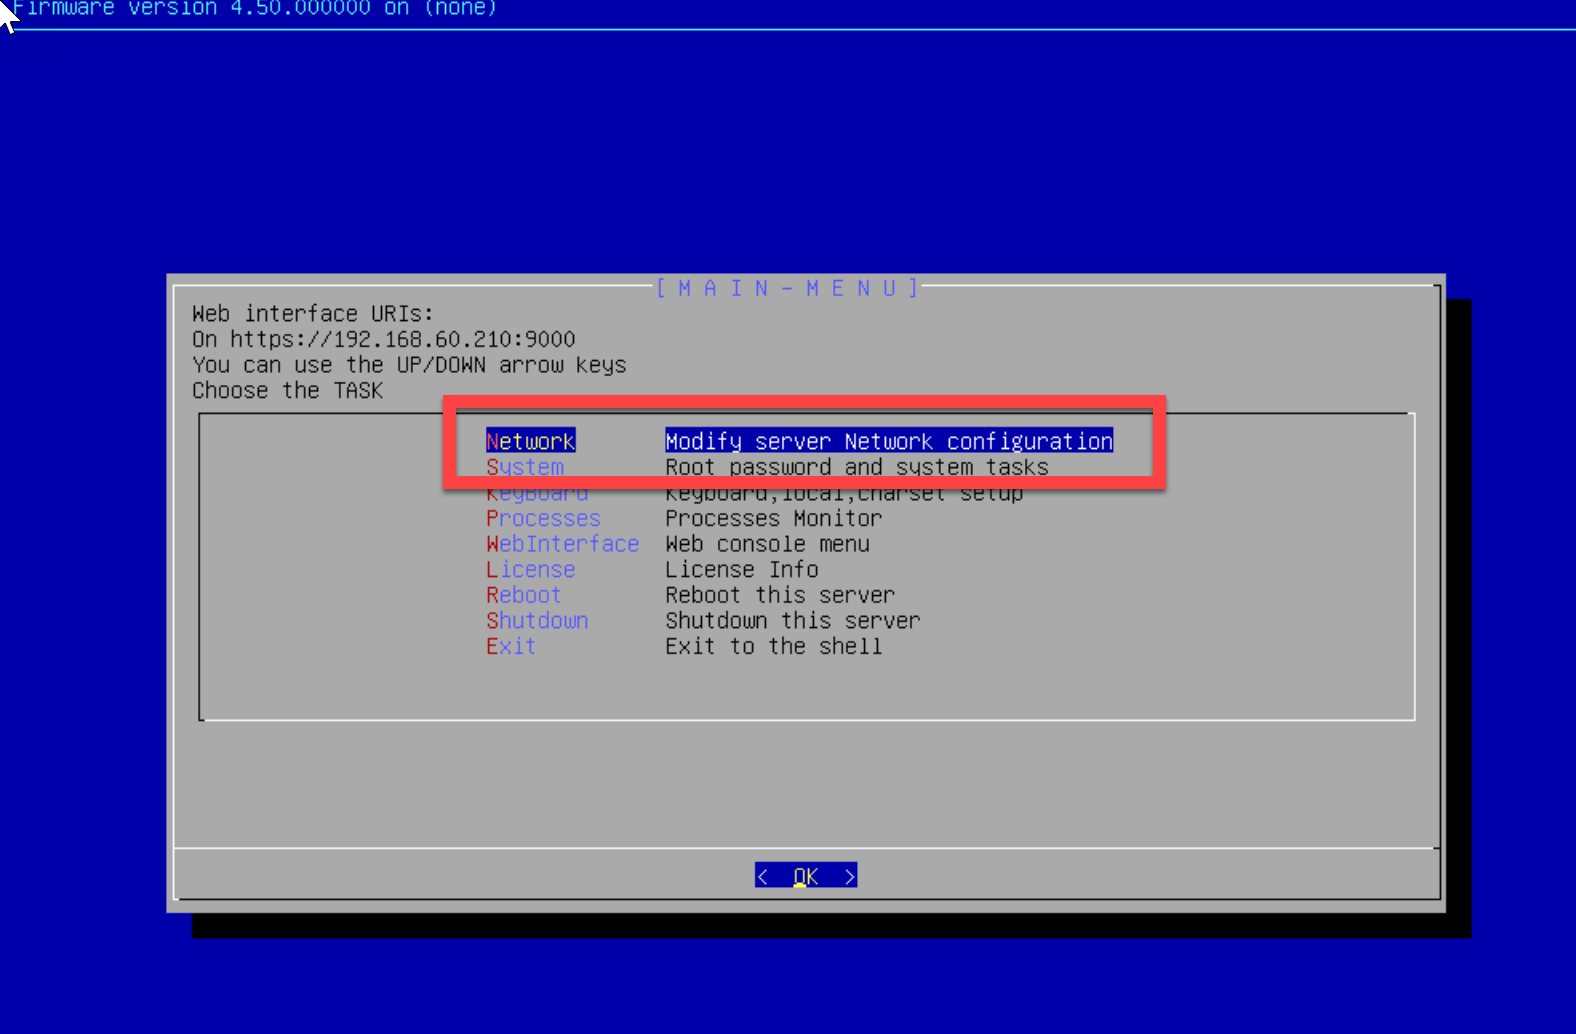
Start your virtual machine and use the Network menu in order to change the default network address of the machine
